
Table of Contents >> Show >> Hide
- Why a Rolling Plywood Plant Stand Is a Game Changer
- Gather Your Materials (and Raid the Scrap Pile)
- Step-by-Step: Build a Rolling Plywood Plant Stand from Scraps
- Design Ideas: From Minimalist to Rustic
- Safety, Durability, and Weight Capacity
- Smart Ways to Use a Rolling Plant Stand at Home
- Troubleshooting: Wobbles, Sticky Wheels, and Other “Oops” Moments
- Eco-Friendly Bonus: Why Scrap Plywood Projects Matter
- Real-Life Rolling Plywood Plant Stand Experiences
- Ready to Roll (Literally)
If you’ve ever tried to drag a giant potted fiddle-leaf fig across the living room without scratching your floors
(or your soul), you already know why a rolling plant stand is basically a superhero in disguise. The good news:
you don’t need fancy lumber, a full workshop, or a woodworking degree to make one. A chunky bit of scrap plywood,
four casters, and a free afternoon are all it takes to build a rolling plywood plant stand that looks custom and
costs next to nothing.
Inspired by the creative, budget-friendly DIY spirit you see on Hometalk and other home project communities, this
guide walks you through how to turn leftover plywood into a strong, stylish rolling plant caddy. We’ll cover what
to look for in scrap wood, how to size and cut your stand, the right kind of wheels to buy, and how to finish it
so it can handle heavy pots without complaining. We’ll also talk design ideas, safety tips, and real-world lessons
learned from rolling plant stand projects that use scraps, not brand-new boards.
Why a Rolling Plywood Plant Stand Is a Game Changer
Rolling plant standssometimes called plant caddiesshow up again and again in DIY blogs because they solve several
problems at once. First, they make heavy plants moveable. Large planters filled with soil and water can easily weigh
over 50–100 pounds, and rolling them on wheels is far kinder to your back than lifting or dragging them. Many DIY
builders specifically design their plant caddies for large, heavy pots for this reason.
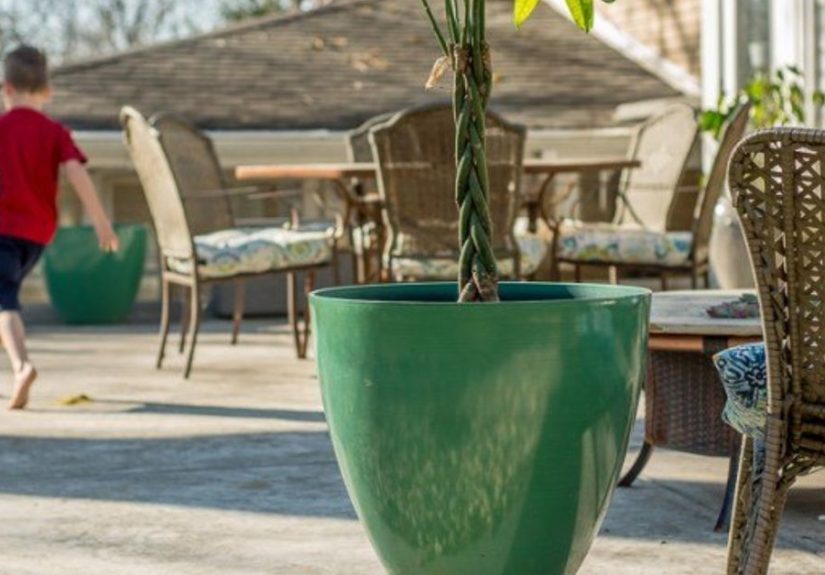
Second, a rolling plywood plant stand protects your floors. Moisture can seep through porous pots, and rough edges
on terra-cotta or concrete planters can scuff hardwood, tile, or vinyl. Elevating the pot on a sealed plywood base
helps prevent water rings, stains, and scratches. Many DIYers choose 3/4-inch or thicker wood to handle weight and
provide a stable surface, especially when using casters.
Third, mobility makes your plant care routine a lot easier. Instead of wrestling a pot closer to the window every
time your monstera begs for more light, you just unlock the wheels, roll, and relock. Gardeners also love rolling
caddies for outdoor plants when they need to move containers out of harsh afternoon sun or in from early frost.
Even commercially sold caddies highlight this benefitrolling stands are often marketed as “back savers” for
moving heavy pots with minimal effort.
Gather Your Materials (and Raid the Scrap Pile)
One of the best things about this project is that it’s scrap-friendly. If you’ve done any furniture builds, home
repairs, or shelving projects, there’s a good chance you already have usable plywood offcuts lying around.
Most DIY plant caddies in the wild use simple, sturdy materials:
- Plywood: 3/4-inch (19 mm) plywood is ideal for strength. Thicker is fine; thinner can work for smaller pots.
- Casters (wheels): Four heavy-duty casters, preferably with at least two locking wheels. Look for sets labeled for 100–200+ pounds total load.
- Screws: Wood screws that match the caster mounting holes and are slightly shorter than your plywood thickness.
- Tools: Drill/driver, drill bits, jigsaw or circular saw, sandpaper or sanding block, measuring tape, pencil, and safety gear (glasses, hearing protection).
- Finish: Wood stain, paint, or a clear sealer (polyurethane or exterior sealer if the stand will live outside).
Many DIYers report that a basic rolling plant stand can easily be built for around $20–$30, especially when the
plywood comes from your scrap pile and all you really buy are the casters and a bit of finish.
Step-by-Step: Build a Rolling Plywood Plant Stand from Scraps
Step 1: Measure Your Pot and Choose a Shape
Start by measuring the diameter (or width) of the pot you plan to use. Add at least 1–2 inches all around for a
comfortable margin so the pot doesn’t sit right at the edge. For example, if your pot measures 14 inches across,
aim for a 16–18 inch base.
Decide on a shape:
- Circle – modern and sleek, a classic look for a single feature plant.
- Square or rectangle – easier cuts, great for long trough planters or grouping multiple pots.
- Rounded square – square with gently rounded corners for a softer look without complicated cutting.
Use a plate, large bowl, or string-and-pencil trick as a compass to mark a circle on your plywood, or use a
carpenter’s square to lay out a clean rectangle. Many DIY tutorials use large dinner plates or paint bucket lids as
easy cutting templates for circular plant stands.
Step 2: Cut Your Plywood Base
Clamp the plywood securely to a work surface before cutting. Use a jigsaw for curves and a circular saw for straight
cuts. Cut slowly and let the saw do the workforcing it can splinter the plywood edges.
If you’re new to power tools, don’t worry. Many beginner-friendly tutorials walk through simple cuts for scrap wood
projects and stress using clamps and safety glasses. The key is to work slowly, support the wood on both sides of
the cut, and keep your hands well clear of the blade path.
Step 3: Sand and Soften the Edges
Once your base is cut, sand all surfaces and edges. Start with a medium-grit sandpaper (around 120-grit) to knock
down splinters, then move to a finer grit (180–220) for a smooth finish. Pay extra attention to the edges, which
are more prone to chipping in plywood.
Many DIYers round over edges slightly by hand for a nicer feel and a more finished look. This also helps prevent
chipped veneer if the stand gets bumped or knocked around while rolling.
Step 4: Mark and Pre-Drill for the Casters
Flip the plywood base upside down. Place one caster near each corner (for a square/rectangle) or at four evenly
spaced points near the edge (for a circle). Keep the casters set in from the edge at least 1–1.5 inches so the
wheels don’t stick out awkwardly.
Use a pencil to mark the screw holes for each caster. Remove the casters and pre-drill pilot holes for the screws.
Pre-drilling helps prevent the plywood from splitting or cracking as you drive in screwsespecially important with
thinner scrap pieces. Tutorials from hardware and home improvement sites almost always recommend pre-drilling for
cleaner, safer results when attaching casters.
Step 5: Attach the Casters
Line each caster’s plate up with its pilot holes and drive in the screws snugly. If you’re using locking casters,
place them diagonally opposite each other or use four locking casters so you can lock the stand in place on smooth
floors.
Check that all four wheels swivel freely and sit flat on the floor. If one caster is slightly higher, adjust the
screw tightness or shift it a little to make sure your plant stand doesn’t wobble. DIYers who move large containers
often stress the importance of level casters and a flat base to avoid tipping when rolling heavy plants.
Step 6: Finish and Seal the Wood
Before your new stand meets soil and water, seal the wood. At a minimum, apply one or two coats of clear
polyurethane on all sides, including the underside and edges. If you’re planning to use the stand outdoors, consider
an exterior-rated sealer or paint to protect against moisture and UV light.
You can keep it simple with a clear coat that lets the plywood grain show, or go bold with paint. Many rolling plant
stands are painted a fun accent color that coordinates with furniture or trim; others use stain for a warm,
mid-century-style vibe. Design-forward DIYers sometimes mask off geometric patterns and use two or three colors for
a modern look.
Design Ideas: From Minimalist to Rustic
Once you understand the basic structurea flat plywood base plus castersyou can customize the look to match your
style. Here are a few design twists inspired by popular DIY plant stand projects:
- Modern plywood disc: A simple circle with a smooth clear finish. Great with sleek white or concrete planters.
- Rustic “crate” look: Glue and nail a few scrap slats over the plywood top to mimic pallet boards, then stain for a weathered finish.
- Two-tier stand: Use two plywood circles with short dowels or scrap boards between them to create a rolling shelf for multiple plants.
- Paint-dipped edges: Keep the top natural and paint only the edges or a band around the stand for a subtle pop of color.
- Pattern play: Use painter’s tape to create stripes or color blocks. Many DIYers use scrap plywood as a canvas for fun paint experiments because there’s nothing to lose.
Scrap wood plant stands and plywood-based designs are popular because they’re forgivingyou can sand, repaint, or
add details later if you change your mind, and you haven’t sunk a lot of money into brand-new materials.
Safety, Durability, and Weight Capacity
When you’re trusting four small wheels to hold a giant ceramic pot full of wet soil, it pays to think about
durability. Here are a few key guidelines drawn from both DIY tutorials and commercial plant caddy specs:
- Use thick, solid plywood: 3/4-inch plywood is a good baseline for large pots. Avoid soft, crumbling scraps.
- Check caster ratings: Casters are often rated for total load. If each caster is rated at 75 pounds, four of them together can theoretically handle 300 poundsstill, give yourself a safety margin.
- Seal against moisture: Water and raw plywood do not mix well. Sealing every surface helps prevent swelling, warping, and delamination.
- Lock the wheels: Locking casters keep your plant from slowly rolling away on smooth floors or sloped patios.
Pre-built wooden plant caddies sold by retailers often advertise capacities of over 200 pounds, thanks to sturdy
wood and metal frames. That gives you a realistic target: with solid plywood and decent casters, your DIY rolling
stand can comfortably handle typical large containers if you build it carefully and seal it well.
Smart Ways to Use a Rolling Plant Stand at Home
Once you build one rolling plywood plant stand, you’ll start seeing uses everywhere. A few creative ways people use
their caddies:
- Chasing the sun: Roll plants closer to bright windows in the morning, then pull them back to protect furniture from harsh afternoon rays.
- Cleaning days: No more wrestling pots away from the wall just to vacuum behind them.
- Frost protection: Move outdoor pots into a garage, sunroom, or covered porch ahead of cold snaps without heavy lifting.
- Indoor jungle corners: Group several plants on a rolling base to create a mobile “green island” you can rearrange with your furniture.
- Herb or seedling cart: Use a small rolling stand to move herb pots or seedling trays between kitchen, balcony, and grow-light zones.
DIY bloggers regularly highlight how a simple plant caddy becomes part of a flexible plant care routineespecially
in smaller homes where every inch of space and light matters.
Troubleshooting: Wobbles, Sticky Wheels, and Other “Oops” Moments
Even a simple project can have some hiccups. Here are common issues and quick fixes:
- The stand wobbles. Lay it on a truly flat surface and look underneath. Often, one caster is mounted slightly higher or the base isn’t perfectly flat. Loosen screws, reposition the caster, or lightly sand any high spots on the bottom.
- The wheels don’t roll smoothly. Check for sawdust or debris stuck in the caster mechanisms. A quick blast of compressed air or a wipe with a damp cloth usually helps. For outdoor use, choose casters designed for rough surfaces.
- The finish is bubbling or peeling. That usually means moisture got under the sealer, or the surface wasn’t clean or dry before finishing. Let it dry completely, sand problem areas, and recoat. For outdoor stands, consider a marine or deck sealer.
- The pot slides. If your planter slides around on top, add small rubber bumpers or a thin non-slip mat between the pot and the plywood for extra grip.
Eco-Friendly Bonus: Why Scrap Plywood Projects Matter
Using scraps isn’t just cheaperit’s greener. Every leftover plywood piece that becomes a plant stand is one less
chunk headed for the landfill. Many DIY plant stand ideas highlight reclaimed or scrap materials, from pallet boards
to reclaimed flooring and offcuts from larger builds.
When you mix that eco-friendly mindset with the Hometalk-style “make it your own” creativity, you end up with a
small, useful project that reflects your style, keeps waste down, and makes caring for your plants more enjoyable.
Real-Life Rolling Plywood Plant Stand Experiences
Building a rolling plant stand from scraps sounds straightforward on paper, but the real fun (and learning) happens
in the actual builds. Here are some experience-based tips and stories that echo what many DIYers discover once they
start rolling their plants around the house.
One common “aha” moment happens right after the first test roll. People are often surprised by how much difference
a few casters make. A pot that used to require two people to scoot a few inches suddenly glides with one hand. This
is especially noticeable for big indoor trees or massive outdoor containers filled with wet potting soil. More than
a few DIYers admit they immediately decided to build a second or third plant stand because they didn’t want to go
back to dragging pots across the floor.
Another shared experience is underestimating weight. It’s very easy to think “this pot isn’t that heavy,” only to
realize your scrap plywood is flexing more than you’d like once everything is loaded up. Many seasoned DIYers end up
recommending thicker plywood or slightly oversized bases after their first build. Some even double up two thinner
pieces of plywood, gluing and clamping them together into a thicker panel before cutting the circle or square. That
simple step can dramatically improve stiffness and reduce long-term sagging under heavyweight containers.
Finish choice is another area where experience pays off. People who’ve used unsealed or lightly sealed plywood
outdoors often report swelling, stains, or peeling veneer after a season or two. The fix is straightforwardtake
the time to seal every side, not just the top. For stands that live on covered porches, a few coats of exterior
polyurethane usually hold up well. For fully exposed decks or patios, some DIYers prefer deck stains or marine
finishes, borrowing products meant for outdoor furniture or boats. The extra effort upfront tends to pay off in
caddies that last for years instead of months.
A surprisingly big quality-of-life upgrade is locking casters. People who skip locks sometimes find their plant
stands slowly migrating across smooth floors, especially when bumped by pets, kids, or vacuum cleaners. Once you’ve
had to chase a palm that rolled away on tile, you become a locking-caster cheerleader. Many builders now consider at
least two locking wheels non-negotiable, especially for tall plants that might tip if the base moves unexpectedly.
There’s also the decorating side of the experience. At first, most makers focus on functionality: cut circle, add
wheels, done. But once they see how visible the stand is under a big plant, they often go back and dress it up.
Some add decorative trim around the edge to hide plywood layers; others stencil plant-themed designs, stripes, or
color blocks on top. A few creative builders turn the plant stand into a design feature of its ownusing bold color
to tie in with throw pillows, artwork, or outdoor cushions, so the stand looks intentional rather than purely
utilitarian.
For gardeners with mobility issues or small-space dwellers, the experience can be genuinely life-changing. Having a
plant stand that rolls easily means you can keep larger, heavier plants that would otherwise feel too difficult to
manage. People who rely on these stands for accessibility often mention how much easier it is to water, rotate, and
prune their plants when they don’t have to wrestle heavy pots or bend in awkward positions. A scrap of plywood and a
$15–$25 set of casters becomes a small adaptive tool that makes a favorite hobby more doable and enjoyable.
Finally, there’s the satisfaction factor. Turning a forgotten piece of plywood into something useful and good-looking
is inherently rewarding. Many DIYers share before-and-after photos not just of the stand but of the whole room or
patio: the plant corner looks more polished, the floors are safer, and the project itself becomes a conversation
starter. When friends ask where they bought the plant caddy, being able to say “I made it from scraps” is half the
fun.
Ready to Roll (Literally)
A rolling plywood plant stand is one of those rare DIY projects that checks every box: it’s practical, affordable,
beginner-friendly, and it helps your plantsand your backat the same time. By raiding your scrap pile, choosing
sturdy casters, and sealing the wood properly, you can create a durable plant caddy that looks like something you’d
find in a stylish home store, not in the offcut bin.
Whether you’re working on your first power-tool project or adding one more clever build to your Hometalk-inspired
portfolio, this rolling plant stand is a satisfying way to turn leftovers into something that earns its spot in your
home every single day. Once you finish your first, don’t be surprised if every big pot in your house starts begging
for its own set of wheels.


