
Table of Contents >> Show >> Hide
- What Is a Wood Inlay?
- Why Skip the CNC?
- Essential Tools for Machining Wood Inlays Without CNC
- Choosing the Right Wood for Inlays
- The Template Method: Clean, Repeatable, and Low-Tech
- How to Machine Bow Tie Inlays Without CNC
- Stringing and Border Inlays
- Adhesives for Wood Inlays
- Leveling the Inlay
- Safety Tips for Routing Inlays
- Common Mistakes and How to Avoid Them
- Finishing Wood Inlays
- Best Beginner Projects for No-CNC Wood Inlays
- Real Workshop Experience: Lessons From Machining Wood Inlays by Hand
- Conclusion
Wood inlay has a funny way of making people whisper, “Wow, you must have a CNC machine.” The truth? You do not need a glowing screen, a stepper motor, or a laptop covered in sawdust to create crisp, elegant inlays. With a trim router or plunge router, a guide bushing, a shop-made template, a sharp bit, and a little patience, you can machine wood inlays by hand that look clean, professional, and wonderfully intentional.
Inlays are among the most satisfying woodworking details because they combine precision with personality. A simple contrasting stripe can make a cutting board look boutique-worthy. A bow tie key can turn a crack in a slab into a design feature. A small maple diamond set into walnut can make a box lid look like it belongs on a velvet pillow. Best of all, this kind of work is still very approachable for a small shop. No CNC required. No robot overlord. Just smart setup and careful routing.
What Is a Wood Inlay?
A wood inlay is a decorative or functional piece of material set into a recess cut into another piece of wood. The inlay may be a different wood species, veneer, shell, brass, stone, epoxy, or even a combination of materials. In woodworking, solid wood inlays are especially popular because they create contrast while still feeling natural.
Common examples include butterfly keys in tabletops, stringing around drawer fronts, geometric patterns in box lids, banding on furniture, and small accent shapes on guitars, picture frames, trays, and cabinets. Some inlays are purely decorative. Others help stabilize cracks or reinforce weak areas. Either way, a good inlay should sit flush, fit tightly, and look like it meant to be there from the beginning.
Why Skip the CNC?
CNC routers are powerful tools, but they are not the only path to precision. For many woodworkers, manual inlay machining is faster, quieter, cheaper, and more flexible for one-off projects. If you only need one bow tie, one logo-style accent, or a simple decorative border, building a CNC file may take longer than making a template and routing the shape by hand.
Manual routing also teaches valuable skills. You learn how grain direction affects the cut, how templates control repeatability, how tiny offsets matter, and how a sharp chisel can rescue a corner that a round router bit cannot reach. In short, the process makes you a better woodworker. The machine does not do the thinking for you, which is rude but educational.
Essential Tools for Machining Wood Inlays Without CNC
1. A Router
A compact trim router works well for small inlays, while a plunge router is excellent for deeper recesses and controlled entry cuts. A plunge base makes it easier to lower the bit into the workpiece safely and consistently. For delicate work, choose a router that feels comfortable in your hands. If the router feels like a caffeinated raccoon, it is not the right tool for tiny inlay details.
2. Router Inlay Kit or Guide Bushing
A router inlay kit usually includes a guide bushing and a removable collar or sleeve. The basic idea is simple: rout the recess with the collar installed, then remove the collar and rout the matching inlay piece using the same template. The collar accounts for the offset between the bit and the template, allowing both parts to match closely.
3. Straight or Spiral Router Bit
Small straight bits and spiral bits are common for inlay work. A 1/8-inch bit is often used for fine details, while 1/4-inch bits work for larger shapes. Spiral upcut bits clear chips efficiently, but they can lift fibers at the surface. Downcut bits leave cleaner top edges but may pack chips into the recess. For many projects, a sharp spiral bit and shallow passes are the winning combination.
4. Template Material
Templates can be made from hardboard, MDF, plywood, acrylic, or phenolic sheet. A 1/4-inch-thick template is common because it gives the guide bushing enough edge to ride against while still being easy to shape. The template must be smooth, accurate, and firmly secured. A sloppy template creates a sloppy inlay, and sadly, wood glue does not come with an undo button.
5. Chisels and Marking Tools
Routers cut round inside corners because bits are round. If your inlay has sharp corners, you will need a chisel to square them. A marking knife, sharp pencil, ruler, dividers, and layout square also help you place the inlay accurately. Precision begins before the router is even plugged in.
6. Clamps and Double-Sided Tape
Your template must not move during routing. Use clamps whenever possible. For small templates, quality double-sided woodworking tape can help, but test it first and avoid relying on weak tape alone. A moving template is how a graceful diamond becomes an abstract potato.
Choosing the Right Wood for Inlays
Contrast is the secret ingredient. Maple in walnut, walnut in maple, cherry in ash, ebony in mahogany, and padauk in white oak all create visual pop. But beauty is only part of the decision. You also need to think about hardness, grain direction, stability, and thickness.
Use dry, stable stock for the inlay. Wood moves with changes in moisture, especially across the grain, so avoid using green or poorly acclimated material. Thin inlays are less likely to cause movement problems than thick inserts, but you should still pay attention to grain orientation. For wide inlays, try to align the inlay grain in a way that behaves reasonably with the host board.
Hardwoods with tight grain tend to machine cleanly. Open-grained woods can work, but they may chip or show small gaps more easily. Very brittle species can crack when pressed into place. Before committing to the final piece, make a test inlay from the same materials. Test cuts are cheaper than emotional damage.
The Template Method: Clean, Repeatable, and Low-Tech
The most reliable no-CNC method is template routing. The template controls the router’s path, which means your hands only have to guide the tool against a fixed edge. This approach is ideal for bow ties, diamonds, circles, rectangles, badges, simple logos, and decorative panels.
Step 1: Design the Inlay Shape
Start with a simple shape if you are new to the process. A rectangle, oval, diamond, or bow tie is easier than a maple leaf with 47 dramatic points. Draw the shape full size on paper, then transfer it to your template material. Make sure the design is large enough for the router bit and bushing to move smoothly around the shape.
Step 2: Make the Template
Cut the template opening carefully with a scroll saw, jigsaw, coping saw, drill press, files, or sanding sticks. The router bushing will follow every bump in the template, so refine the edge until it is smooth. If you feel a lump with your fingertip, your router will find it and introduce it to your project.
Step 3: Secure the Workpiece
Clamp the workpiece to the bench. Then clamp or tape the template in position. Check alignment from multiple angles. For furniture or box lids, a small shift can look obvious later, especially if the inlay is meant to be centered.
Step 4: Rout the Recess
Install the guide bushing and collar according to your inlay kit instructions. Set the bit depth slightly shallower than the thickness of the inlay material. Rout in shallow passes rather than trying to remove all the waste at once. Move steadily and keep the bushing against the template wall. Clear chips often so they do not interfere with the cut.
Step 5: Rout the Matching Inlay
Now remove the collar from the guide bushing and use the same template to rout the inlay piece. This produces a matching shape that should fit into the recess. Leave the inlay slightly proud of the surface so it can be planed, scraped, or sanded flush after glue-up.
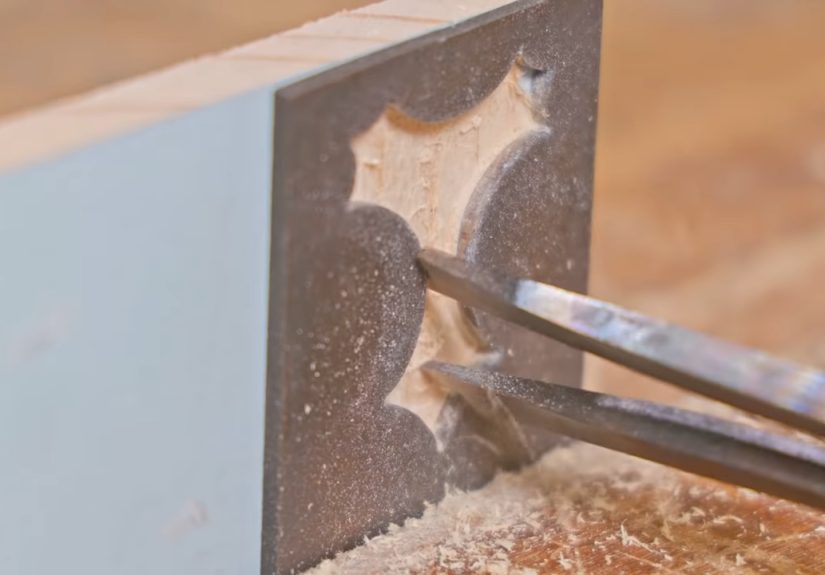
Step 6: Fine-Tune the Fit
Test the fit gently. Do not pound the inlay into the recess like you are driving a fence post. If it is too tight, lightly sand or pare the inlay edges. A small chamfer on the bottom edge helps it start cleanly. The goal is a snug fit without splitting the host board or crushing the inlay.
How to Machine Bow Tie Inlays Without CNC
Bow tie inlays, also called butterfly keys, are classic for slabs, benches, and tabletops. They can stabilize cracks while adding a handmade detail. The shape narrows in the center and flares at both ends, resisting movement across a split.
To make one, create a bow tie template from 1/4-inch hardboard or acrylic. Position it across the crack, making sure the narrow waist bridges the split. Rout the recess with a guide bushing and collar, then rout the bow tie insert from contrasting hardwood. Square the inside corners with a chisel if needed. Glue the key in place, tap it gently with a scrap block, and level it after the glue cures.
For a polished look, orient the bow tie grain along its length. This improves strength and creates a clean visual flow. Walnut bow ties in maple slabs and maple bow ties in walnut slabs are reliable crowd-pleasers. They say, “I fixed a crack,” but in a fancy voice.
Stringing and Border Inlays
Stringing is a narrow decorative line, often used around table aprons, drawer fronts, boxes, and musical instruments. It can be cut with a router, scratch stock, marking gauge, or specialized hand tools. For router-based stringing, use an edge guide or straight fence and a small bit to cut a shallow groove. Then glue in a thin strip of contrasting wood or veneer.
The key to clean stringing is consistent groove depth and width. Mill the inlay strip slightly thicker than needed, glue it into the channel, and level it flush. Curved stringing requires more finesse. Thin veneer strips can be bent into gentle curves, while tight curves may require segmented pieces or a custom template.
Adhesives for Wood Inlays
Yellow wood glue works well for most wood-to-wood inlays. It gives enough open time, bonds strongly, and cleans up with water before it cures. For oily exotic woods, epoxy may be more reliable. Thin cyanoacrylate glue can be useful for tiny gaps or delicate veneer, but it can stain surrounding wood if used carelessly.
Avoid flooding the recess with glue. Too much adhesive can prevent the inlay from seating fully. Apply a thin, even coat to the recess and the inlay, press it in place, and clamp or weight it if needed. Wax paper between the clamp block and the inlay keeps things civilized.
Leveling the Inlay
Once the glue cures, level the inlay with a sharp block plane, card scraper, or sanding block. Work carefully around grain changes. A plane can leave a gorgeous surface, but it may tear out reversing grain if the blade is dull or the cut is too heavy. A scraper is slower but safer for small decorative work.
Finish sanding through the same grits used on the rest of the project. Do not oversand the inlay area or you may create a shallow dish around it. Keep the surface flat, especially on tabletops, trays, and box lids where reflected light reveals every little wobble.
Safety Tips for Routing Inlays
Small inlay work can feel harmless because the cuts are shallow, but routers deserve respect. Wear eye protection, hearing protection, and a suitable dust mask or respirator. Use dust collection when possible. Wood dust can irritate eyes, skin, and lungs, and some species are more irritating than others.
Always unplug the router before changing bits or adjusting the bushing. Make sure the bit is properly seated in the collet. Clamp your work securely. Keep both hands on the router whenever possible, and take shallow passes. A router bit spinning at high speed is not interested in your optimistic personality.
Common Mistakes and How to Avoid Them
Loose-Fitting Inlays
Loose inlays usually come from template errors, bushing misalignment, or inconsistent pressure against the template. Make sure the router base is centered around the bit and the bushing is tight. Practice on scrap before cutting the final piece.
Burn Marks
Burning happens when the bit is dull, the feed rate is too slow, or chips are not clearing. Use sharp bits, move steadily, and make multiple shallow passes. If you smell smoke, the wood is not applauding.
Tear-Out
Tear-out occurs when grain lifts at the edge of the recess. A downcut bit, light scoring pass, sharp knife line, or climb-cutting in tiny controlled sections can help. Be cautious with climb cuts because the router can pull itself forward.
Inlay Sits Too Low
If the recess is too deep, the inlay will sit below the surface. Set the bit depth carefully and test on scrap. It is better for the inlay to stand slightly proud than to sink like a tiny wooden submarine.
Finishing Wood Inlays
Most clear finishes make inlays look richer by increasing contrast and depth. Oil-based finishes warm the color, while water-based finishes keep pale woods lighter. Shellac adds warmth and dries quickly. Hardwax oils are popular for furniture and decorative objects because they are easy to apply and repair.
Before finishing, remove glue squeeze-out completely. Glue residue can block stain or finish, leaving pale halos around the inlay. Wipe the surface with mineral spirits or water, depending on your finish plan, to preview the final look and spot any problems.
Best Beginner Projects for No-CNC Wood Inlays
If you are learning, start small. Add a maple diamond to a walnut box lid. Rout a rectangular nameplate-style inlay into a tray handle. Add a contrasting bow tie to a cracked practice board. Create a simple border line around a picture frame. These projects teach layout, routing depth, template control, glue-up, and leveling without risking a dining table that took three weekends and one minor existential crisis to build.
As your confidence grows, try multi-piece inlays, curved patterns, mixed materials, and layered designs. The same core principles apply: accurate template, stable workholding, sharp cutting tools, shallow passes, and patient fitting.
Real Workshop Experience: Lessons From Machining Wood Inlays by Hand
The first lesson of no-CNC inlay work is that the template is the project before the project. Beginners often rush the template because it feels like a temporary helper. In reality, it is the boss. If the template edge has a dip, the inlay will have a dip. If the corner is lumpy, the finished recess will be lumpy. Spending an extra 20 minutes refining the template can save an hour of sanding, fitting, muttering, and pretending the gap is “rustic character.”
The second lesson is to practice the full sequence on scrap from the same wood species. Not similar wood. Not that mystery board leaning behind the bandsaw since 2018. The same wood. Walnut, maple, cherry, oak, and exotic hardwoods all cut differently. Some rout like butter. Some chip if you look at them with a negative attitude. Testing lets you confirm bit depth, template position, inlay thickness, glue behavior, and finish appearance before the real cut.
Another practical trick is to mark the top face and grain direction of the inlay blank before routing. Small pieces become confusing very quickly. After the insert is cut free, you may rotate it, flip it, drop it, or place it on a bench full of identical-looking offcuts. A pencil arrow on the waste area can prevent mistakes. This is especially useful for bow ties, where grain direction matters for strength and appearance.
Depth control is another area where patience pays. Set the recess depth so the inlay is slightly proud, usually just enough to feel with your fingertip. If it sticks up too much, leveling becomes slow and risky. If it sits too low, the repair is frustrating. A proud inlay can be planed or scraped flush. A sunken inlay usually requires filler, creative language, or starting over.
For glue-up, dry-fit everything first. The inlay should enter the recess with firm hand pressure or light tapping from a wooden block. If you need a hammer swing worthy of a carnival strength test, the fit is too tight. When glue is applied, the wood can swell slightly and the fit becomes tighter. A tiny bottom chamfer helps the piece start straight and gives excess glue somewhere to go.
One of the best finishing habits is to level the inlay with a scraper before reaching for sandpaper. Sandpaper removes surrounding wood and inlay at different rates, especially when one species is harder than the other. A sharp scraper gives more control and keeps the surface flatter. After scraping, sand lightly with a firm block to blend the area into the rest of the workpiece.
Finally, embrace small imperfections as information. Every gap teaches template control. Every burn mark teaches feed rate. Every chip teaches grain awareness. Manual inlay work rewards calm repetition. You are not trying to beat a CNC machine at being a CNC machine. You are using simple tools to create precise, expressive details with your own hands. That is the charm. And when someone asks what software you used, you can proudly say, “Mostly pencils, clamps, and stubbornness.”
Conclusion
Machining wood inlays without CNC is not only possible; it is one of the most rewarding ways to add craftsmanship, contrast, and personality to a woodworking project. With a router, guide bushing, accurate template, sharp bit, and careful setup, you can create clean inlays for furniture, boxes, slabs, trays, and decorative panels. The process is hands-on, affordable, and flexible enough for small shops. Start with simple shapes, practice on scrap, respect the router, and let each project sharpen your eye. A beautiful inlay does not need a computer-controlled machine. Sometimes it just needs a steady hand, a smart jig, and enough patience to let the wood behave itself.


