
Table of Contents >> Show >> Hide
- What Is Lemon Jelly (and What It Isn’t)?
- The Classic Lemon Jelly Recipe (Bright, Clear, and Spreadable)
- Lemon Jelly Variations (Because Life Is Too Short for One Flavor)
- Serving Ideas (Beyond Toast, Though Toast Is Already Winning)
- Troubleshooting: When Your Jelly Has Opinions
- Storage and Food Safety Notes
- Bonus: Quick Lemon Gelatin “Jelly” Dessert (Wobbly, Bright, and Chill)
- Real-World “Experience” Notes: What Making Lemon Jelly Is Actually Like (Plus the Lessons You’ll Keep)
- Conclusion
If your life has recently handed you lemons, congratulations: you’re halfway to a jar of sunshine.
This in-depth guide walks you through a classic lemon jelly recipe (the toast-and-biscuit kind),
plus an optional quick lemon gelatin dessert for when you want something wobbly and dramatic.
You’ll learn why jelly sets, how to avoid runny “lemon syrup,” and how to customize flavor without
accidentally inventing Lemon Cement.
What Is Lemon Jelly (and What It Isn’t)?
In American kitchens, “lemon jelly” can mean two different treats:
-
Lemon jelly spread: a clear, citrusy preserve made from lemon juice, sugar, and pectin.
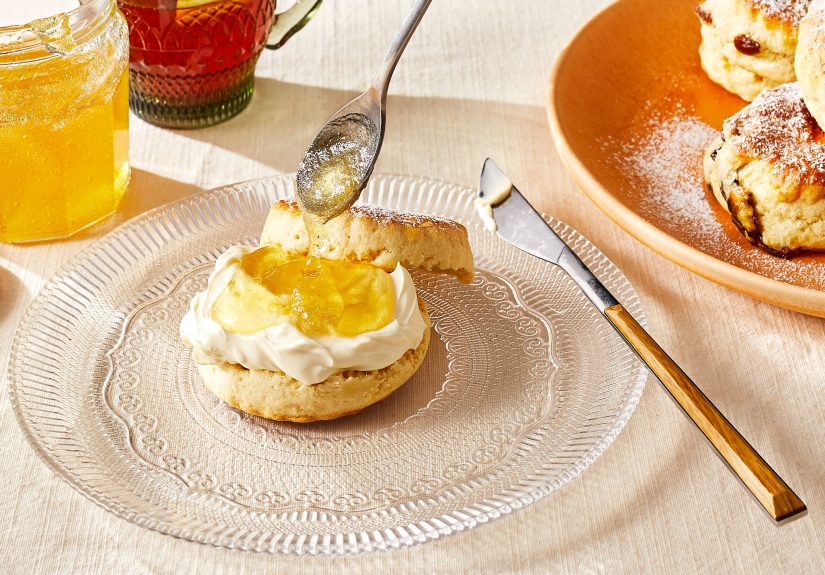
It’s glossy, spoonable, and the perfect sidekick for toast, scones, pound cake, and cheese boards. -
Lemon gelatin dessert: a chilled gel made with unflavored gelatin (or flavored gelatin mix),
lemon juice, and sweetenermore “wiggle” than “spread.”
This article focuses on the homemade lemon jelly spread first (because jars are cute and
breakfast deserves sparkle), then finishes with a quick lemon gelatin option.
The Classic Lemon Jelly Recipe (Bright, Clear, and Spreadable)
This is the go-to style for a lemon jelly with pectin: tart lemon flavor, clean sweetness,
and a set that holds on toast without sliding off like a tiny citrus waterslide.
Flavor Profile and Texture
Expect a clear, pale-yellow jelly with a lively lemon zing. If you love a punchier citrus bite,
add extra zest (instructions below). If you prefer mellow lemon, use Meyer lemons or add a splash
of vanillayes, vanilla and lemon are friends, not frenemies.
Ingredients (Yield: about 5–6 half-pint jars or roughly 5–6 cups)
- 2 cups lemon juice (fresh-squeezed for best flavor; strain out pulp/seeds)
- 2 1/2 cups water (or reduce to 2 cups for a more intense, tangy set)
- 1 box powdered fruit pectin (follow the brand’s “powdered pectin” directions)
- 4 1/2 cups granulated sugar (measured into a separate bowl)
- Optional: 1–2 teaspoons finely grated lemon zest (for extra lemony aroma)
- Optional: 1/2 teaspoon butter (helps reduce foam)
Why these amounts? Many classic powdered-pectin jellies use a high-sugar, short-boil method:
pectin + juice to a full boil, add sugar, then a hard 1-minute boil to set. That quick boil preserves
bright lemon flavor instead of cooking it into “lemony caramel.”
Equipment You’ll Want (No Fancy Stuff Required)
- Large, heavy-bottom pot (6–8 quart is ideal; jelly foams like it has ambitions)
- Whisk or sturdy spoon
- Fine-mesh strainer (for clear juice)
- Candy/jelly thermometer (helpful, not mandatory)
- Clean jars with lids and bands (if canning), plus a jar funnel and ladle
- Large stockpot or water-bath canner with rack (if canning)
Step-by-Step: How to Make Lemon Jelly
-
Prep the lemon juice.
Squeeze lemons, then strain the juice to remove pulp and seeds. For a clearer jelly, strain twice.
For a more aromatic jelly, stir in a little zest (but keep it fine so it doesn’t cloud the jar). -
Measure everything before you turn on the heat.
Jelly moves fast. When it’s time to add sugar, you want to dump it in confidentlynot search the pantry
like you’re on a game show. -
Combine juice, water, and pectin.
In a large pot, whisk together the lemon juice, water, and powdered pectin until smooth. -
Bring to a full boil.
Heat over high heat, stirring constantly, until it reaches a full boil.
(Translation: it’s bubbling enthusiastically across the surface.) -
Add sugar all at once.
Pour in the measured sugar and stir to dissolve. -
Boil hard for exactly 1 minute.
Return to a full rolling boilone that doesn’t stop when you stirand boil hard for 1 minute,
stirring constantly. If using butter for foam control, add it now. -
Skim foam quickly.
Remove from heat. Skim off foam with a spoon for a clearer, prettier finish. -
Decide: refrigerate or can.
If you’re making a small batch for immediate use, pour into clean jars, cool, then refrigerate.
If you want shelf-stable jars, follow the canning steps below.
Optional: Water-Bath Canning for Shelf-Stable Lemon Jelly
If you want pantry-friendly jars, use a boiling water bath. The basics: hot jelly into hot jars,
leave 1/4-inch headspace, wipe rims, apply lids, then process for the recommended time.
Processing time varies by altitude.
- Prepare jars. Wash jars and keep them hot until filling.
- Fill jars. Ladle hot jelly into hot jars, leaving 1/4-inch headspace.
- De-bubble and wipe. Remove air bubbles, wipe rims clean, apply lids and bands (fingertip-tight).
- Process. Place jars on a rack in boiling water, ensuring water covers jars by at least 1–2 inches.
-
Processing time.
Many jellies process for 5 minutes at 0–1,000 ft, 10 minutes at 1,001–6,000 ft,
and 15 minutes above 6,000 ft (always follow a tested recipe or your pectin brand’s directions for your exact batch). - Cool and check seals. Cool undisturbed 12–24 hours, then check that lids don’t flex.
Good to know: If you’re new to canning, stick closely to a tested method and your pectin package directions.
Lemon is naturally high-acid, which is helpful, but the details (headspace, boil strength, timing, and processing) still matter.
How to Tell When Jelly Will Set (Without Guessing and Praying)
With added pectin, the “boil hard for 1 minute” method is designed to set reliablyif your boil is truly vigorous and your timing is accurate.
For extra confidence, use one of these classic checks:
-
Rolling-boil rule: the boil doesn’t stop bubbling when stirred.
If it calms down when you stir, keep heating. -
Temperature cue (especially for no-pectin jellies):
jelly often reaches gel stage around 220°F at sea level, adjusting lower at higher elevations. - Spoon “sheeting” test: syrup drips become heavier and “sheet” off a spoon in two drops that merge.
Lemon Jelly Variations (Because Life Is Too Short for One Flavor)
Meyer Lemon Jelly
Meyer lemons are less tart and more floral. Use the same method, but consider reducing water slightly
so the flavor stays bold. If it tastes “soft,” add a pinch of zest to wake it up.
Vanilla Lemon Jelly
Stir in 1 teaspoon vanilla extract after removing the pot from heat. It turns “bright lemon” into
“lemon dessert vibes,” like a jar of bakery air.
Herb-Infused Lemon Jelly (Rosemary or Thyme)
Add a small sprig of rosemary or a few thyme sprigs to the juice/water mixture while heating.
Remove before jarring. Keep it subtlethis is lemon jelly, not a candle.
Low-Sugar Options
If you want a lower-sugar lemon jelly, use a low- or no-sugar pectin and follow its label instructions
(different pectins behave differently). Don’t simply cut sugar in a classic powdered-pectin recipe unless the pectin is designed for it.
Serving Ideas (Beyond Toast, Though Toast Is Already Winning)
- Cheese board: spoon next to brie, goat cheese, or sharp cheddar for sweet-tart contrast.
- Glaze: warm a few tablespoons and brush over pound cake, lemon loaf, or fruit tarts.
- Yogurt swirl: stir into plain Greek yogurt with granola for “breakfast that feels like a reward.”
- Cocktail helper: dissolve a spoonful into sparkling water (or a grown-up beverage) for instant lemony shine.
- Thumbprint cookies: fill buttery cookies with lemon jelly for a bright bite.
Troubleshooting: When Your Jelly Has Opinions
Problem: It Didn’t Set (a.k.a. Lemon Syrup)
Common causes include: not reaching a true rolling boil, boiling for too short a time, inaccurate measuring,
old pectin, or trying to reduce sugar with a standard pectin.
Fix for future batches: use fresh pectin, measure precisely, and time the “hard boil” from the moment the mixture reaches a rolling boil.
If you already jarred a soft batch, it’s still delicious on pancakes, stirred into tea, or used as a glaze.
Problem: It’s Too Firm
Overboiling or extra pectin can create a rubbery set. Thin it at serving time by warming gently with a teaspoon or two of water,
or use it as a “lemon candy” layer between cookies and frosting (unexpected hero move).
Problem: Cloudy Jelly
Cloudiness often comes from unstrained juice, lots of zest, or vigorous stirring while filling.
For clearer jelly next time: strain juice well and skim foam before jarring.
Problem: Crystals
Sugar crystals can form if sugar wasn’t fully dissolved or if jelly is disturbed while cooling.
Dissolve sugar completely and let jars cool undisturbed.
Storage and Food Safety Notes
- Refrigerator jelly (not canned): cool, cover, and refrigerate; use within a few weeks for best flavor.
- Water-bath canned, sealed jars: store in a cool, dark place; best quality is usually within about 12 months.
- After opening: refrigerate and use within a few weeks (and keep the rim cleansticky jars attract everything).
If a jar doesn’t seal, refrigerate it and treat it like a “use soon” jar. No shame. It’s still lemon jelly.
Bonus: Quick Lemon Gelatin “Jelly” Dessert (Wobbly, Bright, and Chill)
If you meant lemon jelly as in a gelatin dessert, here’s a simple, refreshing version
that tastes like lemonade in its most organized form.
Ingredients (4 servings)
- 1 envelope unflavored gelatin
- 1/3 cup cold water
- 1 1/3 cups hot water
- 1/3 cup fresh lemon juice
- 4 tablespoons sugar (adjust to taste)
Directions
- Bloom the gelatin: sprinkle gelatin over cold water; let stand about 3 minutes.
- Dissolve: add hot water and stir until fully dissolved.
- Flavor: stir in lemon juice and sugar until sugar dissolves.
- Chill: pour into cups and refrigerate until set (about 3 hours).
Tip: Very acidic mixtures can be a little tougher on certain gelatins, so dissolve gelatin fully in warm liquid first,
then add lemon juice. That’s the calm, drama-free path to a clean set.
Real-World “Experience” Notes: What Making Lemon Jelly Is Actually Like (Plus the Lessons You’ll Keep)
Making a lemon jelly recipe at home is one of those kitchen projects that feels suspiciously easyright up until it isn’t.
The good news: the “isn’t” moments are usually small, fixable, and oddly satisfying once you know what’s going on.
First, the smell is a full event. When lemon juice heats with sugar, the aroma shifts from “freshly cut lemon”
to “lemon candy store,” and it happens fast. Many people are surprised by how quickly the kitchen goes from normal to
citrus-powered. If you add zest, you’ll notice a deeper, more perfumey lemon scentless lemonade, more lemon grove.
That’s the zest oils doing their job.
Next comes the boil moment, which is where most first-timers learn respect for a truly big pot.
Jelly foams because it’s a sugary liquid that’s being whipped by aggressive bubbles. If your pot is small,
the mixture may try to climb out like it has places to be. The typical experience is: you turn your back for two seconds,
then you’re doing a panicked “stir, lower heat, stir, raise heat” dance like a reality show contestant.
Using a wide, tall pot makes the whole process feel calmer and more controlled.
The rolling boil can be oddly intimidating the first time, mostly because recipes talk about it like a mythical creature.
Here’s what you’ll experience: at first, the surface bubbles look busy but they pause when you stir. Then, suddenly,
the whole surface bubbles so strongly that stirring doesn’t stop it. That’s the moment you start your 1-minute timer.
A lot of soft-set jelly stories begin with starting the timer too earlybefore the mixture really hit that unstoppable boil.
Then there’s the color check. Many home cooks expect bright yellow jelly, but lemon jelly spread can be pale,
especially if you used strained juice and little zest. The “aha” experience is realizing that clarity is a feature:
the jelly looks almost like liquid sunshine in the jar. If you want more golden color without artificial dyes,
a little zest helps, and so does using some Meyer lemon juice (which often leans warmer in tone).
Finally, the cooling and setting phase teaches patience. Jelly can look loose while it’s hot
and still set beautifully as it cools. A common experience is poking the jar too soon, then doubting everything.
Resist the urge. Let it cool undisturbed. If you did everything rightaccurate measuring, proper boil, correct timing
you’ll get that satisfying set by the next day. And if it’s a touch soft? You didn’t fail. You made lemon syrup,
which is basically a breakfast upgrade in disguise.
The lasting lesson most people walk away with is that jelly-making is less about muscle and more about precision.
Measure carefully, use a real timer, and don’t improvise the sugar unless your pectin is built for it. Once you’ve made it once,
the second batch feels like you unlocked a new kitchen skill: you’ll recognize the boil, you’ll skim foam confidently,
and you’ll start brainstorming flavors like, “Okay, what if I do lemon-ginger next?” That’s how it gets youone jar at a time.


