
Table of Contents >> Show >> Hide
- Before You Start: Know What “Normal” Looks Like
- Tools You’ll Need
- Safety Notes (Not the Boring Kind the Useful Kind)
- How to Test a Battery Charger: 11 Steps
- Step 1: Identify the Charger Type and Battery Chemistry
- Step 2: Create a Safe Test Setup
- Step 3: Do a “No-Tools” Inspection of the Charger
- Step 4: Confirm the Power Source (Outlet, Breaker, GFCI)
- Step 5: Test the Battery First (Yes, Really)
- Step 6: Check Charger Polarity and Clamp Integrity
- Step 7: Measure Charger Output Voltage (The Right Way)
- Step 8: Perform a Simple “Voltage Rise” Reality Check
- Step 9: Measure Charging Current (Without Sacrificing Your Meter)
- Step 10: Check for Proper Charging Stages (Bulk, Absorption, Float)
- Step 11: Evaluate Heat, Noise, Smell, and “Weirdness”
- Quick Reference: Common Voltage Ranges You Might See
- Common Charger Test Results (and What They Usually Mean)
- of Real-World Testing Experiences (What People Actually Run Into)
- Conclusion
Battery chargers are like people at parties: some are quietly helpful, some are loud and confusing, and a few are definitely lying about what they’re doing. If your charger isn’t charging (or seems to be “charging” in the same way a treadmill “folds flat” technically true, emotionally misleading), a simple test can save you time, money, and at least one avoidable “Why is it smoking?” moment.
This guide walks you through 11 practical steps to test most common low-voltage battery chargers: automotive/marine 6V/12V lead-acid chargers, maintainers (“tenders”), and many consumer DC chargers. You’ll use a multimeter, a little logic, and just enough caution to keep your eyebrows employed.
Before You Start: Know What “Normal” Looks Like
The #1 reason charger testing feels confusing is that charger labels are… optimistic. A “12V” charger often outputs more than 12 volts during chargingbecause a 12V lead-acid battery needs a higher charging voltage to actually fill up. Meanwhile, many modern “smart” chargers output nothing unless they detect a battery, as a safety feature (translation: your meter sees a big fat zero and you panic).
So the goal isn’t “does it say 12.0V?” The goal is: does it behave like a charger shoulddelivering the right voltage and current, safely, in the right mode, and then backing off when the battery is full.
Tools You’ll Need
- Digital multimeter (DC volts, resistance/continuity; current capability is a bonus)
- Clamp meter (DC-capable) (optional but very convenient for measuring charging current)
- A known-good battery of the correct type (12V lead-acid is the most common test battery)
- Basic PPE: safety glasses, gloves (especially around lead-acid batteries)
- Good lighting and a ventilated area (batteries can vent flammable gas while charging)
- Notebook/phone notes to record readings over time
Safety Notes (Not the Boring Kind the Useful Kind)
- Ventilation matters. Charging lead-acid batteries can produce flammable gases; avoid sparks/open flames.
- Connect clamps before powering the charger (when the charger design allows it) to reduce sparking.
- Don’t measure current the “wrong way.” A multimeter in current mode must be placed in series. If you place it across the output like voltage testing, you can blow the meter fuse (or worse).
- Inspect cords and plugs. If the insulation is damaged, testing stops herereplace or repair safely.
How to Test a Battery Charger: 11 Steps
Step 1: Identify the Charger Type and Battery Chemistry
Start with the label. Write down: input (e.g., 120V AC), output (voltage and amps), and supported battery types (Wet/Flooded, AGM, Gel, Lithium, etc.).
Why it matters: a lithium mode on a lead-acid battery (or the reverse) can look “broken” because the charger is doing exactly what it was designed to dojust not for your battery.
Step 2: Create a Safe Test Setup
Put the battery on a stable surface in a ventilated area. Keep metal tools away from the battery terminals. Wear eye protection. If you’re testing near a vehicle, ensure the area is dry and well-lit.
If you must use an extension cord, use one that’s in good condition (no cuts, crushed insulation, loose prongs). A quick visual inspection before use is a simple habit that prevents a lot of bad outcomes.
Step 3: Do a “No-Tools” Inspection of the Charger
Before the meter comes out, look for obvious deal-breakers:
- Cracked casing, rattling parts, scorch marks, melted plastic
- Frayed cord, bent prongs, loose strain relief
- Corroded clamps, broken spring tension, damaged insulation on clamp handles
- Burnt smell (trust your nose; it’s surprisingly smart)
If you see severe damage, skip “testing” and move directly to “retiring.”
Step 4: Confirm the Power Source (Outlet, Breaker, GFCI)
Plug a lamp or a known-working device into the outlet you plan to use. This eliminates the classic mistake: blaming the charger when the outlet is the one taking a nap.
If the charger has a fuse, inspect it (unplugged). If the charger has indicator lights, note what “standby” looks like. Some smart chargers won’t start charging if the battery voltage is extremely low or connections aren’t detected.
Step 5: Test the Battery First (Yes, Really)
A weak or damaged battery can make a good charger look bad. Measure the battery’s resting voltage:
- Set the multimeter to DC volts.
- Red probe to positive (+), black probe to negative (–).
For a typical 12V lead-acid battery at rest, you’ll often see roughly 12.6V when fully charged, and lower values as it discharges. Don’t obsess over decimalsthis is a “sanity check,” not a courtroom testimony.
Step 6: Check Charger Polarity and Clamp Integrity
With the charger unplugged from the wall, use continuity (or resistance) to check the basics:
- Do the clamps feel solid and bite firmly?
- Are the clamp teeth clean enough to make metal-to-metal contact?
- Is there visible corrosion or looseness where the clamp connects to the cable?
Corroded clamp contact is a sneaky failure: the charger may show “on,” but current can’t flow through a high-resistance connection.
Step 7: Measure Charger Output Voltage (The Right Way)
This is where charger design matters:
- Older/transformer-style chargers may show a voltage even with no battery connected.
- Smart chargers often show little or no output until connected to a battery.
Best practice: measure voltage with the charger connected to a battery (the battery acts like a real-world load and “wakes up” many smart chargers).
- Connect clamps to the battery: positive first, then negative (and confirm you’re on the right terminals).
- Set the charger to the correct mode (12V/AGM/etc.).
- Plug the charger into the wall and turn it on.
- Measure DC voltage across the battery terminals while charging.
If the battery voltage rises above its resting voltage after a few minutes, that’s a strong sign the charger is functioning.
Step 8: Perform a Simple “Voltage Rise” Reality Check
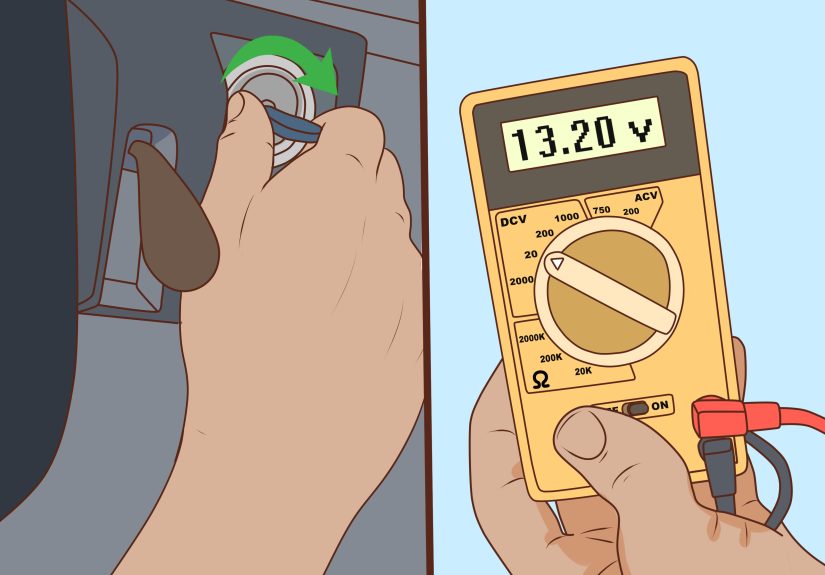
Watch the battery voltage over 5–15 minutes:
- If the battery starts at 12.1V and climbs to 12.6V, 13.2V, and beyond, charging is happening.
- If the voltage doesn’t budge, either the charger isn’t delivering or the connection/battery is blocking the charge.
If the charger has status lights, match what you see to the manual’s meanings (charging, full, error, reverse polarity, standby).
Step 9: Measure Charging Current (Without Sacrificing Your Meter)
Current is the “effort” part of charging. Voltage can look fine while current is basically a tricklelike ordering a smoothie and getting a single blueberry.
Option A (Easier): Use a DC Clamp Meter
Clamp around one of the charger’s output cables (not both together). Read the DC current while charging. Compare the reading to the charger’s rated output. It may start higher and taper down as the battery fills.
Option B (Doable but Risky): Use a Multimeter in Series
Only do this if you’re comfortable with your meter’s current limits (many are 10A max, often for a short duration). You must place the meter in series with the circuit, using the correct current jack and range. If you’re not 100% sure, use a clamp meter instead.
Step 10: Check for Proper Charging Stages (Bulk, Absorption, Float)
A healthy charger doesn’t just “push power forever.” It changes behavior as the battery approaches full. For lead-acid batteries, many chargers move through phases that often look like:
- Bulk: higher current; voltage climbs toward the mid–high 13s or 14s
- Absorption: voltage is held relatively high while current tapers
- Float/Maintenance: lower voltage to maintain charge without cooking the battery
For lithium-ion chargers (including many tool battery chargers), charging commonly follows a constant-current / constant-voltage (CC/CV) pattern: current is strong at first, then tapers down near full charge. This is why “it’s barely drawing any amps” near full can be totally normal.
Step 11: Evaluate Heat, Noise, Smell, and “Weirdness”
Functional chargers can get warm; they shouldn’t get concerningly hot. During a 15–30 minute test, watch for:
- Excessive heat at the charger body, plug, or clamp connections
- Buzzing that’s new or unusually loud
- Intermittent charging (starts/stops rapidly with no clear reason)
- Burning odor or discoloration
If the charger is erratic, overheating, or smelly: stop testing and retire it. The “maybe it’s fine” phase ends the moment plastic starts auditioning for a campfire.
Quick Reference: Common Voltage Ranges You Might See
These are general ranges for 12V lead-acid systems. Manufacturer specs win if they differ. Temperature and battery type (AGM vs flooded) can shift targets.
| Situation | Typical Reading (12V Lead-Acid) | What It Suggests |
|---|---|---|
| Battery at rest (healthy) | ~12.6V (often in the 12.5–12.8V neighborhood) | Battery likely charged |
| Battery at rest (low) | ~12.0–12.2V | Battery significantly discharged |
| Charging (bulk/absorption) | Often ~13.8–14.7V depending on charger/battery | Charger is actively charging |
| Float/maintenance | Often ~13.2–13.8V | Charger is maintaining without overcharging |
Common Charger Test Results (and What They Usually Mean)
“It shows 0V output on my meter.”
- Many smart chargers output little/no voltage unless a battery is connected and correctly detected.
- If connected to a very low-voltage battery, the charger may stay in standby or error mode.
- Double-check mode selection (6V vs 12V; AGM vs lithium).
“Voltage rises, but current is tiny.”
- The battery may already be near full (current naturally tapers).
- Clamp contact may be poor (corrosion, weak clamp tension).
- The charger may be in maintainer/float mode or a low-amp setting.
“The charger immediately shows an error/reverse polarity.”
- Clamps may be reversed (happens to everyone eventually).
- The battery may be damaged internally (some chargers detect abnormal conditions and refuse to charge).
- Loose or corroded connections can confuse battery detection.
“The charger gets hot fast.”
- High charge rate on a low battery can warm the chargersome warmth is normal.
- Hot plug/cord or melting smell is not normal. Stop and replace/repair safely.
- Undersized extension cords can cause extra heat and voltage drop (avoid long, thin cords).
of Real-World Testing Experiences (What People Actually Run Into)
In the real world, charger testing rarely happens in a spotless lab with a perfectly cooperative battery. It happens in garages, driveways, sheds, and that one corner of the workshop where every “future project” goes to retire. The good news: most charger mysteries fall into a handful of repeat offenders.
One of the most common “dead charger” scares comes from modern smart chargers that refuse to output power until they sense a battery. People probe the clamps, see 0.00V, and pronounce the charger deceased. Then they clip it to a battery andsurpriseit wakes up and starts charging like nothing happened. The lesson: if your charger is the smart type, test it under real conditions with a battery connected, not floating in the air like a pair of lonely jumper cables.
Another repeat scenario: the charger is fine, but the clamps are not. Clamp jaws can look clean while hiding corrosion exactly where the metal needs to touch. Or the spring tension weakens so the clamp makes “emotional contact” rather than electrical contact. The classic symptom is a charger that indicates charging, but the battery voltage barely moves, and current readings stay stubbornly low. Cleaning the clamp teeth and ensuring a tight bite often transforms “broken charger” into “working charger with trust issues.”
Then there’s the battery that plays villain. A battery with an internal fault can trigger charger protection, causing a charger to flash error codes, cycle on and off, or remain in standby. People assume the charger is defective because “it won’t charge this battery.” But when the same charger is connected to a known-good battery, it behaves normally. That’s why step-by-step testing is so powerful: it separates “charger can’t” from “battery won’t.”
Another real-life headache is selecting the wrong mode. A charger set to AGM may target different voltages than a flooded battery. A lithium mode on a lead-acid battery may behave oddly (or refuse to charge). Some chargers also have “supply,” “repair,” or “recondition” modes that intentionally behave differentlysometimes with higher voltages for specific purposes. When people accidentally choose a special mode, their meter readings look “wrong,” but the charger is simply doing what it was told.
Finally, current measurement causes more blown fuses (in multimeters) than almost any other DIY electrical task. It’s easy to forget that voltage is measured in parallel, while current is measured in series. Someone moves the red lead to the current jack, forgets they did it, and then measures “voltage” across the clampsinstantly turning a meter fuse into a sacrifice. A DC clamp meter avoids this drama entirely and turns current testing into a one-handed, no-sparks operation.
Conclusion
Testing a battery charger isn’t about chasing one “perfect number.” It’s about confirming the charger’s behavior: it powers on safely, detects the battery correctly, raises voltage appropriately, delivers current that makes sense for the mode, and tapers or transitions to maintenance when the battery approaches full. If your readings improve with a different battery or cleaner clamps, you’ve found your culprit. If the charger overheats, smells, behaves erratically, or fails basic output checks under proper setup, replacement is usually the smartest (and safest) decision.


