
Table of Contents >> Show >> Hide
- First: Figure Out What “Print Screen” Looks Like on Your Toshiba
- The Fastest Ways to Screenshot on a Toshiba Laptop (Windows 11/10/8)
- Method 1: Full Screen Screenshot That Auto-Saves
- Method 2: Full Screen Screenshot Copied to Clipboard (Paste Anywhere)
- Method 3: Screenshot of Just One Window (No Desktop Clutter)
- Method 4: Snip a Custom Area (Best Overall for Most People)
- Method 5: Make the PrtSc Key Open Snipping Tool (Windows 11 Convenience Mode)
- Using the Built-In Snipping Tool App (More Control, Less Chaos)
- Xbox Game Bar Screenshots (Great for Games and Full-Screen Apps)
- Where Screenshots Are Saved on Windows (So You’re Not Playing Hide-and-Seek)
- Toshiba Screenshot Troubleshooting (When the Keys Refuse to Cooperate)
- Bonus: Toshiba Chromebook Screenshot Shortcuts (If Your Toshiba Runs ChromeOS)
- Quick Cheat Sheet: Toshiba Laptop Screenshot Shortcuts
- Conclusion: The Best Screenshot Method for Most Toshiba Owners
- Real-World Experiences: What Screenshot Life on a Toshiba Laptop Really Feels Like (and How to Win)
Screenshots are the modern-day “proof it happened.” Weird pop-up error? Screenshot. Online receipt? Screenshot.
A group chat message you’ll definitely regret later? Screenshot (and maybe breathe first).
The good news: taking a screenshot on a Toshiba laptop is usually just a couple of keys awayonce you know
which keys your specific keyboard is hiding the magic under.
This guide covers the fastest Toshiba screenshot shortcuts for Windows 11, Windows 10, and older versions,
plus what to do if your Toshiba doesn’t have a clearly labeled PrtSc key (because Toshiba keyboards
sometimes play peekaboo). You’ll also learn where screenshots go, how to capture a single window, how to snip
a custom area, and how to fix the most common “I pressed the keys and nothing happened” moment.
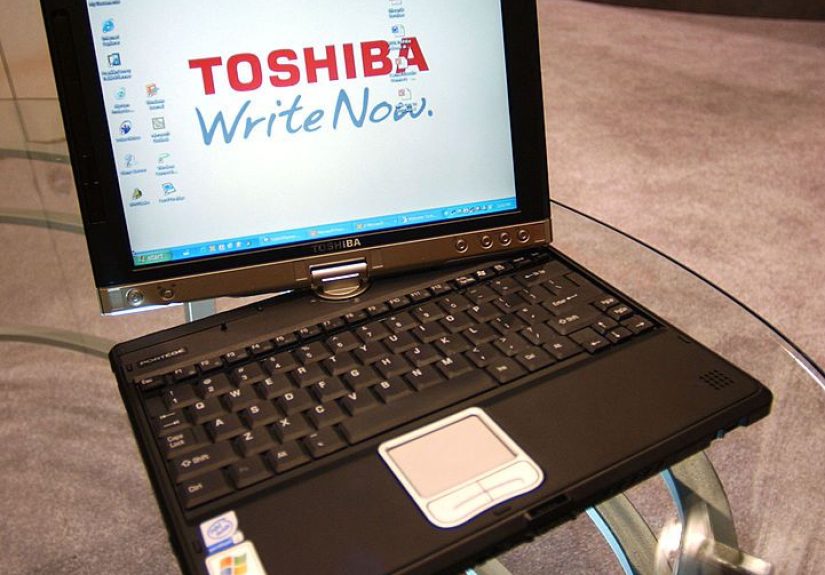
First: Figure Out What “Print Screen” Looks Like on Your Toshiba
Most screenshot methods on Windows revolve around the Print Screen key. On many laptops it’s labeled:
PrtSc, PrtScn, PRT SC, or some tiny text on another key.
- Dedicated key: You see PrtSc printed clearly on a key (often near the top-right area).
-
Shared key: Print Screen is the “second job” of another key (commonly End), meaning you may need
the Fn key to activate it. -
No obvious PrtSc: Your Toshiba might still have itjust printed small, or accessed via Fn combinations.
(We’ll cover the best guesses in a minute.)
Quick Toshiba tip: If you see PrtSc in small letters on the same key as End,
try Fn + End. If your Toshiba has a dedicated PrtSc key but it behaves like a “secondary” function,
you may need Fn + PrtSc.
The Fastest Ways to Screenshot on a Toshiba Laptop (Windows 11/10/8)
Method 1: Full Screen Screenshot That Auto-Saves
If you want the simplest “take it and file it automatically” option, use:
Windows key + PrtSc.
- Open whatever you want to capture (webpage, app, video frame, the masterpiece you made in Paint).
- Press Windows + PrtSc at the same time.
- Your screen may dim brieflythat’s Windows saying, “Yep, I got it.”
- Find it later in Pictures > Screenshots (details in the “Where Screenshots Are Saved” section).
If your Toshiba needs Fn: try Windows + Fn + PrtSc or Windows + Fn + End
(when PrtSc is shared with End). Different Toshiba models label keys differently, so you may need to test one combo.
Method 2: Full Screen Screenshot Copied to Clipboard (Paste Anywhere)
This method is perfect when you want to paste the screenshot into an email, chat, Google Doc, or an image editor:
- PrtSc (or Fn + PrtSc / Fn + End)
What happens next is the part that surprises people: it usually copies the screenshot to your clipboard, but it
doesn’t automatically create a file. To save it:
- Open an app like Paint, Word, or even an email draft.
- Press Ctrl + V to paste.
- Save it (in Paint: File > Save As).
Method 3: Screenshot of Just One Window (No Desktop Clutter)
If you only want the active window (and not the taskbar, background, or 37 other tabs judging you), use:
Alt + PrtSc.
- Click the window you want to capture so it’s active.
- Press Alt + PrtSc (or add Fn if needed).
- Paste with Ctrl + V into an app (Paint, Word, email) and save.
Method 4: Snip a Custom Area (Best Overall for Most People)
When you want to capture exactly what mattersan error message, a chart, a recipe ingredient list, a single meme
the Snipping overlay shortcut is the MVP:
Windows + Shift + S.
- Press Windows + Shift + S.
- Your screen will dim and a small toolbar appears.
- Choose a snip mode:
- Rectangular (most common)
- Freeform (draw a shape)
- Window (one app window)
- Fullscreen (everything)
- Select the area you want.
- The image is copied to the clipboard. Click the notification (if it appears) to open it in Snipping Tool and save it.
Pro move: Use this for fast tech support. Instead of describing an error like “a box popped up with numbers,”
you can send a crisp snip that shows the exact message.
Method 5: Make the PrtSc Key Open Snipping Tool (Windows 11 Convenience Mode)
On Windows 11, you can often set things up so tapping PrtSc launches the snipping experienceno finger gymnastics required.
Look for a setting like Use the Print Screen button to open screen snipping in your Keyboard/Accessibility settings.
This is great on Toshiba laptops where the Print Screen key feels awkwardly placed, or when your hands are busy holding
coffee and regret at the same time.
Using the Built-In Snipping Tool App (More Control, Less Chaos)
If you want delays, easy markup, or consistent saving, open the Snipping Tool directly:
- Open Start and type Snipping Tool.
- Choose a capture mode (rectangle, window, fullscreen, freeform).
- Optional: Use a delay if you need to capture a menu that disappears when you click away.
- Capture, then annotate (highlighter/pen/crop) and save.
Example: Need to capture a dropdown menu in Settings? A delay lets you open the menu, then Snipping Tool grabs it
before it vanishes like it heard you say “documentation.”
Xbox Game Bar Screenshots (Great for Games and Full-Screen Apps)
If you’re gaming, watching something full-screen, or an app blocks normal screenshot shortcuts, try the Xbox Game Bar:
- Windows + G to open Game Bar
- Windows + Alt + PrtSc to take a screenshot quickly (where supported)
Game Bar captures usually save to Videos > Captures, which is helpful if your Pictures folder is already a wilderness of memes.
Where Screenshots Are Saved on Windows (So You’re Not Playing Hide-and-Seek)
Where your screenshot ends up depends on how you captured it:
-
Windows + PrtSc (Windows 8/10/11): Typically saves automatically to
Pictures > Screenshots. - PrtSc or Alt + PrtSc: Usually copied to the clipboard. You must paste and save manually.
- Windows + Shift + S: Copied to clipboard; you can click the pop-up/notification to open and save in Snipping Tool.
- Xbox Game Bar: Typically saves to Videos > Captures.
Heads-up: Cloud backup tools (like OneDrive) can sometimes change where screenshots go, or duplicate them in a cloud folder.
If you can’t find a screenshot, search File Explorer for ScreenShot and sort by Date modified.
Toshiba Screenshot Troubleshooting (When the Keys Refuse to Cooperate)
Problem: “There’s No PrtSc Key on My Toshiba!”
Many Toshiba Satellite/Dynabook models place Print Screen on a shared key, often with End.
Look closely for tiny PrtSc text.
- Try Fn + End
- Try Fn + PrtSc
- Try Windows + Fn + End (for auto-save behavior on Windows 8/10/11)
Problem: “I Pressed PrtSc and Nothing Saved”
That’s normal for the clipboard-based methods. Remember:
PrtSc often copies to clipboard. Open Paint and press Ctrl + V to confirm it worked, then save.
Problem: “Win + PrtSc Doesn’t Create a File”
Try these quick fixes:
- Make sure you’re on Windows 8/10/11 (Windows 7 often relies on clipboard capture).
- Try adding Fn to the shortcut if your Toshiba keyboard requires it.
- Check Pictures > Screenshots and also search for .png files created today.
- Check if OneDrive is redirecting screenshot saves.
- Use Windows + Shift + S as a reliable backup method.
Problem: “My Print Screen Key Opens Snipping Instead of Copying the Full Screen”
On Windows 11, Print Screen can be mapped to open screen snipping. If you prefer the classic behavior, look for the
setting that controls Print Screen and toggle it off.
Bonus: Toshiba Chromebook Screenshot Shortcuts (If Your Toshiba Runs ChromeOS)
Some Toshiba laptops are Chromebooks, which use different shortcuts:
- Full screen: Ctrl + Show windows (the Show windows key looks like a rectangle with lines)
- Partial: Ctrl + Shift + Show windows, then select an area
- Alternative: Use the Screen Capture tool from Quick Settings
If you’re not sure whether you’re on Windows or ChromeOS: Windows usually has a Start menu and a Windows logo key,
while Chromebooks typically have a Launcher/Search key and no Windows logo key.
Quick Cheat Sheet: Toshiba Laptop Screenshot Shortcuts
| Goal | Shortcut | What Happens |
|---|---|---|
| Save full screen automatically (Win 8/10/11) | Windows + PrtSc (add Fn if needed) | Saves to Pictures > Screenshots |
| Copy full screen to clipboard | PrtSc (or Fn + PrtSc / Fn + End) | Paste with Ctrl+V, then save |
| Copy active window to clipboard | Alt + PrtSc (add Fn if needed) | Paste with Ctrl+V, then save |
| Snip a custom area | Windows + Shift + S | Choose region/window/fullscreen, then save from Snipping Tool |
| Game screenshot (where supported) | Windows + Alt + PrtSc | Saves to Videos > Captures |
Conclusion: The Best Screenshot Method for Most Toshiba Owners
If you only remember one shortcut, make it Windows + Shift + S. It works on most Windows Toshiba laptops,
lets you capture exactly what you want, and doesn’t care if your keyboard hid Print Screen on some mysterious secondary function.
If you want automatic saving, use Windows + PrtSc (and add Fn if your Toshiba requires it).
Once you get comfortable, screenshots stop feeling like a technical chore and start feeling like a superpower:
you can capture proof, instructions, receipts, errors, and “look what I found” moments in secondsand keep your digital life organized.
Real-World Experiences: What Screenshot Life on a Toshiba Laptop Really Feels Like (and How to Win)
In the real world, most “How do I screenshot on my Toshiba?” stories don’t start with a perfect keyboard label and a calm,
well-lit desk. They start with urgency. A pop-up error appears during an online exam. A payment confirmation flashes and disappears.
A relative calls and says, “My screen is doing a thing.” Suddenly, taking a screenshot isn’t a fun featureit’s the fastest way to capture
evidence before it vanishes.
One of the most common experiences Toshiba owners report is the clipboard surprise. They press PrtSc, look around for a saved file,
and find… nothing. That’s because the classic Print Screen behavior is more like copying than saving. The screenshot is quietly sitting in
the clipboard, waiting to be pasted. The “aha” moment usually happens when they open Paint, hit Ctrl + V, and the image appears like
a magician pulling a rabbit out of a hat. After that, a lot of people switch to Windows + PrtSc because it feels more modern:
press keys, get a file, move on with life.
Another very Toshiba-specific experience is the “Where is the PrtSc key?” scavenger hunt. Some Toshiba keyboards tuck Print Screen onto
another key like End, and the lettering can be small enough to require the ancient art of “tilt the laptop toward a lamp.”
In those cases, Fn + End becomes the hero. And if that still doesn’t behave like you expect, the next experience is usually
trying one extra variation: add the Windows key for auto-save (Windows 8/10/11), or add Alt for active-window-only.
Once someone learns that Toshiba models can treat Print Screen as a secondary function, troubleshooting becomes less frustrating and more like
solving a tiny puzzle.
People also run into “I can’t capture this menu” momentsespecially with right-click menus, drop-downs, or hover tooltips that vanish the second
you touch the keyboard. That’s where the Snipping Tool’s delay (or launching the tool directly) feels like a cheat code. It gives you time to open
the menu first, then capture it cleanly. The first time someone successfully screenshots a tricky disappearing menu, they usually feel like they just
leveled up.
Finally, there’s the organizational side of screenshot life. Many users start out with screenshots scattered everywhere, then discover the joy of
predictable folders: Pictures > Screenshots for Win+PrtSc and Videos > Captures for Game Bar. A simple habitrenaming
files (like “receipt-nov-2025.png” or “error-code-0x____.png”)turns screenshots from clutter into a personal help desk. Once you’ve used screenshots
to fix a driver issue, document a warranty claim, or show tech support exactly what’s happening, the feature stops being “just a screenshot.”
It becomes a practical tool you’ll use constantlyon purpose.


