Table of Contents >> Show >> Hide
- What Is System File Checker in Windows?
- When Should You Run SFC?
- Before You Start
- How to Run System File Checker in Windows: 6 Easy Steps
- Step 1: Update Windows and restart your PC
- Step 2: Open Command Prompt or Windows Terminal as administrator
- Step 3: Run DISM first for a healthier repair source
- Step 4: Run the System File Checker scan
- Step 5: Read the result like a normal person, not a panic goblin
- Step 6: Restart and use advanced repairs if SFC still cannot fix Windows
- Extra SFC Commands Worth Knowing
- Common Mistakes to Avoid
- Why SFC and DISM Work Better Together
- Conclusion
- Real-World Experiences With Running System File Checker
- SEO Tags
When Windows starts acting weird, it rarely sends a polite calendar invite first. One day your apps open slowly, File Explorer freezes for no reason, or your PC suddenly behaves like it has a personal grudge against productivity. That is where System File Checker, better known as SFC, comes in.
If you have ever searched for how to run System File Checker in Windows, you are in the right place. This built-in Windows tool scans protected system files, looks for corruption, and replaces damaged versions when possible. In plain English, it is one of the easiest repair tools you can run before you panic, reinstall Windows, or begin negotiating with your laptop like it is a moody roommate.
This guide walks you through 6 easy steps to run sfc /scannow, explains what the results mean, shows when to use DISM, and covers what to do if SFC cannot fix everything. The steps work for both Windows 11 and Windows 10, and you do not need any third-party software. Just a few commands, a little patience, and maybe a tiny bit of trust in Microsoft’s repair toolbox.
What Is System File Checker in Windows?
System File Checker is a built-in command-line utility that scans protected Windows system files and repairs problems when it can. It is designed to catch missing, damaged, or altered core files that can lead to crashes, performance problems, failed updates, random error messages, or features that stop working correctly.
Think of SFC as the part of Windows that says, “Hold on, that file does not look right,” and then tries to swap in a clean copy. It is not magic, but it is one of the most useful first-line fixes for operating system corruption.
It is also worth knowing what SFC does not do. It does not fix every driver problem, cure a dying hard drive, or rescue a PC from every blue screen scenario. If the problem is caused by hardware, malware, or a broken Windows image, SFC may need backup. That is why many current repair workflows recommend running DISM first or alongside SFC when Windows is particularly cranky.
When Should You Run SFC?
Running System File Checker in Windows makes sense when your PC is showing symptoms like these:
- Windows features stop opening or crash unexpectedly
- Built-in apps fail after an update
- You see strange DLL or missing system file errors
- Your PC becomes unstable for no obvious reason
- Startup behavior changes after a failed update or forced shutdown
- You want to rule out system file corruption before more aggressive repairs
If your computer boots normally, SFC is easy to run from an elevated Command Prompt, PowerShell window, or Windows Terminal session. If Windows will not boot properly, you can still run it from recovery mode using an offline command.
Before You Start
Before running SFC, do yourself one favor: save your work and close anything important. The scan itself is safe, but if Windows has been misbehaving, this is not the perfect moment to keep seventeen browser tabs, a half-finished spreadsheet, and a game launcher all fighting for attention.
It also helps to be connected to the internet if you plan to use DISM /RestoreHealth, because DISM may pull repair files from Windows Update. A restart before scanning is smart too. Sometimes Windows just needs a clean reboot before it stops pretending it has never met your taskbar.
How to Run System File Checker in Windows: 6 Easy Steps
Step 1: Update Windows and restart your PC
Start with the simple stuff. Install the latest Windows updates, then restart your computer. This step matters because a pending update or half-finished reboot can interfere with file repair. It also clears minor glitches that may be causing the problem in the first place.
If your system is only mildly unstable, this step alone may solve the issue. If not, move on to the scan.
Step 2: Open Command Prompt or Windows Terminal as administrator
To run sfc /scannow correctly, you need elevated permissions. In other words, Windows wants to make sure you are not a random app trying to rearrange its plumbing.
Here is the easiest method:
- Press Windows + X
- Select Windows Terminal (Admin) or Command Prompt (Admin)
- Approve the User Account Control prompt
You can also search for Command Prompt from the taskbar, right-click it, and choose Run as administrator. PowerShell works too, as long as it is opened with admin rights.
Step 3: Run DISM first for a healthier repair source
Many Windows repair guides now recommend using DISM before SFC. Why? Because SFC uses the local Windows image as its repair source. If that source is damaged, SFC may throw up its hands and give you the digital equivalent of a shrug.
Type this command, then press Enter:
This command checks and repairs the Windows image used for recovery. It may take several minutes to start and finish, and sometimes it looks stuck. That does not always mean anything is wrong. Windows loves dramatic pauses.
If DISM completes successfully, you are in a much better position to run SFC and get a real repair instead of a sad little status message.
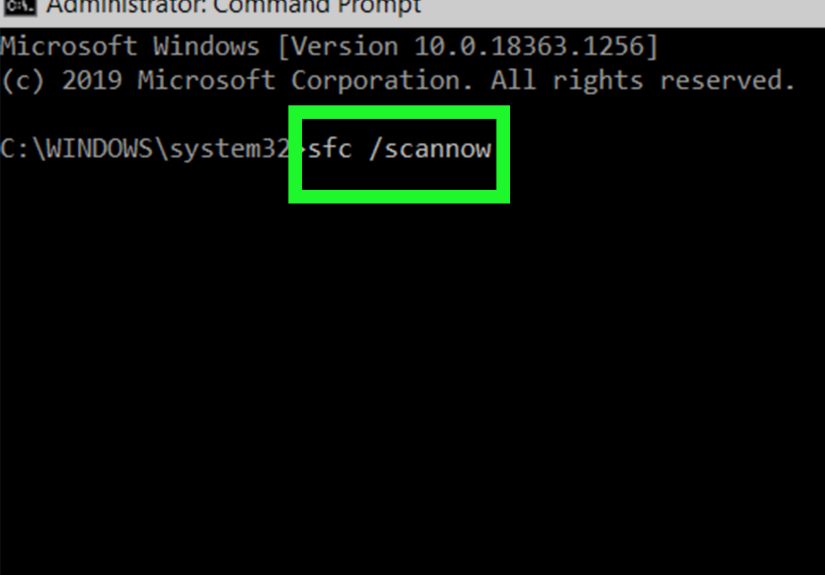
Step 4: Run the System File Checker scan
Now for the main event. In the same elevated window, type:
Then press Enter and let it run to 100 percent. Do not close the window halfway through, even if the progress bar seems to be taking the scenic route. The scan checks all protected system files and repairs problems when possible.
Depending on your PC, this may take anywhere from several minutes to much longer. Older machines, slower storage, and more serious corruption can all stretch the process out. So yes, this is a great time to get coffee. It is not a great time to assume the scan has failed just because it parked at a certain percentage for a while.
Step 5: Read the result like a normal person, not a panic goblin
When SFC finishes, it will return one of several common messages. Here is what they actually mean:
- Windows Resource Protection did not find any integrity violations.
Good news. Your protected system files appear fine. Your problem may be caused by something else, such as drivers, hardware, updates, or third-party software. - Windows Resource Protection found corrupt files and successfully repaired them.
Also good news. SFC found issues and fixed them. Restart your PC and test the original problem again. - Windows Resource Protection found corrupt files but was unable to fix some of them.
This means the tool found damage but could not repair everything. You may need to run DISM again, repeat SFC, review the log file, boot into Safe Mode, or use recovery tools. - Windows Resource Protection could not perform the requested operation.
This often points to deeper repair issues. In many cases, running SFC in Safe Mode or from the Windows Recovery Environment is the next step.
If you want more detail, you can extract the SFC results from the CBS log with this command:
That creates a text file on your desktop so you can review what SFC found and what it repaired. Handy for troubleshooting, and even handier if you are helping someone who says, “My computer is broken,” then offers zero additional context.
Step 6: Restart and use advanced repairs if SFC still cannot fix Windows
After SFC finishes, restart the computer. Even when repairs complete successfully, a reboot helps Windows apply changes cleanly.
If the issue remains, try these next moves:
- Run DISM again, then rerun sfc /scannow
- Run SFC more than once if corruption was found on the first pass
- Boot into Safe Mode and run SFC there
- Use the Windows Recovery Environment for an offline scan
If Windows will not boot normally, you can run an offline SFC scan from recovery media or the recovery environment. A common format looks like this:
Important: in recovery mode, the Windows drive letter may not actually be C:. On some systems it could be D: or something else, so always verify the correct drive before running the command.
Extra SFC Commands Worth Knowing
Most people only need sfc /scannow, but there are a few useful variations:
- sfc /verifyonly scans system files without making repairs
- sfc /scanfile=path scans a specific file
- sfc /verifyfile=path verifies a specific file without repairing it
These are more specialized, but they can be helpful when you want confirmation without changes, or when a specific Windows file is causing trouble.
Common Mistakes to Avoid
A lot of SFC problems come from simple user mistakes, not catastrophic system corruption. Here are the biggest ones:
- Not running the terminal as administrator. SFC needs elevated access.
- Closing the window too early. Let the scan finish completely.
- Skipping DISM when the image is damaged. If SFC cannot fix files, DISM is often the missing step.
- Using the wrong drive letter in recovery mode. Recovery environments love changing drive letters just to keep life interesting.
- Assuming SFC fixes everything. It is powerful, but it is not a cure-all for failing drives, bad RAM, malware, or broken drivers.
Why SFC and DISM Work Better Together
If you only remember one thing from this guide, make it this: DISM repairs the image, SFC repairs the active system files. That is why they are often used as a pair.
Here is the simple version:
- DISM fixes the source files Windows uses for repair
- SFC checks and fixes the protected files Windows is actively using
That sequence is especially useful after failed updates, recurring system errors, or weird Windows behavior that refuses to explain itself in plain language.
Conclusion
Learning how to run System File Checker in Windows is one of those small tech skills that pays off over and over again. It is built in, free, and often surprisingly effective. In just a few minutes, you can check for damaged system files, repair Windows corruption, and get your PC back on speaking terms with itself.
The smartest workflow is simple: update and restart, open an elevated terminal, run DISM, run sfc /scannow, read the result, and restart. If the problem sticks around, move to Safe Mode or an offline recovery scan. No mystery tools. No sketchy downloads. No ritual sacrifice to the blue screen gods.
For everyday Windows troubleshooting, SFC remains one of the easiest and most useful repair commands you can keep in your toolkit.
Real-World Experiences With Running System File Checker
In real life, running System File Checker in Windows is rarely a dramatic movie scene where the computer sparks, the hero types three commands, and the orchestra swells. It is usually much more ordinary, which is actually a good thing. A lot of people first use SFC after a confusing update, a random crash, or a weird system issue that feels too small for a reinstall but too annoying to ignore.
One of the most common experiences is this: the PC still boots, but something feels off. Maybe the Start menu opens slowly, Settings crashes, or Windows Security refuses to launch. The user searches for a fix, opens Command Prompt as administrator, types sfc /scannow, and then stares at the screen wondering whether 43 percent means success, failure, or emotional betrayal. Usually, it just means the tool is still working.
Another common experience is impatience. SFC has a special talent for looking stuck when it is not. Many users see the progress pause at a certain number and assume disaster. In reality, the scan may just be chewing through files, checking permissions, or waiting on system resources. The best move is often the least exciting one: leave it alone and let it finish.
There is also the very satisfying scenario where SFC reports that it found corrupt files and repaired them. That result feels great because it is specific, useful, and unexpectedly honest. It is the rare moment when Windows says, “Yes, something was broken. Yes, I fixed it. You are welcome.” After a reboot, many people notice the original problem is simply gone, which makes SFC feel like a tiny built-in superhero wearing a command-line cape.
Then there is the less glamorous but very normal experience where SFC says it found problems but could not fix them all. That message sounds alarming, but it is not the end of the road. It usually means the repair source is damaged, which is why running DISM /RestoreHealth is so often the next successful step. A lot of users only get full repairs after using DISM first and then rerunning SFC.
Some people first encounter SFC while helping a family member. That experience deserves its own category. The symptoms are usually described with world-class vagueness: “It does not work right,” “The screen thing is weird,” or the timeless classic, “I clicked something and now it is broken.” In those cases, SFC is useful because it gives you a structured first check instead of random guessing.
Advanced users often appreciate SFC for another reason: it helps narrow the problem. If the scan finds no integrity violations, that is still valuable information. It tells you to stop blaming core Windows files and start looking at drivers, disk health, software conflicts, or hardware issues instead. In troubleshooting, knowing what isn’t broken is half the battle.
So the real experience of using SFC is not flashy. It is practical, occasionally slow, sometimes mildly annoying, and often surprisingly effective. And in the world of Windows repair, that is honestly a pretty good deal.