
Table of Contents >> Show >> Hide
- Why Use a Projector for a Mural?
- What You’ll Need
- Step 1: Prep the Wall Like You Actually Want This to Look Good
- Step 2: Prep Your Image So It Projects Cleanly
- Step 3: Choose a Projector Setup That Won’t Fight You
- Step 4: Set Up the Projection (The “Measure Twice, Trace Once” Moment)
- Step 5: Trace the Design Without Regretting Your Life Choices
- Step 6: Paint the Mural (AKA: The Fun Part You Earned)
- Step 7: Troubleshooting Common Projection Problems
- Step 8: Seal and Protect (Optional, But Smart)
- Quick FAQ
- Real-World Experiences: What People Learn After Their First Projected Mural (Extra )
- 1) The room doesn’t have to be pitch-black, but it can’t be “sunlit and optimistic” either
- 2) Keystone correction is handy, but “perfectly squared” isn’t always worth the blur
- 3) Tracing every detail is a trap
- 4) The projector will move at least onceplan for it, don’t panic
- 5) Wall prep changes everything more than fancy brushes do
- 6) The best workflow is: project to trace, then stop projecting to paint
- Final Thoughts
Painting a mural sounds like a “cool weekend project” until you’re three hours in, your “simple vine border” looks like
a confused spaghetti monster, and you start bargaining with the wall. The good news: projecting an image onto the wall
is basically giving yourself a cheat codeone that helps you scale your design, keep proportions accurate, and avoid the
classic “why is the cat’s head bigger than the sofa?” problem.
This guide walks you through the full processplanning, wall prep, projector setup, tracing, painting, and finishing
with real-world troubleshooting along the way. You’ll also get a longer “experience” section at the end with practical
lessons people learn the hard way (so you don’t have to).
Why Use a Projector for a Mural?
A projector turns your wall into a giant reference screen. Instead of measuring and redrawing everything by hand, you
can project your artwork at full size, trace the key lines, and paint with confidence.
It’s especially helpful when you’re:
- Scaling up a small sketch to a big wall (without math-induced despair).
- Working with portraits, lettering, or geometric patterns where proportions matter.
- Recreating a digital design from Procreate, Photoshop, Canva, or Illustrator.
- Painting around obstacles like outlets, doors, trim, or furniture you can’t move.
When a projector might not be ideal
If your wall is super textured (heavy orange peel, rough stucco, deep brick joints), projection can still work, but your
traced lines may look wobbly. In those cases, you may combine projection with a grid method, stencils, or simplified
shapes.
What You’ll Need
Core tools
- A projector (any model that can clearly show your design at the size you need)
- A stable stand (tripod, shelf, ladder shelf, or table that won’t wiggle)
- Your image source (laptop, tablet, phone, streaming stick, or HDMI-connected device)
- Tracing tool (pencil, chalk pencil, or removable chalkavoid permanent marker)
- Painters tape for marking boundaries and reference points
- Measuring tape + level (or a level app)
- Drop cloth and basic room protection
Paint and prep supplies
- Wall cleaner (mild soap/water is often enough for interior walls)
- Spackle/joint compound for holes and dents
- Sanding sponge
- Primer (especially if patching, color-changing, or painting over shiny paint)
- Base wall paint (often interior latex in matte/eggshell)
- Mural paint (many people use acrylics for details and color variety)
- Brushes/rollers in a few sizes, plus a tray/liners
Safety basics (non-negotiable grown-up energy)
- Good ventilation (open windows, use a fan if appropriate)
- Dust protection when sanding (mask/respirator as needed)
- Ladder/step stool used on a stable, level surface
- Keep cords taped down to prevent tripping
Step 1: Prep the Wall Like You Actually Want This to Look Good
A projector can help your lines look crisp, but it can’t save you from a greasy wall, flaking paint, or a patch job that
looks like a tiny mountain range. Wall prep is the boring hero of mural success.
Clean first
Dust and grime can interfere with paint adhesion. Wipe down the wall with a damp cloth or sponge and let it dry fully.
If the wall is in a kitchen or high-traffic zone, you may need a little mild cleanerjust rinse afterward so paint sticks.
Patch, sand, and smooth
Fill holes and dents, let the patch dry, then sand smooth. Run your hand over ityour fingers are excellent critics.
Wipe away dust after sanding so your primer doesn’t glue it back to the wall.
Prime (often worth it)
Primer helps create an even surface, blocks stains, and improves adhesionespecially over patched areas, bold colors,
glossy paint, or anything questionable. If you’re painting a light mural over a dark wall, primer can keep you from
needing 47 coats of “almost white.”
Important older-home note
If you live in a home built before 1978, be careful with sanding or scraping old paint. Lead-based paint is a real risk
when disturbed. If you suspect lead paint, follow lead-safe guidance and consider a certified professional for anything
beyond light painting. Your mural is not worth a health hazard.
Step 2: Prep Your Image So It Projects Cleanly
The cleaner the image, the easier it is to trace. “Clean” doesn’t necessarily mean “highly detailed.” It means your
edges and major shapes are easy to see.
Best image characteristics for projection
- High contrast: dark lines on a light background are easier to trace.
- Simple outlines: simplify tiny details that won’t read from 6–10 feet away.
- Large file size: bigger images look sharper when blown up.
- Correct aspect ratio: match your projector’s output (often 16:9) to avoid stretching.
Quick example: turning a photo into a traceable mural design
- Convert to black-and-white (or increase contrast).
- Use an “edges” or “posterize” effect to simplify shapes.
- Thicken the key outlines so they remain visible when projected.
- Save a backup version with fewer details for easier tracing.
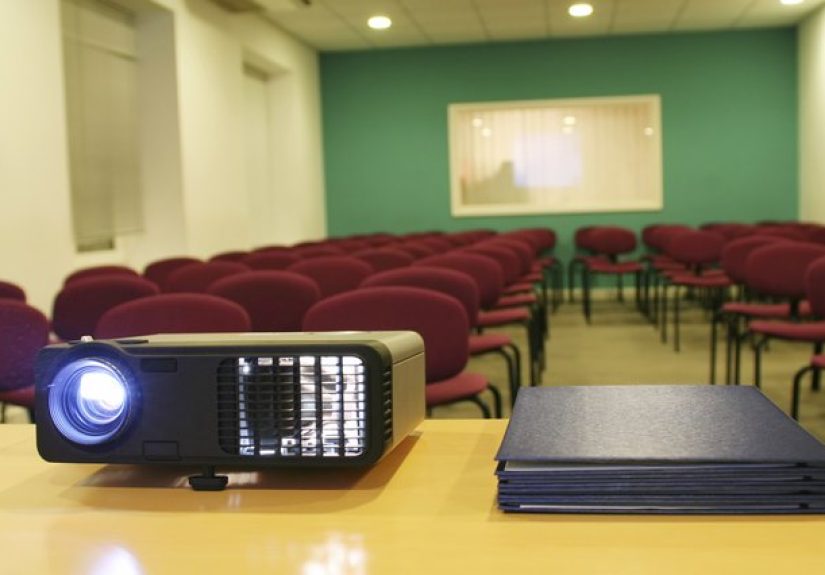
Step 3: Choose a Projector Setup That Won’t Fight You
You don’t need a Hollywood home theater projector, but you do need a projected image you can see clearly enough to trace.
Two things matter most: brightness and placement.
Brightness: why dark rooms are your best friend
In a bright room, projection can look washed out, especially on colored walls. If you can dim lights or work at night,
you’ll get a sharper, more traceable image. If you can’t darken the room, you’ll likely need a brighter projector and a
higher-contrast design.
Placement: keep it straight to avoid distortion
The best projection happens when the projector is centered and aimed squarely at the wall. If it’s off to the side or too
high/low, your image turns into a trapezoid (fun for geometry class, less fun for mural painting).
Lens shift vs. keystone correction (simple version)
If your projector has lens shift, use it first. It physically adjusts the image position with minimal quality loss.
Keystone correction digitally reshapes the image, which can reduce sharpness and effective resolution. Keystone is helpful
when you must project from an imperfect anglebut treat it like hot sauce: useful, but don’t pour the whole bottle.
Step 4: Set Up the Projection (The “Measure Twice, Trace Once” Moment)
1) Mark your mural boundaries
Decide the mural’s size and location. Use painter’s tape to mark a rectangle or key boundary points. This gives you a
visual target and helps you scale the projected image correctly.
2) Position the projector
- Put the projector on a stable surface (tripod is ideal).
- Center it horizontally to the mural area when possible.
- Keep it level (use a bubble level or level app).
- Set the distance so the image fills your taped boundary.
3) Focus and sharpen
Let the projector warm up if needed, then focus carefully. If your image looks sharp in the middle but fuzzy on edges,
the projector may be angled or the wall surface may be uneven. Adjust placement first, then use keystone if you must.
4) Reduce distractions
- Dim lights, close blinds, or wait until evening.
- Turn off screensavers and notifications (nobody wants to trace a “Low Battery” pop-up).
- Tape down cords so you don’t trip mid-masterpiece.
Step 5: Trace the Design Without Regretting Your Life Choices
Tracing isn’t about copying every tiny detail. It’s about building a reliable map: main shapes, key lines, and important
landmarks. The paint does the rest.
What to trace (and what to skip)
- Trace: outlines, major shapes, facial features (if any), lettering guides, and key boundaries.
- Skip: micro-textures, tiny shading lines, and details you can paint freehand later.
Best tracing tools for walls
- Light pencil: good for smooth walls; easy to paint over.
- Chalk pencil: visible, often erasable; great for darker walls.
- Removable chalk: helpful, but test firstsome walls stain or hold chalk in texture.
Pro tip: use anchor points
Before you trace everything, mark “anchors” like the top of a head, corners of a shape, baseline of text, or edges of
a big element. If the projector shifts later, you can realign faster by matching anchors.
Work in sections
For a big mural, it’s normal to reposition the projector. Trace one section fully, then shift and overlap slightly to
keep continuity. Think “map tiles,” not “one giant perfect projection forever.”
Step 6: Paint the Mural (AKA: The Fun Part You Earned)
Start with big shapes and background
Block in large areas with a roller or big brush. This sets the stage and makes the mural feel real fastwhich is great
for morale.
Layer from general to specific
- Background color fields first
- Mid-size shapes and shadows
- Details, outlines, highlights last
Keep your edges clean
If your mural has crisp geometric edges, painter’s tape is your friend. Burnish the tape edge (press it down firmly),
paint away from the tape edge, and remove tape while paint is slightly wet for cleaner lines.
Color-matching tip (so you don’t remix “the same blue” eight times)
Mix enough paint for a full section and store it in a labeled container. Write the “recipe” (example: “2 parts navy, 1
part white, tiny dot black”). Future-you will feel emotionally supported.
Step 7: Troubleshooting Common Projection Problems
The image is too faint
- Darken the room (biggest improvement, fastest).
- Increase contrast of the design (thicker, darker lines).
- Project onto a lighter base coat (even a quick white/neutral base helps).
- Move the projector closer (often increases perceived brightness and sharpness).
The image is distorted
- Re-center and level the projector first.
- Use lens shift if available.
- Use keystone correction as a last step (small corrections are better than extreme ones).
The wall texture makes lines hard to trace
- Trace only major shapes; freehand the smaller details.
- Use a thicker outline version of your design.
- Consider a light skim coat or sanding (only if safe and appropriate for your wall).
The projector keeps moving (and your sanity with it)
- Stabilize the stand (tripod, weighted base, or a sturdy shelf).
- Mark the projector’s “feet position” with tape on the floor/table.
- Use anchor points on the wall to re-align quickly.
Step 8: Seal and Protect (Optional, But Smart)
Sealing can help protect a mural from scuffs, cleaning, and general life happening near the wall. This matters most in
hallways, kids’ rooms, and anywhere people touch the wall like it’s a museum exhibit.
Sealing considerations
- Let the mural cure fully before sealing (follow your paint’s guidance).
- Choose a finish you can live with (matte, satin, or gloss changes the look).
- Test the sealer in a small corner firstsome top coats slightly deepen colors.
For many interior murals, a clear, compatible protective coat (often acrylic-based) can work well. For more technical
“art” systems, artists sometimes use an isolation layer and a removable varnish systemespecially for murals that need
future maintenance.
Quick FAQ
Can I use a cheap mini projector?
Sometimes, yesespecially in a dark room on a light wall with a simple design. The biggest limitation is brightness and
clarity. If you can’t see your outlines clearly, tracing becomes slow and frustrating.
Do I have to trace everything?
Nope. Trace the structure. Paint the personality. The goal is accuracy where it matters and freedom where it looks best.
What if I mess up the tracing?
Light pencil lines can be erased. Chalk can often be wiped. And if you make a mistake, you can usually paint over it
after you’ve laid down your base colors. Murals are forgivingwalls are basically giant “undo buttons” with primer.
Real-World Experiences: What People Learn After Their First Projected Mural (Extra )
If you ask a handful of DIY mural painters how projection went, you’ll get the same theme in different words:
“Amazing… once I stopped doing the three things that made it miserable.” Here are the most common real-world lessons
people report after their first projected wall mural.
1) The room doesn’t have to be pitch-black, but it can’t be “sunlit and optimistic” either
A lot of first-timers try to trace midday with sunlight pouring in, then wonder why the lines look like a ghost story.
The usual fix is surprisingly simple: wait until evening, close blinds, turn off overhead lights, and suddenly your design
looks crisp enough to trace without squinting like you’re decoding ancient runes. Some people also discover that even one
bright lamp behind them can wash out the image. Once they turn it off, the projection “pops” instantly.
2) Keystone correction is handy, but “perfectly squared” isn’t always worth the blur
Many people start by cranking keystone correction to force the image into place. Then they notice the details look softer,
especially around text and fine outlines. The next attempt goes better: they physically reposition the projector first,
then use only minimal keystone adjustments. In practice, a slightly less “perfect” rectangle that stays sharp can be easier
to trace than a perfectly squared image that looks fuzzy.
3) Tracing every detail is a trap
A common experience: someone decides to trace every leaf vein, every eyelash, every tiny sparkle highlight. Two hours
later they’re tired, their hand hurts, and the wall looks like a complicated coloring book. The best “second mural”
strategy is tracing only what you truly need: the big outlines, a few reference points, and any critical symmetry or
lettering baselines. Then they paint the finer details by eye while zooming in on the image on a phone or tablet.
The mural often ends up looking more confident and less stiff.
4) The projector will move at least onceplan for it, don’t panic
People underestimate how easy it is to bump a stand, snag a cord, or shift a table. The calm solution is to assume it’ll
happen and build in a system: tape marks on the floor where the stand sits, plus a few anchor points on the wall (like
the corners of a shape or key intersections). That way, if the image shifts, you can realign quickly instead of starting
over or “eyeballing it” and hoping for the best.
5) Wall prep changes everything more than fancy brushes do
A consistent “wish I knew earlier” is how much smoother paint looks on a properly prepped wall. People who skip cleaning
sometimes notice paint fisheyes or patchy adhesion. People who skip sanding patched areas often see those patches under
the mural lighting like tiny speed bumps. Meanwhile, people who prime first are more likely to say the mural felt easier,
the colors stayed true, and the final result looked more professional. It’s not glamorous, but neither is repainting the
entire wall because your mural peeled near the baseboard.
6) The best workflow is: project to trace, then stop projecting to paint
Many painters start out thinking they’ll keep the projector on the whole time. In reality, it gets hot, it can shift, and
it adds pressure to “keep up” with the projection. A better rhythm is: trace the section, turn off the projector, paint
that section, then re-project only if you need to place the next piece accurately. It’s calmer, safer for your equipment,
and easier to focus on painting rather than babysitting your setup.
Final Thoughts
Projecting an image onto a wall to paint a mural isn’t “cheating.” It’s using the right tool for the joblike measuring
tape, but with extra drama. Prep your wall, simplify your design, set up your projector square and stable, trace the
structure, and let the paint do the storytelling. By the end, you’ll have a mural that looks intentionalbecause it is.


