
Table of Contents >> Show >> Hide
- Pick Your Sign Style (Because “Illuminated” Can Mean a Lot)
- Materials & Tools You’ll Actually Use
- Safety First: The Rules That Keep Your Sign (and Eyebrows) Intact
- How to Size Your Power Supply (Without Guessing)
- Build Option A: LED Neon-Flex “Modern Neon” Sign
- Build Option B: DIY Marquee Letters (Bulb-Style Glow)
- Build Option C: Edge-Lit Acrylic Sign (Clean, Modern, Very “Pro Desk”)
- Build Option D: Lightbox / Backlit Sign (Even Glow, Easy Readability)
- Troubleshooting: The Usual Suspects
- FAQ
- Common “Real-World” Experiences (What DIYers Learn the Hard Way)
- Conclusion
An illuminated sign is basically a tiny, controllable sunrise that says something useful (or hilarious) like “OPEN,” “TACOS,” or “PLEASE PUT THE LAUNDRY AWAY.”
And the best part? You don’t need a glass-blowing apprenticeship or a secret workshop behind a pawn shop to make one. With modern LEDs, a few basic tools,
and a healthy respect for electricity (read: don’t lick wires), you can build a custom light-up sign that looks legitimately professional.
This guide walks you through the most common DIY styles, the materials that actually work, how to size your power supply without guessing, and how to avoid
the classic mistakes that turn a “cool project” into a “why is the wall warm?” situation.
Pick Your Sign Style (Because “Illuminated” Can Mean a Lot)
Before you buy anything, decide what kind of glow you want. Different styles have different difficulty levels, costs, and “wow” factors.
Here are the most DIY-friendly options:
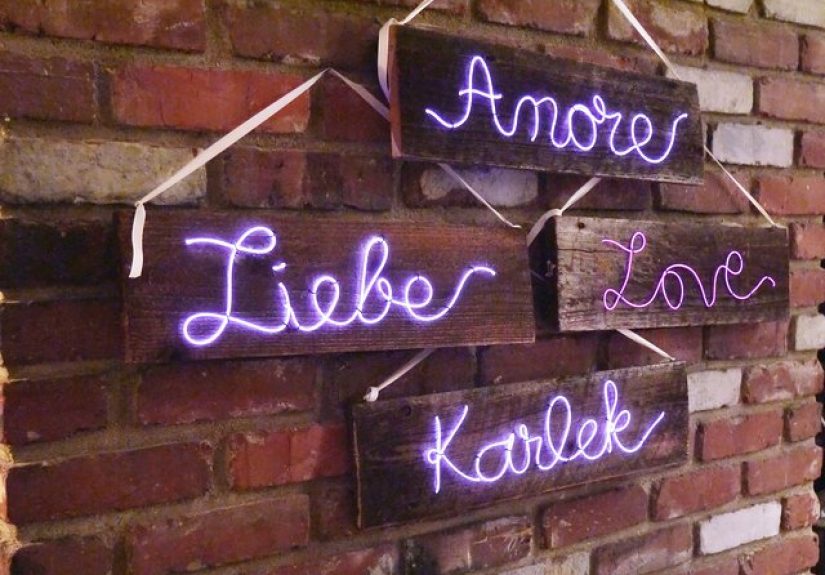
1) LED Neon-Flex Outline Sign
This is the modern “neon look” made with flexible silicone LED tubing. It gives you that continuous line of lightperfect for cursive words, logos, and
simple shapes. It’s lightweight, low-voltage, and easier than traditional neon by approximately one million percent.
2) Marquee Letters (Bulb-Style)
Think big letters with individual “bulbs” or pixels. Great for parties, weddings, home bars, or that one friend who insists their garage is a “studio.”
You can build these from wood, foam board, PVC, or metal sheetwhatever matches your tool comfort level.
3) Edge-Lit Acrylic (Glowing Engraved Panel)
A clear acrylic sheet is engraved (or etched) with your design, then lit from the edge with LEDs. The engraved lines catch the light and glow, while the
acrylic stays mostly transparent. This style looks sleek and modernlike something you’d see on a reception desk or gamer setup.
4) Lightbox / Backlit Sign
A shallow box with LEDs inside and a diffuser panel in front. This is the classic “even glow” approachgreat for block lettering, icons, and signs that need
to be readable from across the room.
Materials & Tools You’ll Actually Use
Your exact shopping list depends on the style, but most illuminated signs share the same core components: a structure, a light source, a diffuser (sometimes),
and a safe way to power it.
Core materials (most builds)
- LED lighting: LED strip, LED modules, LED neon-flex, or pixel-style LEDs
- Power supply: matched to your LED voltage (commonly 5V, 12V, or 24V)
- Wire + connectors: appropriately sized wire, solder/heat-shrink or clip-on connectors
- Mounting: adhesive backing, silicone, hot glue (sometimes), screws, brackets, standoffs
- Switch/dimmer: inline switch, PWM dimmer, or controller (especially for RGB)
- Backing/frame: plywood, MDF, acrylic, PVC sheet, or a shadow box frame
Tools (pick what matches your build)
- Measuring tape, ruler, pencil
- Utility knife and/or jigsaw (wood), or acrylic scoring tool (acrylic)
- Drill + drill bits (for marquee “bulb” holes or mounting)
- Soldering iron (optional but very useful), heat-shrink tubing, wire strippers
- Sandpaper and paint supplies (if doing wood letters)
Safety First: The Rules That Keep Your Sign (and Eyebrows) Intact
DIY illuminated signs are safest when you keep everything low-voltage and use purpose-built adapters.
Here’s the practical checklist:
- Match voltage exactly. If your LEDs are 12V, use a 12V supplynot “close enough.”
- Buy quality power supplies. Look for well-reviewed, properly rated adapters and avoid mystery bricks that feel like they were assembled in a cave.
- Don’t run LED strips at max capacity. Leave headroom (more on sizing below) to reduce heat and extend lifespan.
- Insulate connections. Heat-shrink tubing beats bare tape. Always cover exposed conductor.
- Ventilation matters. If your sign is boxed in, don’t trap heat against the power supply or LEDs.
- If you’re dealing with mains wiring, stop. Use a plug-in adapter instead unless you’re trained and local code allows it.
How to Size Your Power Supply (Without Guessing)
Power supply sizing is where most DIY signs go wrong. The good news: it’s just simple math and a little safety buffer.
Step 1: Find LED power draw
LEDs are usually rated in watts per foot (W/ft) or watts per meter (W/m), or sometimes total watts for a reel.
If you only have amps listed, you can convert using: Watts = Volts × Amps.
Step 2: Multiply by your total length
Example: Your LED strip uses 4.4 W/ft and you’re using 10 ft.
Total watts = 4.4 × 10 = 44 W.
Step 3: Add headroom
Don’t run a power supply at its limit. Add about 20% headroom.
So you’d aim for: 44 W × 1.2 = 52.8 W.
A 60 W supply would be a comfortable choice.
Bonus: Pay attention to maximum run length
Many LED strips have recommended maximum continuous run lengths before voltage drop causes dimming or color shift.
If your design needs longer runs, plan to power from multiple points or use higher voltage (like 24V) where appropriate.
Build Option A: LED Neon-Flex “Modern Neon” Sign
If you want that neon vibe with minimal drama, neon-flex is your best friend. It’s flexible LED tubing that produces a smooth line of light.
Ideal for words, outlines, and simple icons.
What you’ll need
- LED neon-flex (12V or 24V, depending on what you buy)
- Backing board (acrylic, PVC sheet, or painted plywood)
- Mounting clips or silicone adhesive rated for your materials
- Power supply (matching voltage) + inline switch or dimmer
- Wire, connectors, heat-shrink (and soldering tools if required)
Steps
- Design your layout. Print your text/logo at full size and tape it to your backing as a guide.
- Plan bends and corners. Neon-flex can bend, but it has limitsespecially for tight curves. Keep your script readable and your curves gentle.
- Mount the tubing. Use clips for clean serviceability. If you use adhesive, apply sparingly and evenly.
- Connect power leads. Follow polarity (+/-) carefully. Insulate all joints with heat-shrink.
- Test before final mounting. Plug in, check for flicker, dead sections, or weird dim spots.
- Finish the edges. Hide wiring with cable channels or route it behind the board with a small pass-through hole.
Pro tip: A dimmer is not just for mood lighting. It can also reduce heat and extend LED lifeplus you won’t blind your guests when the sign is on a small wall.
Build Option B: DIY Marquee Letters (Bulb-Style Glow)
Marquee letters are the attention-grabbers. They’re also very forgiving: if your “O” is slightly lopsided, it just becomes “handmade charm.”
What you’ll need
- Wood or foam board for letter faces
- Side walls (thin plywood strips, foam strips, or pre-made trim)
- LED “bulbs” (string lights, LED pixels, or mini LED modules)
- Paint + primer (optional but recommended)
- Drill (for bulb holes), adhesive, wire management supplies
Steps
- Draw your letters. Use a stencil or print large templates. Keep strokes thick enough to hold holes without weakening the structure.
- Cut letter faces. Sand edges so paint looks clean and light doesn’t leak weirdly.
- Build the depth. Add side walls around each letter to create a shallow “tray.” This hides wiring and makes bulbs look intentional.
- Mark and drill holes. Keep spacing consistent. If you’re going for a classic look, place bulbs closer on curves and farther on long straight strokes.
- Paint before wiring. Painting after installing lights is like trying to frost a cake after it’s been eaten.
- Install lights. Push bulbs through holes and secure wiring inside the tray.
- Test and reinforce. Turn it on, check alignment, add strain relief where wires might tug.
Example: A 3-letter “EAT” sign for a kitchen wall
If each letter uses a short LED string drawing about 5W, your total is roughly 15W. Add headroom and you’re still under 20Wmeaning a compact adapter can handle it.
The bigger challenge becomes cable routing and mounting, not power.
Build Option C: Edge-Lit Acrylic Sign (Clean, Modern, Very “Pro Desk”)
Edge-lit acrylic signs look fancy because the light is “selective.” The engraved design glows while the panel stays clear.
This is a great choice if you want a logo sign, nameplate, or minimalist art piece.
What you’ll need
- Clear acrylic sheet (cast acrylic engraves nicely)
- Design method: laser engraving, rotary tool, or vinyl mask + etch (choose what you can do cleanly)
- LED strip or edge-light bar
- U-channel or base to hold acrylic + LEDs
- Power supply + switch/dimmer
Steps
- Create your design. High-contrast line art works best. Thin lines glow sharply; filled areas glow brighter but can look “hot-spotted.”
- Engrave the acrylic. Keep depth consistent. Messy scratches = messy glow.
- Polish edges (optional). A smoother edge can help light transmission and looks nicer.
- Install LEDs along the edge. Ensure good contact and alignment; light should enter the acrylic evenly.
- Test in the dark. You’ll immediately see if one side is brighter or if your diffuser/base needs adjustment.
Design note: If you want the engraving to really pop, consider applying a light sanding or frosting effect to the engraved areas.
It increases light scatter and makes the glow more uniform.
Build Option D: Lightbox / Backlit Sign (Even Glow, Easy Readability)
Lightboxes are perfect for readable signs: menu boards, “ON AIR,” “WELCOME,” or a home theater sign that makes your living room feel like a tiny cinema.
The trick is diffusionyou want the light to spread out so you don’t see individual LED dots.
What you’ll need
- Shadow box frame or DIY wooden box
- LED strips or modules
- Diffuser panel (acrylic diffuser, frosted plastic, or a proper light-diffusing sheet)
- Graphic layer (vinyl lettering, printed transparency, or cutout stencil)
- Power supply + dimmer
Steps
- Build or choose your box depth. Deeper boxes diffuse better. Shallow boxes need stronger diffusion or more spacing between LEDs.
- Mount LEDs. Place them evenly and avoid leaving big blank zones.
- Add a reflective interior. A white interior helps bounce light for a more even glow.
- Install the diffuser. This is what makes it look “store-bought.” Without it, you’ll see dots and hot spots.
- Add your face graphic. Vinyl lettering on the diffuser or on a front panel works well.
- Test for hot spots. If you see bright bands, add another diffusion layer or increase distance.
Troubleshooting: The Usual Suspects
My LEDs flicker or dim randomly
- Power supply is under-rated (not enough watts/amps).
- Loose connector or poor solder joint.
- Voltage drop from a too-long runpower from both ends or inject power mid-strip.
I can see “dots” instead of smooth light
- Use a diffuser (or add a second diffusion layer).
- Increase spacing between LEDs and the front panel.
- Choose a higher-density strip or neon-flex for continuous glow.
It’s brighter in one corner
- Edge-lit acrylic: LEDs not aligned or not contacting evenly.
- Lightbox: LEDs clustered too tightly; distribute them more evenly.
It gets warm
- Some warmth is normal; “hot” is not. Add airflow, reduce brightness, and confirm your power supply isn’t overloaded.
- Don’t bury power supplies inside sealed boxes unless they’re rated for it.
FAQ
Do I need to solder?
Not always. Many LED systems have clip-on connectors. But soldering is more reliable long-termespecially if the sign will be moved, transported, or mounted vertically.
Should I use 12V or 24V LEDs?
Both can work. 24V systems often handle longer runs with less noticeable voltage drop, while 12V is extremely common and has lots of accessories.
The best choice depends on your sign size, layout, and what products you can source reliably.
Can I power an illuminated sign with batteries?
Yes, especially for small signs or temporary events. But batteries drain quickly at high brightness. If portability matters, plan for lower brightness,
fewer LEDs, or a rechargeable battery pack designed for your LED voltage.
Common “Real-World” Experiences (What DIYers Learn the Hard Way)
If you’ve never built an illuminated sign before, here’s the part nobody tells you: the build usually goes great right up until the moment you plug it in.
That’s when you discover the universe’s favorite hobby is testing your patience through tiny electronics.
One of the most common experiences is the “it lights up, but… weirdly” phase. Maybe the first half of your LED strip is bright and the last third looks like it’s
running on vibes and optimism. That’s often voltage drop, and it’s not a moral failingit’s physics. DIYers typically fix it by powering the strip from both ends
or adding power injection near the dim section. The funny part is how quickly you go from “I’m making a sign” to “I have opinions about wire gauge.”
Another classic moment: you finish mounting everything beautifully, step back to admire your work, and then notice the lettering is slightly off-center.
Like, not “ruined,” but enough that your brain will bring it up at 2:00 a.m. forever. Experienced builders avoid this by taping the full-size template to the backing,
checking alignment from across the room, and only then committing to clips or adhesive. The rest of us learn it after we’ve already peeled the adhesive backingslowly,
tragicallylike a very small, very sticky life lesson.
Light diffusion is its own mini-journey. New builders often expect a lightbox to glow evenly the first time, then get surprised when it looks like a constellation map
of LED dots. The “aha” moment is realizing that diffusion is not optional; it’s the thing that makes the sign look professional. Many DIYers end up layering diffusion:
a frosted panel plus a thin sheet of white acrylic or diffuser film. The improvement feels borderline magicallike you leveled up without grinding.
There’s also the power supply confidence arc. At first, people buy “whatever adapter fits,” then discover that under-powered supplies cause flicker, dimming, or random shutoffs.
After that, you become the person who calculates watts, adds headroom, and labels cables like you run a tiny, responsible spaceship. It’s oddly satisfyingespecially when your sign
runs cool and steady for hours without complaint.
Finally, the best experience is the moment someone sees your sign and assumes you bought it. That’s the sweet spot: your project looks clean, wiring is hidden, edges are finished,
and the glow is exactly what you wanted. At that point, you’ll probably start planning the next one, because illuminated signs are like potato chips: you never stop at one.
Conclusion
Making your own illuminated sign is a perfect mix of creativity and practical building: you get to design something personal, then bring it to life with light.
The keys are choosing the right sign style, using quality low-voltage components, sizing your power supply with headroom, and building in a way that’s easy to mount and maintain.
Whether you go neon-flex, marquee letters, edge-lit acrylic, or a lightbox, you’ll end up with something that looks custombecause it is.


