
Table of Contents >> Show >> Hide
- What Is a Pot-in-Pot Refrigerator and How Does It Work?
- Before You Start: Materials, Tools, and Common-Sense Safety
- How to Make a Pot in a Pot Refrigerator: 10 Steps
- Step 1: Choose the Right Pots (Unglazed, Nested, and Well-Spaced)
- Step 2: Inspect and Clean Everything
- Step 3: Plug the Drain Holes (If Needed)
- Step 4: Prepare the Sand (Yes, Sand Prep Matters)
- Step 5: Add a Base Layer of Sand to the Outer Pot
- Step 6: Insert and Center the Inner Pot
- Step 7: Fill the Gap with Sand
- Step 8: Saturate the Sand with Water (But Don’t Flood It)
- Step 9: Cover the Top with a Wet Cloth or Burlap
- Step 10: Place It in the Right Spot and Maintain It Daily
- What to Store in a Pot-in-Pot Refrigerator (and What Not to Store)
- Troubleshooting: Why Your Pot Cooler Isn’t Cooling Well
- Practical Tips to Get Better Results
- Real-World Experiences and Lessons Learned (Extended Notes)
- Conclusion
If your idea of a refrigerator involves a power cord, a compressor, and a monthly electric bill, this project is about to feel delightfully weird. A pot in a pot refrigerator (also called a zeer pot or clay pot cooler) is a low-tech, off-grid cooling device that uses evaporative cooling to help keep fruits and vegetables fresh longerespecially in hot, dry climates.
In plain English: water evaporates, heat leaves, your produce chills out. No plug. No Freon. No app. (Yes, your smart fridge would judge it. Ignore your smart fridge.)
This guide walks you through 10 practical steps to build one at home, plus setup tips, what to store, what not to store, and real-world lessons that make the difference between “wow, this works” and “why is my sand soup warm?” We’ll also cover food-safety boundaries, because a clay pot cooler is usefulbut it is not a magical replacement for a modern refrigerator for meat, dairy, or leftovers unless you verify temperatures with a thermometer.
What Is a Pot-in-Pot Refrigerator and How Does It Work?
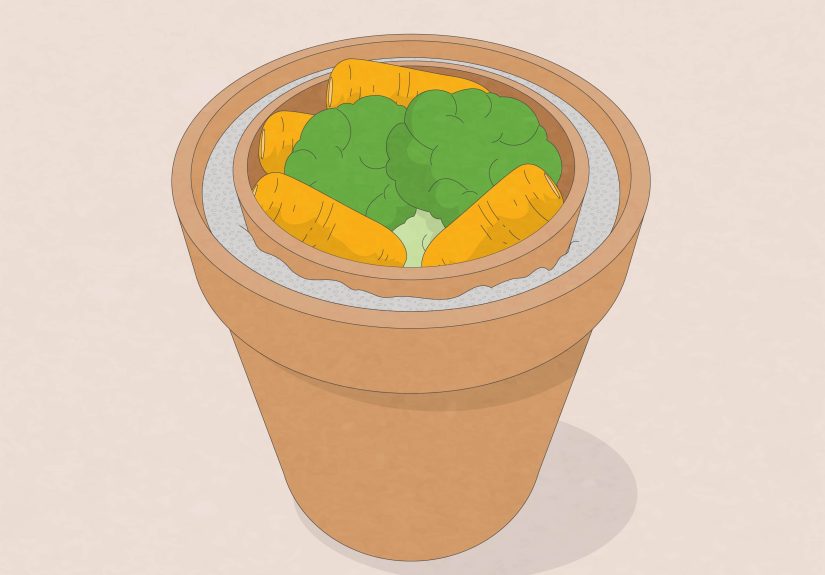
A pot-in-pot refrigerator is typically made by placing a smaller pot inside a larger unglazed terracotta pot, filling the gap with damp sand, and covering the top with a wet cloth. As water moves through the porous clay and evaporates, it removes heat from the system. The inner chamber becomes cooler and more humid than the surrounding air, which can help slow moisture loss and spoilage in many fruits and vegetables.
This is why the system works best in hot, dry, well-ventilated conditions. In humid weather, evaporation slows down, so cooling performance drops. Think “desert breeze” rather than “summer thunderstorm sauna.”
Before You Start: Materials, Tools, and Common-Sense Safety
Materials
- 1 large unglazed terracotta pot
- 1 smaller pot that fits inside (clay, metal, or food-safe plastic can work, but clay is common)
- Clean coarse sand (enough to fill the gap between pots and a base layer)
- Clean water
- A cloth, burlap, or jute covering (absorbent and breathable)
- Optional: cork, clay, or food-safe sealant to plug drain holes
- Optional but highly recommended: thermometer (and even better, a thermometer/hygrometer)
Important Notes Before Building
- Use unglazed clay for the outer pot. Glazed pots won’t breathe, and this device depends on breathability.
- Leave enough gap between pots for sand. A practical range is roughly 3–5 cm (about 1.2–2 inches).
- Do not rely on this as a safe “fridge” for meat, dairy, medications, or leftovers unless you confirm the inside stays at or below safe refrigeration temperatures with a thermometer.
- Location matters as much as construction: shade + airflow = better cooling.
How to Make a Pot in a Pot Refrigerator: 10 Steps
Step 1: Choose the Right Pots (Unglazed, Nested, and Well-Spaced)
The foundation of a good DIY pot-in-pot refrigerator is a good pot pairing. Pick a large unglazed terracotta pot and a smaller pot that nests inside it with a visible gap all around. Aim for a gap of about 3–5 cm for the sand layer. If the gap is too thin, there won’t be enough damp material to support steady evaporation. If it’s too wide, you’ll need more water and the setup gets heavy fast.
Also check the height: the inner pot should sit so its rim ends up a bit higher than the outer pot rim when assembled. This makes it easier to cover and helps keep sand from falling into your food storage area.
Step 2: Inspect and Clean Everything
Rinse the pots and let them dry before assembly. Wipe out dust, clay debris, or manufacturing residue. If you’re reusing pots, scrub gently and make sure they’re free from chemicals, fertilizers, or plant treatments. Your tomatoes deserve better than mystery residue.
Inspect for cracks too. Hairline cracks may worsen when the pot stays damp over time. A cracked outer pot leaks performance; a cracked inner pot leaks your confidence.
Step 3: Plug the Drain Holes (If Needed)
Most plant pots have drainage holes. For a clay pot cooler, that can be a problem if water or sand leaks where you don’t want it. Plug the drainage hole(s) in the inner pot so stored produce is protected from sand and dripping water. If your outer pot leaks heavily through a large drain hole, plug or partially seal that too (depending on your setup and whether you want minimal drainage).
You can use clay, a cork, or a food-safe sealant. Let any sealant cure fully before use. If you skip this step, your “refrigerator” may become more of a “decorative mud fountain.”
Step 4: Prepare the Sand (Yes, Sand Prep Matters)
Don’t dump random sandbox material in and call it a day. Clean, coarse sand works best because it holds water while still allowing airflow and capillary movement. Remove large stones and debris that take up space but do not help evaporation.
If possible, sift the sand and reduce dust. Very dusty sand can clog the pores of the clay, which reduces water movement and evaporation efficiency. That means less cooling. In other words: your sand can absolutely sabotage your science project.
Step 5: Add a Base Layer of Sand to the Outer Pot
Pour a layer of sand into the bottom of the outer pot to create a level base for the inner pot. The goal is to center the inner pot and keep it stable. You can add the sand dry or damp, but it’s often easier to level it before fully soaking.
Check for wobble. If the inner pot rocks like a café table on a bad patio, remove it and adjust the base layer until it sits evenly.
Step 6: Insert and Center the Inner Pot
Place the smaller pot inside the larger pot and center it. Confirm that the spacing around the sides is fairly even. This helps the sand layer stay consistent, which improves cooling performance and keeps the pot from leaning over time.
Make sure the top rim of the inner pot sits slightly higher than the outer pot rim (roughly around 2 cm is a good target). This helps with clean covering and reduces contamination from the sand layer.
Step 7: Fill the Gap with Sand
Now fill the space between the two pots with the prepared sand. Add it gradually and tap the outer pot gently so the sand settles into gaps. Do not pack it rock-hard; you want contact and support, but not a concrete block. The sand should surround the inner pot evenly from bottom to near the top.
Once filled, check stability again. The setup will get heavier after watering, so now is the best time to fix alignment issues.
Step 8: Saturate the Sand with Water (But Don’t Flood It)
Add water slowly to the sand until it is thoroughly wet. The sand should be saturated enough that water spreads and is absorbed through the layer, but not so flooded that the inner pot starts to float or shift. If it does float, you’ve overwatereddrain excess water and reset.
This step activates the cooling system. As moisture migrates through the porous clay and evaporates from the surface, the inner chamber begins to cool. In dry weather with good airflow, you may notice a temperature difference within a short time.
Step 9: Cover the Top with a Wet Cloth or Burlap
Wet a cloth, burlap sack, or jute fabric and place it over the top so the inner pot is fully covered. Wring out excess water first; you want it damp, not dripping like a mop on a mission. The cover helps keep hot air out, supports evaporation, and protects the contents from dust and insects.
Re-wet the cover as needed. A dry cover is basically just a hat. A wet cover is part of the cooling system.
Step 10: Place It in the Right Spot and Maintain It Daily
This is the step people underestimateand it’s often the most important one. Put your pot-in-pot cooler in a shaded, breezy, well-ventilated location. Avoid direct sun and stuffy corners. Air movement supports evaporation, and shade prevents the sun from reheating the pot.
Keep the sand and cloth damp. In hot, dry conditions, that may mean watering daily (sometimes more often). Clean the pot regularly, inspect produce for rot, and remove anything spoiled right away so it doesn’t affect everything else.
What to Store in a Pot-in-Pot Refrigerator (and What Not to Store)
Good Candidates (Usually)
A zeer pot refrigerator is best for many fruits and vegetables that benefit from cooler temperatures and higher humidity. It can be especially useful for short-term storage of fresh produce in off-grid settings. Great examples often include leafy vegetables, some fruits, and produce that wilts quickly in hot weather.
That said, produce storage compatibility matters. Some fruits produce ethylene gas, which can speed ripening and spoilage in nearby produce. Others give off strong odors that neighboring foods absorb. If you’ve ever had an onion take over a room, you already understand the concept.
Use Caution or Store Separately
- Ethylene-producing fruits (for example, bananas, tomatoes, avocados, melons in many cases) may affect other produce.
- Strong odor producers (like onions and garlic) can transfer odors or flavors.
- Some produce prefers drier conditions and may not love the high humidity inside a clay pot cooler.
Do Not Store (Unless You Verify Safe Refrigeration Temperatures)
- Raw meat, poultry, seafood
- Dairy products
- Cooked leftovers
- Medicines/vaccines
Food-safety reminder: perishable foods can become unsafe when held in the temperature “danger zone.” If you want to test whether your setup is truly cold enough for anything beyond produce, use a thermometer and verify conditions consistently.
Troubleshooting: Why Your Pot Cooler Isn’t Cooling Well
Problem: “It’s barely cooler than the room.”
Likely causes: humidity is too high, airflow is poor, pot is in direct sun, sand is drying out, or the outer pot is glazed and not porous enough.
Fixes: move it to a breezier shaded area, rewet sand and cover, improve ventilation, and confirm the outer pot is unglazed terracotta.
Problem: “The inside smells weird.”
Likely causes: spoiled produce, dirty cloth, stagnant water, or odor transfer from mixed produce.
Fixes: clean the inner pot, wash/replace the cover cloth, remove spoiled items, and store odor-heavy produce separately.
Problem: “The sand keeps getting messy and clogged.”
Likely causes: dusty sand or dirty water.
Fixes: replace with cleaner sand, rinse/sift before use, and keep the setup covered.
Practical Tips to Get Better Results
- Use a thermometer. It takes guesswork out of performance testing.
- Pre-cool produce in shade before loading. Don’t load sun-heated produce straight from a hot car trunk.
- Load dry produce. Wet produce can promote rot if water sits on surfaces.
- Don’t overcrowd. Leave a little airflow space inside the inner chamber.
- Check daily. This is a low-tech system, which means it rewards attention.
Real-World Experiences and Lessons Learned (Extended Notes)
One of the most useful things about a pot in a pot refrigerator is that it teaches you very quickly that “simple” does not mean “automatic.” People often build the device in an afternoon and expect it to behave like an electric refrigerator by evening. Then they check it once, shrug, and decide it doesn’t work. In practice, the best results usually come from a little experimentation with placement, watering rhythm, and what you store inside.
A common experience is this: the first setup is placed on a porch that seems shady, but it gets a band of direct late-afternoon sun. The pot warms up, the sand dries faster than expected, and the cooling effect drops. Move that same setup two feet overliterally two feetinto full shade with better airflow, and performance noticeably improves. This is why people who use evaporative coolers a lot tend to sound a little obsessive about shade and breeze. They’re not being dramatic. They’re being practical.
Another lesson people report is that maintenance feels small until you skip it. On day one, wetting the sand and cloth is easy. On day four, when life gets busy, it’s tempting to say, “I’ll do it later.” Later turns into dry sand, a dry cover, and a warm inner pot. The system is still “built,” but the cooling has basically paused. The good news is that once people get used to it, the routine becomes quickcheck moisture, rewet, inspect produce, done in a couple of minutes.
There’s also a learning curve around produce selection. Many beginners toss in everything at once: tomatoes, onions, bananas, peppers, and leafy greens, then wonder why something smells odd and something else ripens overnight. A better real-world approach is to group produce by storage needs and sensitivities. After a few rounds, users typically start separating odor-heavy items and ethylene producers. That one habit alone can make the cooler feel much more effective.
People in dry climates often notice the most dramatic wins with vegetables that wilt fast on the counter. Instead of watching greens or herbs collapse in a day, they may stay usable longer and look fresher. In more humid climates, the same device may still help, but the improvement can be modest. That doesn’t mean the project failedit means the weather is part of the machine. Evaporative cooling is a teamwork sport, and humidity is either your helpful assistant or your passive-aggressive coworker.
Another practical takeaway: weight matters. Once the sand is wet and the pots are loaded, the unit can be surprisingly heavy. Many people build it in one place, then realize the “better” location is across the yard. That’s a memorable day. If possible, assemble it where you plan to use it. Your back will thank you, and your project will avoid an unnecessary stress test.
Finally, experienced users tend to treat the pot cooler as a produce-preservation tool, not a universal refrigerator substitute. That mindset leads to better outcomes and safer choices. Use it for what it does wellhelping maintain a cooler, more humid environment for many fruits and vegetables in off-grid or low-energy situationsand pair it with a thermometer and common-sense food safety rules. When used that way, it’s one of those rare DIY projects that is inexpensive, educational, and genuinely useful.
Conclusion
Building a pot in a pot refrigerator is one of the smartest low-cost DIY projects for anyone interested in off-grid living, emergency preparedness, sustainable food storage, or simply reducing produce waste in hot weather. The concept is beautifully simple, but the results depend on the details: unglazed clay, clean sand, steady moisture, shade, airflow, and smart produce choices.
If you follow these 10 steps and treat the setup like a living system rather than a set-it-and-forget-it appliance, you can create a practical no electricity refrigerator alternative for fruits and vegetables. Start simple, test with a thermometer, and adjust for your climate. The science is old, the method is clever, and your lettuce might just live to see another salad.


