
Table of Contents >> Show >> Hide
- Before You Start: What You Need
- How to Insert and Remove a Scleral Lens: 12 Steps
- Step 1: Wash and Dry Your Hands Carefully
- Step 2: Prepare a Clean, Safe Workspace
- Step 3: Inspect the Lens Before Insertion
- Step 4: Place the Lens on the Inserter or Your Fingertips
- Step 5: Fill the Lens Completely With Preservative-Free Saline
- Step 6: Insert the Lens While Looking Straight Down
- Step 7: Check for Bubbles, Comfort, and Vision
- Step 8: Prepare for Removal With Clean Hands and Lubrication
- Step 9: Place the Removal Plunger Near the Lower Edge
- Step 10: Tilt the Lens to Break the Seal
- Step 11: Clean, Disinfect, and Store the Lens Properly
- Step 12: Know When to Stop and Call Your Eye Doctor
- Common Mistakes to Avoid
- Troubleshooting Scleral Lens Problems
- Real-World Experiences: What Scleral Lens Beginners Usually Learn
- Conclusion
Learning how to insert and remove a scleral lens can feel a little like learning a tiny, very dramatic magic trick. The lens is bigger than a standard soft contact lens, it holds a bowl of preservative-free saline, and your eyelids suddenly act like they have unionized against you. Good news: with the right setup, a steady routine, and a little patience, scleral lens handling becomes much less mysterious.
Scleral lenses are specialty rigid gas permeable lenses that vault over the cornea and rest on the white part of the eye, called the sclera. They are often prescribed for keratoconus, irregular corneas, severe dry eye, post-surgical corneal changes, and other eye conditions where standard contacts may not provide enough comfort or vision clarity. Because the lens creates a fluid reservoir over the cornea, insertion technique matters. A bubble trapped under the lens can blur vision, cause discomfort, and make your eye feel like it is hosting an uninvited guest.
This guide walks through 12 practical steps for inserting and removing a scleral lens safely. It is not a replacement for training from your eye care provider, but it will help you understand the process, avoid common mistakes, and build a routine that feels less like a wrestling match with your eyelashes.
Before You Start: What You Need
Before handling scleral contact lenses, gather your supplies. A good setup saves time and lowers the chance of dropping a lens, contaminating it, or accidentally rinsing it with the wrong solution.
- Preservative-free saline approved or recommended for scleral lens filling
- Your prescribed cleaning and disinfecting solution
- A clean lens case
- A large scleral lens insertion plunger or tripod fingertip method
- A small removal plunger, if recommended by your doctor
- A clean towel or lint-free surface
- A mirror placed flat on a table or counter
- Good lighting and a calm attitude, preferably before caffeine makes your hands jittery
Never use tap water, bottled water, saliva, or homemade saline on your scleral lenses. Water can introduce microorganisms that may cause serious eye infections. Also avoid sleeping, showering, swimming, or using a hot tub while wearing lenses unless your eye doctor has given very specific instructions. Your corneas are important. Treat them like VIPs, not waterproof phone cases.
How to Insert and Remove a Scleral Lens: 12 Steps
Step 1: Wash and Dry Your Hands Carefully
Start by washing your hands with a mild, lotion-free soap. Rinse thoroughly so no soap residue remains, then dry your hands completely with a lint-free towel. Dry fingers are especially important because wet fingers slip on eyelids, and slippery eyelids are the villain of scleral lens insertion.
Avoid hand creams, oils, perfumes, and makeup residue before touching your lenses. Even a small amount of lotion can smear the lens surface or irritate your eye. If your lens feels cloudy soon after insertion, hand residue may be one of the sneaky causes.
Step 2: Prepare a Clean, Safe Workspace
Choose a clean table or bathroom counter with strong lighting. Place a towel underneath your work area to catch the lens if it falls. If you are working near a sink, close the drain. A scleral lens has a talent for rolling toward plumbing like it owes the drain money.
Set your mirror flat on the surface so you can look straight down during application. This position helps keep the saline inside the lens bowl and reduces the chance of an air bubble forming during insertion.
Step 3: Inspect the Lens Before Insertion
Remove the lens from its case and inspect it closely. Look for chips, cracks, scratches, deposits, cloudy areas, or debris. Make sure you have the correct lens for the correct eye. Many scleral lenses have markings, dots, or design features that help identify orientation or right-versus-left placement.
If the lens is damaged, do not insert it. A chipped or cracked lens can scratch the eye. If the lens looks cloudy after cleaning, contact your eye care provider before wearing it. When in doubt, let a professional judge the lens. Your eyeball should not be the testing lab.
Step 4: Place the Lens on the Inserter or Your Fingertips
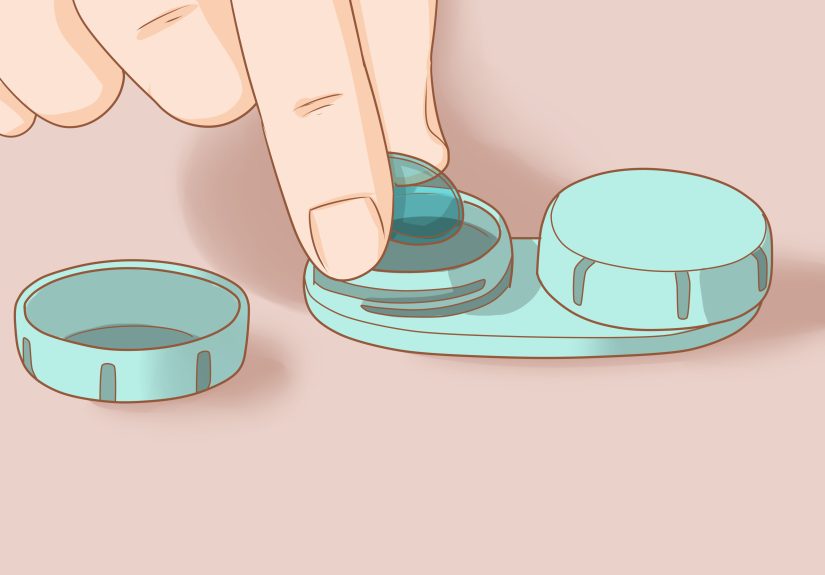
Most beginners use a large scleral lens insertion plunger. Place the lens bowl-side up on the inserter. Some plungers have a hollow center that allows you to look through the tool toward the mirror or a fixation point. Others are solid and simply support the lens.
If your provider taught you the tripod method, balance the lens on three fingertips instead. The goal is the same: keep the lens level, stable, and ready to hold saline without tipping. Choose the method your eye care provider recommends because different lens designs and eye conditions may require different handling techniques.
Step 5: Fill the Lens Completely With Preservative-Free Saline
Fill the bowl of the scleral lens with preservative-free saline until the liquid forms a rounded dome above the edge. It should look slightly overfilled, almost like it is about to spill. This is intentional. Underfilling the lens is one of the most common causes of bubbles.
Do not use multipurpose solution or disinfecting solution as the filling fluid unless your provider specifically instructs you to do so. Many cleaning and storage solutions are not meant to sit against the cornea for hours. Preservative-free saline is typically used because the fluid reservoir stays between the lens and the eye during wear.
Step 6: Insert the Lens While Looking Straight Down
Lean forward until your face is parallel to the table or counter. Your nose should point toward the mirror. Use one hand to hold the upper lid firmly against the brow bone, and use another finger to pull the lower lid down. Open your eyelids wider than the lens diameter. This part is crucial because the lens must land on the eye, not on your eyelashes.
Look straight down into the mirror or through the inserter. Slowly bring the filled lens toward your eye. When the saline touches your eye, continue gently until the lens settles into place. Do not jab, rush, or push hard. Once the lens is on the eye, release the lower lid first, then the upper lid, and blink gently.
Step 7: Check for Bubbles, Comfort, and Vision
After insertion, look in the mirror and check for air bubbles under the lens. A bubble may look like a clear round spot or crescent under the lens. It may also cause blurry vision, irritation, or a feeling that something is not quite right.
If you see a bubble, remove the lens, refill it completely with fresh preservative-free saline, and insert it again. Do not try to “blink out” a bubble under a scleral lens. The fluid reservoir is sealed under the lens, so the bubble usually will not politely excuse itself.
Step 8: Prepare for Removal With Clean Hands and Lubrication
When it is time to remove your scleral lens, wash and dry your hands again. If your lens feels tight or your eyes feel dry, use preservative-free lubricating drops or saline recommended by your provider before removal. This can make the lens easier to remove and more comfortable.
Never rush removal. A scleral lens can create gentle suction on the eye. The trick is not to pull harder; the trick is to break the seal first. Pulling straight outward against resistance can irritate the eye and make the whole process feel scarier than it needs to be.
Step 9: Place the Removal Plunger Near the Lower Edge
If you use a small removal plunger, wet the tip with saline. Look straight ahead into a mirror and hold your lids open. Place the plunger on the lower third of the lens or near the edge, not directly in the center. Positioning matters because attaching near the edge helps break the seal more easily.
Gently press the plunger to create light suction. You do not need to mash it into the lens. The plunger should attach securely enough to control the lens, but the movement should remain gentle and deliberate.
Step 10: Tilt the Lens to Break the Seal
Once the plunger is attached near the lower edge, tilt or lift the lens slightly outward and upward to break the suction seal. The lens should release smoothly. If it does not move, stop and try again after adding more lubricating drops. You may also gently press on the eyelid near the lower edge of the lens if your provider has taught you that technique.
Never yank the lens straight off the eye. Scleral lens removal is more like peeling a sticker from one corner than pulling a suction cup off a window. Break the edge seal first, then lift the lens away.
Step 11: Clean, Disinfect, and Store the Lens Properly
After removal, clean the lens according to your prescribed system. Many scleral lens routines involve rubbing the lens with an approved cleaner, rinsing with the proper solution, and disinfecting it overnight in fresh solution. If you use a hydrogen peroxide system, follow the instructions exactly and allow full neutralization before wearing the lens again. Unneutralized peroxide in the eye is not a “wake-up call”; it is a problem.
Always use fresh disinfecting solution. Do not top off old solution in the case. Empty, rinse, and air-dry the case as directed, and replace the case regularly. Good lens care helps prevent deposits, fogging, irritation, and infection risk.
Step 12: Know When to Stop and Call Your Eye Doctor
Remove the lens and contact your eye care provider if you have pain, significant redness, light sensitivity, sudden blurry vision, discharge, swelling, a scratched feeling that does not improve, or a lens that will not come off comfortably. These symptoms should not be ignored.
Also call your provider if insertion becomes consistently difficult, bubbles keep appearing, the lens fogs quickly, or your wearing time suddenly drops. Sometimes the solution, fit, cleaning routine, or eye surface needs adjustment. Scleral lenses are custom medical devices, so small changes can make a big difference.
Common Mistakes to Avoid
Using the Wrong Fluid
The lens bowl should usually be filled with preservative-free saline recommended for scleral lenses. Using disinfecting solution, tap water, or preserved drops can cause burning, irritation, or infection risk.
Not Opening the Eyelids Wide Enough
If your lids touch the lens during insertion, the lens may tip, spill saline, trap bubbles, or land off-center. Hold the upper lid firmly at the lash line and keep the lower lid pulled down until the lens is seated.
Letting the Lens Go Dry
A dry lens can feel uncomfortable and may collect deposits more easily. Keep the lens hydrated during handling and follow your care routine consistently.
Removing From the Center
Attaching the removal plunger to the center of the lens can increase suction and make removal harder. Place the remover near the lower edge or lower third unless your provider gives different instructions.
Troubleshooting Scleral Lens Problems
If the Lens Keeps Getting Bubbles
Overfill the lens with preservative-free saline, lean farther forward, keep the lens level, and open your lids wider. Some wearers benefit from a more viscous preservative-free filling solution or a few drops of approved lubricating solution in the bowl, but only use products your provider recommends.
If the Lens Feels Tight
Add preservative-free lubricating drops before removal and wait a minute. Make sure you are using the remover near the edge, not the center. If tightness happens often, the lens fit may need evaluation.
If Vision Becomes Foggy
Fogging can come from bubbles, deposits, tear debris, solution sensitivity, dryness, or fit issues. Remove the lens, clean it, refill it with fresh saline, and reinsert it. If fogging returns quickly, ask your provider about possible changes to your care routine or lens design.
Real-World Experiences: What Scleral Lens Beginners Usually Learn
The first week with scleral lenses can be humbling. Many new wearers expect insertion to work immediately because the steps sound simple: wash hands, fill lens, look down, insert. Then reality arrives wearing tiny boxing gloves. The lens spills. The eyelid blinks at the worst possible second. A bubble appears. The plunger sticks to the lens, the lens sticks to nothing, and suddenly the bathroom counter looks like a science project.
That experience is normal. Scleral lens handling is a skill, not a personality test. Most people improve dramatically once they stop rushing and build a repeatable routine. One helpful habit is to do everything in the same order every time. Right lens first, then left lens. Same mirror. Same towel. Same bottle placement. The fewer decisions you make during the process, the easier it becomes for muscle memory to take over.
Another common lesson is that eyelid control matters more than bravery. Beginners often focus on moving the lens toward the eye, but the real challenge is keeping the lids out of the way. If the upper lid slips, the lens may bump into lashes and dump saline. If the lower lid creeps upward, the lens may land unevenly. Dry fingers help. So does holding the lid at the lash line rather than pulling from the soft skin farther away.
Many wearers also learn that bubbles are usually caused before the lens reaches the eye. If the lens is not full enough, if the hand tilts, or if the head is not leaned far enough forward, air can sneak into the saline reservoir. A good trick is to overfill the bowl until the saline forms a dome. Yes, some saline will spill. That is not failure; that is the price of doing business with gravity.
Removal has its own learning curve. The biggest breakthrough usually happens when wearers understand that the goal is to break the seal, not overpower the lens. A small removal plunger placed near the edge can release the lens with much less effort than a hard pull from the center. If the lens resists, adding lubricating drops and waiting briefly can help. The eye should not feel like it is being dragged along for the ride.
Travel teaches another set of lessons. Experienced scleral lens wearers often pack more supplies than they think they need: extra saline vials, a backup case, a spare plunger, glasses, tissues, and disinfecting solution. A dropped plunger in a hotel sink can ruin a morning faster than weak coffee. Keeping a small emergency kit in a backpack, desk drawer, or school bag can save the day.
Finally, scleral lens success is not only about technique. Comfort depends on the fit, the health of the eye surface, the cleaning system, and the wearing schedule. If a lens suddenly becomes uncomfortable after weeks of good wear, do not assume you have forgotten how eyeballs work. Something may have changed. Call your eye care provider, explain the symptoms clearly, and bring your lenses and solutions to the appointment if requested.
The best experience advice is simple: be patient, stay clean, practice when you are not in a rush, and celebrate small wins. The first smooth insertion feels like unlocking a secret level. The first calm removal feels even better. Over time, scleral lenses can become a normal part of the day instead of a dramatic morning event starring you, a mirror, and a very determined eyelid.
Conclusion
Learning how to insert and remove a scleral lens takes practice, but the process becomes easier when you follow a clean, steady routine. Wash and dry your hands, prepare a safe workspace, inspect the lens, fill it fully with preservative-free saline, insert it while looking straight down, and check for bubbles. For removal, lubricate the eye, place the remover near the lens edge, break the seal gently, and clean the lens properly before storage.
Scleral lenses are designed to support vision and comfort, especially for people with complex corneal or dry eye conditions. But they also require careful handling. Avoid water exposure, never ignore pain or redness, and contact your eye care provider if anything feels wrong. With time, patience, and good technique, scleral lens care can shift from intimidating to routineand your eyes will thank you without needing to send a formal memo.
Note: This article is for educational publishing purposes only. Scleral lenses are prescribed medical devices, so readers should follow the exact instructions given by their own optometrist or ophthalmologist.





 Close
Close