
Table of Contents >> Show >> Hide
- Quick-Start Checklist (Read This Before You Plant Anything)
- Step 1: Choose the Right Onion for Your Zip Code (Day Length 101)
- Step 2: Decide How You’ll Start: Indoor Seedlings vs. Direct Seeding
- Step 3: Start Onion Seeds Indoors (Without Turning Your Kitchen Into a Science Project)
- Step 4: Harden Off and Transplant Outdoors
- Step 5: Prep the Bed Like You Mean It
- Step 6: Watering, Fertilizing, and the Big “Don’t Overdo Nitrogen” Rule
- Step 7: Weed Control (The Part Everyone SkipsThen Regrets)
- Step 8: Common Problems (and How to Fix Them Without Panicking)
- Step 9: Harvesting, Curing, and Storing (Where Great Onions Become Legendary)
- Step 10: Seed Tips That Matter More Than People Think
- A Simple “Onion from Seed” Timeline (Examples)
- Conclusion: Your Best Onions Are Built Before Bulbing Even Starts
- Real-World Growing Experiences and Lessons Learned (500+ Words)
Growing onions from seed is a little like raising tiny green teenagers: they start out skinny, they grow fast,
they flop over at inconvenient times, andif you treat them rightthey eventually turn into something impressive
that you’ll brag about to anyone who will stand still long enough.
The payoff is real. Starting from seed gives you the biggest variety (storage onions, sweet onions, reds, whites,
weirdly gorgeous purples), often costs less per plant, and lets you grow varieties you’ll never find as sets at
a garden center. The “secret” is not fancy gear. It’s timing, day length, steady care, and avoiding the two onion
tragedies: weeds and late-season nitrogen.
Step 1: Choose the Right Onion for Your Zip Code (Day Length 101)
Onions don’t decide to bulb just because you’re excited. Bulbing is triggered mainly by day length.
That’s why the same variety can be a superstar in Maine and a total disappointment in Georgia (or vice versa).
Onion varieties are generally grouped as:
Long-day onions
Best for northern areas. They form bulbs when days are long (roughly 14–16 hours of daylight). If you grow these
too far south, they may not bulb when you need them toor they’ll bulb at the wrong time and stay small.
Intermediate-day (often called day-neutral) onions
Great for the “middle” of the U.S. They bulb with mid-range day length (often around 12–14 hours), and can be a
smart choice when you’re on the fence.
Short-day onions
Best for southern regions. They start bulbing with shorter day lengths (often around 10–12 hours). Many short-day
onions are planted in fall or early winter in warm zones so they grow tops in cool weather and bulb as days
lengthen in late winter and spring.
The takeaway: if your onion variety’s day-length category doesn’t match your region, you can do everything else
“right” and still get sad little bulbs. When in doubt, pick a variety recommended for your latitude/region and
your goal (fresh eating vs. storage).
Step 2: Decide How You’ll Start: Indoor Seedlings vs. Direct Seeding
Option A: Start onion seeds indoors (most reliable for home gardens)
Many gardeners get the best results by starting onion seeds inside and transplanting sturdy seedlings outdoors.
Typical guidance ranges from about 8 to 12+ weeks before planting out, depending on your climate,
variety, and how quickly you can get onions into the garden in spring.
Why this works: onions grow slowly at first, and bigger bulbs later depend on how many healthy leaves the plant
builds before bulbing begins. Starting indoors gets you a head start on leaf-making season.
Option B: Direct-seed outdoors (simple on paper, fussy in real life)
You can direct-seed onions outdoors as soon as soil is workable in spring (and, in warmer climates, sometimes in
fall/winter windows). Direct seeding is totally doable, but it demands excellent weed control and consistent
moisture during germination and early growth.
If you’re new to onions, indoor starts are usually the “easy mode” that still produces impressive bulbs.
Step 3: Start Onion Seeds Indoors (Without Turning Your Kitchen Into a Science Project)
Timing
Pick your target transplant window first, then count backward. In many areas, onions can be transplanted outdoors
in early spring when temperatures are cool (they tolerate light frosts). A common home-garden approach is sowing
indoors roughly 8–12 weeks before you expect to plant outside; some guides suggest even longer
(10–15 weeks) to get good-sized transplants.
Supplies
- Seed-starting mix (light, sterile, drains well)
- Cell trays or shallow flats (onions don’t need deep pots early)
- Bright light (a sunny window rarely cuts it; a shop light or grow light works better)
- Spray bottle or gentle watering can
- Labeling system (because “mystery onion” is not a variety)
How to sow
- Moisten the seed-starting mix so it’s damp like a wrung-out sponge.
- Sow seeds about ¼ inch deep and lightly cover.
- Keep evenly moist (not swampy). Onions hate drama.
- Provide steady warmth until germination, then cooler, bright conditions for stocky growth.
Light, water, and the “haircut” trick
Once seedlings are up, give them bright light for strong, upright growth and water consistently. If tops get long
and floppy indoors, you can snip them shorter (think 4–5 inches) to keep seedlings tidy and reduce
tangling. This doesn’t hurt the plantonions are surprisingly chill about haircuts.
Feeding seedlings (lightly)
Onion seedlings appreciate gentle feeding once they’re established. A diluted, balanced fertilizer applied
occasionally is plenty. The goal is steady growth, not leaf balloons that collapse at the first sign of real
weather.
Step 4: Harden Off and Transplant Outdoors
Hardening off (the outdoor “training montage”)
About a week before transplanting, gradually introduce seedlings to outdoor conditions: more sun, more wind, more
temperature swings. Start with a protected spot for a couple hours a day and work up to full days outside. This
reduces transplant shock and helps seedlings stand up to spring breezes without sulking.
When to transplant
Onions are cool-season vegetables and can go out early. Many guides note that transplants tolerate light frosts,
and can be planted once conditions are workable and cool. If your soil is still a frozen brick, wait. If it’s
workable and not waterlogged, onions are ready to roll.
Spacing for big bulbs
Spacing depends on your goal:
- Big slicing/storage bulbs: about 3–4 inches apart in rows roughly 12–18 inches apart.
- Green onions/scallions: closer spacing is fine since you’re harvesting young.
Plant seedlings so the white base is in the soil, but don’t bury the growing point deeply. Onions form bulbs at
the soil line; planting too deep can slow bulbing and invite rot.
Step 5: Prep the Bed Like You Mean It
Onions want full sun and well-drained soil. They’re shallow-rooted, which means:
- They dry out faster than deeper-rooted crops.
- They compete poorly with weeds.
- They appreciate soil that’s loose enough for bulbs to expand without fighting clay boulders.
Improve the bed with compost or well-rotted organic matter. Avoid fresh manure (it can bring pathogens and weeds).
If your soil is heavy, loosening it with organic matter makes a noticeable difference in bulb size and shape.
Step 6: Watering, Fertilizing, and the Big “Don’t Overdo Nitrogen” Rule
Watering
Consistent moisture matters most during active leaf growth and bulbing. Aim for roughly the equivalent of
about 1 inch of water per week from rain or irrigation, especially as bulbs form and swell. Deep,
infrequent watering is better than daily sprinkles that only wet the surface.
Fertilizing (feed early, taper later)
Onions need available nitrogen to build leaves, but too muchespecially latecan cause thick necks, delayed
maturity, soft bulbs, and poorer storage. A practical approach:
- At planting/early growth: incorporate balanced fertility based on soil needs.
- Early to mid-season: side-dress nitrogen after roots are established to support leaf growth.
- As bulbs size up: reduce nitrogen so plants mature and cure well (late nitrogen can hurt storage quality).
If you want a concrete home-garden example: some Extension guidance suggests a measured nitrogen side-dress in late
spring and again in early summer, then stopping nitrogen by mid-summer for dry-bulb onions so storage quality
doesn’t suffer. The exact product and rate depend on your soil test and garden scalebut the principle holds:
nitrogen early, not late.
Step 7: Weed Control (The Part Everyone SkipsThen Regrets)
Onions are not good at “fighting for their rights.” Their leaves don’t shade soil well and their roots are shallow.
That means weeds can steal water and nutrients fast, shrinking bulbs dramatically.
Use a combination of:
- Mulch (once seedlings are established) to suppress weeds and conserve moisture.
- Shallow cultivation to avoid damaging roots (think “surface scratch,” not “mini rototiller”).
- Hand weeding early before weeds get confident and start paying rent.
Step 8: Common Problems (and How to Fix Them Without Panicking)
Bolting (flower stalks)
Bolting happens when onions decide it’s time to reproduce instead of bulb. Cold exposure at the wrong stage can
trigger bolting, and planting outside recommended windows can increase risk. Avoid using overly large, stressed
transplants and try to hit your region’s recommended planting window. If an onion bolts, the bulb is usually
less ideal for storageuse those first.
All tops, no bulb
Causes often include the wrong day-length variety, overcrowding, excessive nitrogen, or heat arriving too quickly.
First, confirm you’re growing the right type for your latitude. Then revisit spacing and late-season feeding.
Thrips (tiny pests, big annoyance)
Thrips can rasp and suck juices from leaves, causing silvery streaks and slowing growth. In home gardens, cultural
practices and encouraging beneficial insects often keep damage manageable. Avoid over-fertilizing with nitrogen,
reduce plant stress, and keep the garden diverse so natural enemies can do their thing.
Onion maggots (and other maggoty villains)
Onion maggots can damage seedlings and developing bulbs. Prevention focuses on crop rotation and
exclusion:
- Don’t plant onions (or close relatives like garlic/leeks) in the same spot year after year.
- Use floating row cover as a barrier at planting in areas where maggots are common (and don’t trap pests inside by covering an already-infested bed).
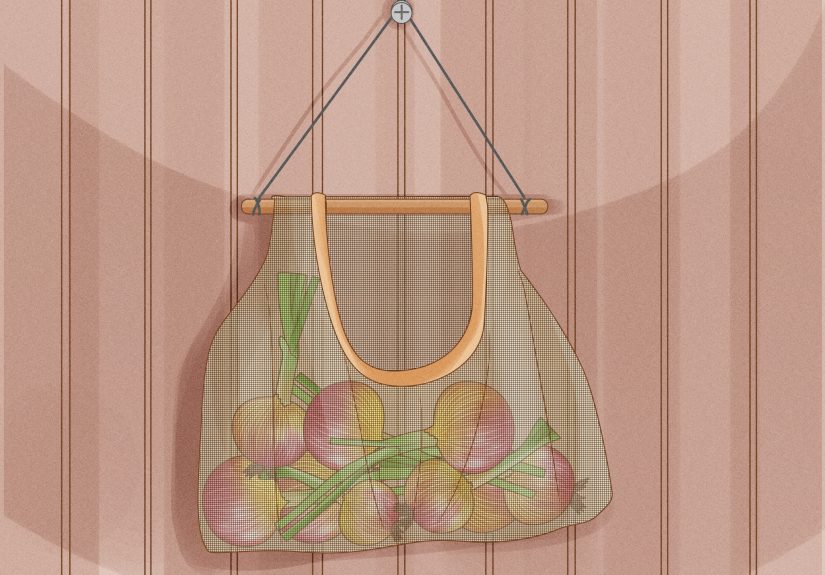
Step 9: Harvesting, Curing, and Storing (Where Great Onions Become Legendary)
When to harvest
For bulb onions, harvest when tops naturally fall over and a significant portion of foliage has yellowed and died
back (often around half to three-quarters of the tops down). This is a classic sign that the bulb is mature and
the neck is starting to dry.
Curing
Curing dries the neck and outer skins so onions store without rotting. Cure in a warm, dry, well-ventilated place
out of direct harsh sun. Depending on conditions, curing typically takes 2–4 weeks. You’re done
when the neck is tight and dry, and the outer skins are papery.
Storage
Store fully cured onions in containers that allow airflowmesh bags, wire baskets, slatted crates. Many Extension
references recommend cool storage temperatures around 32–40°F with moderate humidity
(about 65–70%) for best storage life. Keep them away from moisture, and check occasionally for soft spots.
Step 10: Seed Tips That Matter More Than People Think
Buy fresh seed (seriously)
Onion seed doesn’t stay viable forever. A common rule of thumb is that onion seed is best when fresh and may
decline notably after about a year. If last year’s packet has been living in a hot drawer, treat yourself to new
seed and better germination.
Pick varieties based on your goal
If you want onions that last, look for varieties described as “storage” or “keepers.” If you want sweet, juicy
onions for fresh eating, choose sweet types but plan to use them sooner. Matching variety to your kitchen habits
is the most delicious kind of planning.
A Simple “Onion from Seed” Timeline (Examples)
Because the U.S. is basically 50 different microclimates wearing one trench coat, here are general examples.
Adjust based on your local frost dates and recommended varieties.
Northern / Long-day regions (many Upper Midwest & Northeast areas)
- Late winter: start seeds indoors 8–12 weeks before planting out.
- Early spring: harden off and transplant when soil is workable and weather is cool.
- Summer: maintain moisture and weed control; taper nitrogen as bulbs swell.
- Late summer: harvest when tops fall; cure; store.
Middle latitudes / Intermediate-day regions
- Late winter: start indoors; transplant in early spring.
- Spring–summer: steady care; watch heat and water consistency.
- Summer: harvest/cure/store on schedule.
Southern / Short-day regions (many Zone 7+ areas)
- Fall or early winter: plant short-day onions so they grow tops in cool months.
- Late winter–spring: bulbs form as days lengthen; keep moisture steady.
- Spring: harvest when tops fall; cure; store (or eat immediatelyno judgment).
Conclusion: Your Best Onions Are Built Before Bulbing Even Starts
If onions had a motivational poster, it would say: “Leaves today, bulbs tomorrow.” Bulb size is
largely determined by how much healthy top growth the plant builds before bulbing is triggered by day length.
So the winning strategy is simple (even if it takes some follow-through):
- Choose the right day-length type for your region.
- Get an early start (often indoors), then transplant on time.
- Keep weeds down and moisture steady.
- Feed nitrogen earlybut don’t keep pushing it late.
- Harvest at maturity, cure patiently, and store with airflow.
Do that, and you’ll grow onions that make your cutting board cry tears of joy (and, okay, sulfur).
Real-World Growing Experiences and Lessons Learned (500+ Words)
Gardeners who switch from sets to seeds often say the first surprise is how “un-onion-like” seedlings look at the
beginning. They’re thin, grasslike, andunder weak indoor lightdramatically floppy. The most common lesson is
that onions don’t need pampering; they need consistency. Steady light and even moisture produce
seedlings that feel almost wiry, like they’re training for a marathon. In contrast, seedlings that swing between
“bone dry” and “oops, I drowned them” tend to stall, yellow, and sulk for days.
Another frequently reported experience is the value of the “haircut.” Many gardeners hesitate to snip onion tops,
as if they’re committing a botanical crime. But trimming long, tangled leaves often makes seedlings easier to
handle and transplant. The key is not to scalp them into little stubsjust shorten unruly growth so plants focus
on roots and steady leaf production instead of falling over like toddlers at nap time.
Outdoors, the biggest “aha” moment tends to be weed pressure. People who can grow tomatoes in a slightly weedy bed
are shocked when onions barely grow in the same conditions. In real gardens, weeds steal the shallow surface water
that onions rely on, and bulbs shrink quietly without obvious warninguntil harvest day, when you pull what looks
like a ping-pong ball wearing an onion costume. Gardeners who succeed long-term often adopt a simple routine:
mulch once plants are established, do quick shallow weeding often (not heroic weeding rarely), and avoid deep
hoeing that damages onion roots.
Watering is another place where experience teaches nuance. Many gardeners notice that onions tolerate cool spring
weather well, but they really dislike inconsistent moisture during bulbing. If the bed dries out for a stretch,
then gets drenched, bulbs can split, growth can slow, and curing becomes harder. People who get the best storage
onions often use a “boring” scheduledeep watering when needed, checking soil moisture a couple inches down, and
keeping the bed evenly moist rather than cycling between extremes.
Fertilizer mistakes also show up in real-world stories. A classic pattern is “I fed them and fed them and fed
them…and now they won’t cure.” Excess late-season nitrogen can keep necks thick and green, delaying dry-down and
shortening storage life. Gardeners who want onions that last often talk about shifting their mindset: fertilize to
build leaves early, then let plants mature. When tops start naturally weakening and bulbing is well underway, they
resist the urge to “help” with extra nitrogen. That restraint tends to pay off months later when stored onions are
still firm.
Finally, many gardeners learn that variety choice is not a minor detailit’s the whole game. When someone plants a
long-day onion in a short-day region (or the reverse), the plants can look healthy and still produce disappointing
bulbs. Once gardeners match day length to location and choose varieties aligned with their goals (sweet vs.
storage), success becomes far more predictable. The shared experience across climates is reassuring: onions aren’t
hard, but they are specific. Give them the right variety, early growth, low weed competition, and a sensible
feeding schedule, and they tend to repay you with bulbs that feel downright unfair compared with store-bought.


