Table of Contents >> Show >> Hide
- Understanding the Amaryllis Rebloom Cycle
- Step 1: Remove Spent Flowers, Not Healthy Leaves
- Step 2: Move the Plant to Bright Light
- Step 3: Water Correctly During Active Growth
- Step 4: Fertilize to Rebuild the Bulb
- Step 5: Give It a Summer Vacation Outdoors
- Step 6: Start Dormancy in Late Summer or Fall
- Step 7: Wake the Bulb Back Up
- Step 8: Repot Only When Necessary
- Common Reasons Amaryllis Will Not Rebloom
- What About Waxed Amaryllis Bulbs?
- How to Keep Amaryllis Blooms Looking Good Longer
- Beginner-Friendly Step-by-Step Summary
- Conclusion
- Extra Growing Experience: What Reblooming Amaryllis Teaches You
Few houseplants make an entrance quite like amaryllis. One day there is a plain, onion-looking bulb sitting in a pot. A few weeks later, it is throwing up trumpet-shaped blooms like it has a tiny opera career to protect. The best part? That dramatic holiday flower does not have to be a one-season wonder. With the right after-bloom care, your amaryllis can rebloom year after year.
The secret to getting amaryllis to rebloom is simple: treat the bulb like a rechargeable battery. After flowering, the leaves collect light and turn it into stored energy inside the bulb. Later, a cool, dry rest period helps you control when the next bloom appears. Skip the recharge stage, and the bulb may sulk. Give it proper care, and it may reward you with another round of spectacular flowers.
This step-by-step guide explains exactly what to do after amaryllis blooms, how to feed and rest the bulb, when to bring it back into growth, and how to fix common reblooming problems.
Understanding the Amaryllis Rebloom Cycle
Most plants sold as “amaryllis” during the holidays are actually Hippeastrum hybrids, but home gardeners usually call them amaryllis. These tropical bulbs are popular because they bloom indoors with very little drama. Unlike tulips or daffodils that need a cold winter chill, amaryllis bulbs can bloom indoors after a period of warm growth and, if you want to control timing, a dry dormancy.
Think of the reblooming process in four stages:
- Bloom stage: The flower stalk opens and puts on the show.
- Recharge stage: Leaves grow and feed the bulb for next year.
- Rest stage: Watering stops and the bulb rests in a cool, dark place.
- Restart stage: Warmth, light, and water wake the bulb back up.
Many people fail at reblooming amaryllis because they throw the plant away after the flowers fade or cut off the leaves too soon. The leaves may not be glamorous, but they are doing the real work. Flowers are the fireworks; leaves are the factory.
Step 1: Remove Spent Flowers, Not Healthy Leaves
Once each amaryllis flower fades, snip off the wilted bloom. When the entire flower stalk begins to yellow or collapse, cut the stalk near the top of the bulb. Do not cut green leaves. Those long, strappy leaves are the plant’s solar panels, and the bulb needs them to rebuild strength.
Why remove the flowers? Because if the plant starts forming seed pods, it spends energy on seeds instead of storing energy in the bulb. Unless you are breeding amaryllis for fun, remove faded flowers promptly. Your bulb has one job now: eat light, store food, and prepare for the next floral performance.
Quick example
If your amaryllis bloomed in January, remove faded flowers as they finish. Cut the stalk only after it yellows. Then keep the leaves growing through spring and summer. That single habit can make the difference between a strong rebloom and a disappointing pot of green spaghetti.
Step 2: Move the Plant to Bright Light
After flowering, place the amaryllis in the brightest indoor location you have. A sunny window is ideal, especially one that gets several hours of light each day. Bright light helps the leaves produce carbohydrates that are stored in the bulb.
If your home is dim, the plant may survive, but it may not store enough energy to rebloom well. The leaves might become floppy, pale, or weak. If possible, move the plant outdoors after all danger of frost has passed. Start in light shade for a week or two, then gradually shift it to brighter light. Sudden direct sun can scorch leaves that grew indoors, so do not toss the poor thing into full sun like it owes you money.
Step 3: Water Correctly During Active Growth
During the recharge stage, water whenever the top inch or two of potting mix feels dry. The soil should be evenly moist, not soggy. Amaryllis bulbs hate sitting in wet soil because excess moisture can lead to rot. A pot with drainage holes is not optional; it is the bulb’s life insurance policy.
When watering, pour water around the soil rather than directly into the neck of the bulb. Let extra water drain away completely. If the pot is inside a decorative cachepot, empty standing water after watering. A beautiful pot full of trapped water is basically a spa day for root rot.
Signs your watering is off
- Too much water: Soft bulb, yellowing leaves, sour-smelling soil, fungus gnats.
- Too little water: Limp leaves, dry potting mix pulling away from the pot, stalled growth.
- Just right: Firm bulb, steady leaf growth, soil that dries slightly between waterings.
Step 4: Fertilize to Rebuild the Bulb
Once the plant is growing leaves, feed it with a balanced houseplant fertilizer according to the label directions. Many gardeners fertilize every three to four weeks during active growth. The goal is not to force instant flowers; it is to help the bulb store enough energy for the next bloom cycle.
A balanced fertilizer, such as an all-purpose houseplant formula, works well. Avoid the “more is better” mindset. Too much fertilizer can cause salt buildup and damage roots. Amaryllis is dramatic, yes, but it does not need a buffet every day.
If the plant spends summer outdoors, regular watering and feeding become even more important. Outdoor light can help the bulb grow bigger and stronger, but containers dry faster outside. Check the soil often, especially during hot weather.
Step 5: Give It a Summer Vacation Outdoors
Moving amaryllis outdoors for summer is one of the best ways to encourage reblooming. Wait until nighttime temperatures are safely above chilly conditions and all frost risk has passed. Place the pot in a sheltered, partly shaded area first. After the plant adjusts, move it to a location with bright light and several hours of sun.
You can keep the bulb in its pot on a patio, balcony, porch, or garden bed. Some gardeners sink the entire pot into the ground, which keeps the container stable and helps prevent it from drying too quickly. Keeping the bulb in the pot also protects its brittle roots from unnecessary disturbance.
Outdoor care checklist
- Introduce outdoor light gradually.
- Keep the soil moist but never waterlogged.
- Fertilize monthly during active growth.
- Inspect for pests before bringing the plant back indoors.
- Bring the plant inside before frost or cold nights arrive.
Step 6: Start Dormancy in Late Summer or Fall
Amaryllis can sometimes rebloom without a forced dormancy, but a dry rest period helps you control timing. If you want winter or holiday flowers, begin dormancy in late summer or early fall. Stop fertilizing first. Then gradually reduce watering. The leaves will yellow and die back as the bulb slows down.
When the leaves are fully yellow or brown, cut them off. Move the potted bulb to a cool, dry, dark place such as a basement, closet, or garage that stays above freezing. Aim for a cool range around 45 to 60 degrees Fahrenheit. Do not water during dormancy.
The rest period usually lasts about 8 to 12 weeks. During this time, the bulb is not dead. It is simply taking a well-earned nap. Check it occasionally for mold, softness, or pests. A healthy bulb should remain firm.
Step 7: Wake the Bulb Back Up
After 8 to 12 weeks of dry rest, bring the pot back into a warm, bright location. Water the soil thoroughly once, let it drain, and then wait. Do not keep watering heavily before growth appears. Once you see a flower bud or new leaves emerging, resume normal watering.
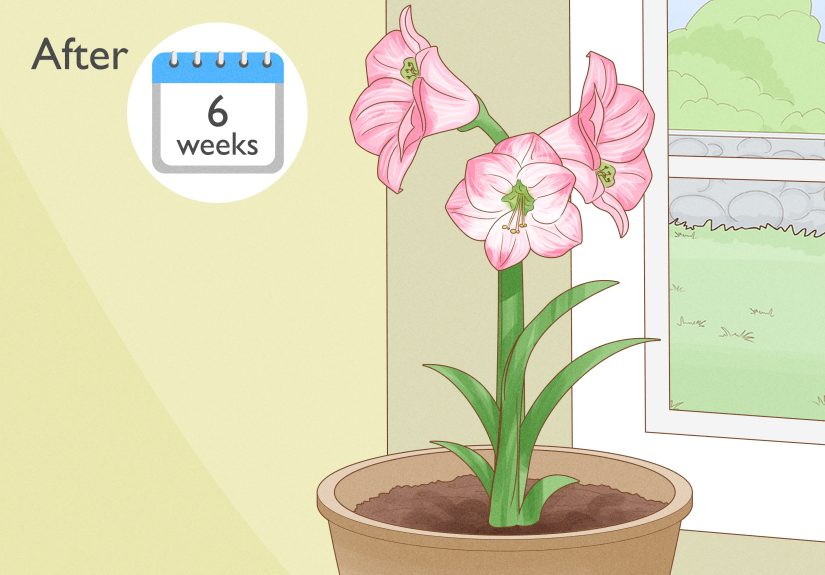
Amaryllis usually blooms about 4 to 8 weeks after it begins growing again, although some varieties take longer. For Christmas flowers, many gardeners restart bulbs in October or early November. For late winter blooms, restart later.
Simple rebloom timing plan
- January: Flowers fade; remove blooms and stalks.
- February to May: Grow leaves indoors in bright light.
- May to August: Move outdoors after frost; water and fertilize.
- September: Stop watering and begin dormancy.
- November: Restart with warmth, light, and water.
- December to January: Enjoy the new bloom.
Step 8: Repot Only When Necessary
Amaryllis bulbs bloom best when slightly potbound. A pot that is too large holds excess moisture, which increases the risk of rot. If you need to repot, choose a container only one to two inches wider than the bulb. Use a well-draining potting mix, not heavy garden soil.
Plant the bulb with the upper third to half above the soil surface. This exposed top helps prevent moisture from collecting around the bulb neck. A heavy pot is helpful because blooming amaryllis can become top-heavy. If your plant leans toward the window, rotate the pot every few days while the flower stalk grows.
Common Reasons Amaryllis Will Not Rebloom
The leaves were cut too early
This is the most common mistake. Without leaves, the bulb cannot recharge properly. Always keep healthy leaves after flowering.
The plant did not get enough light
Dim rooms may look cozy to humans, but amaryllis needs strong light after bloom. Bright light during spring and summer is essential.
The bulb was too small or weak
Large, firm bulbs store more energy and often produce stronger flower stalks. A small bulb may need another full growing season before it blooms again.
The pot stayed too wet
Soggy soil can rot roots and weaken the bulb. Use drainage holes and let the top layer of soil dry between waterings.
The bulb skipped its rest period
Some bulbs rebloom without dormancy, but many perform better when given a cool, dry rest. Dormancy also helps you schedule bloom time.
The plant was brought outdoors too quickly
Indoor-grown leaves can burn in sudden full sun. Acclimate gradually, starting with shade or indirect light.
What About Waxed Amaryllis Bulbs?
Waxed amaryllis bulbs are sold as no-water, no-soil novelty plants. They bloom using stored energy inside the bulb. They are fun, tidy, and perfect for people who enjoy flowers without the whole “dirt under the fingernails” experience.
However, waxed bulbs are usually intended as temporary plants. Their roots are often removed, and the wax prevents normal watering and growth. After blooming, you can try to save a waxed bulb by carefully removing the wax and any wire support, then potting the firm bulb in soil. Success is not guaranteed, but if the bulb is still solid and healthy, it may recover with patience.
How to Keep Amaryllis Blooms Looking Good Longer
Once your reblooming amaryllis opens, move it out of harsh direct sun and into bright, indirect light. Cooler room temperatures can help flowers last longer. Keep the soil lightly moist, but do not drown the plant in celebration. Tall stalks may need a stake, especially if the pot is lightweight.
Remove each faded bloom as it wilts. This keeps the plant looking tidy and prevents seed formation. When the entire stalk turns yellow, cut it down near the bulb and begin the recharge cycle again. Congratulations: you are now officially in a long-term relationship with a bulb.
Beginner-Friendly Step-by-Step Summary
- After flowers fade, remove spent blooms.
- Cut the flower stalk only after it yellows.
- Keep all healthy green leaves.
- Place the plant in bright light.
- Water when the top inch or two of soil is dry.
- Fertilize monthly during active leaf growth.
- Move outdoors after frost, starting in shade.
- Bring indoors before frost in fall.
- Stop watering and rest the bulb in a cool, dark place for 8 to 12 weeks.
- Restart with warmth, light, and water.
- Wait 4 to 8 weeks for flowers, depending on the bulb and variety.
Conclusion
Getting amaryllis to rebloom is not complicated, but it does require patience. The plant needs time to gather energy after flowering, which means the post-bloom leaf stage matters more than many people realize. Bright light, careful watering, regular feeding, and a summer growing season help the bulb bulk up. A cool, dry rest period then gives you a practical way to schedule the next bloom.
If your amaryllis does not rebloom the first year, do not panic. A healthy bulb may simply need more time to rebuild. Keep it growing, avoid overwatering, and resist the urge to cut off green leaves. With steady care, your amaryllis can become a repeat performer instead of a holiday fling.
Extra Growing Experience: What Reblooming Amaryllis Teaches You
The first lesson of reblooming amaryllis is that plants are not machines, even when the instructions make them sound like one. You may follow every step perfectly and still have one bulb bloom in December, another in January, and a third sit there like it is considering a career change. That is normal. Bulbs vary in size, health, variety, and stored energy. The goal is not to bully the plant into a schedule; it is to create the conditions that make blooming likely.
One useful habit is keeping a simple amaryllis journal. Write down the date it bloomed, when you cut the stalk, when you moved it outdoors, when you stopped watering, and when you restarted it. This may sound overly serious for a flowerpot, but it quickly reveals patterns. Maybe your bulbs need a longer rest. Maybe your sunny window is not as sunny in winter as you thought. Maybe the plant that spent summer outdoors bloomed better than the one kept indoors. Notes turn guesswork into gardening wisdom.
Another practical experience is learning to read the bulb. A firm, heavy bulb usually has good stored energy. A soft, shrinking, or moldy bulb is warning you that something is wrong. During dormancy, check the bulb every couple of weeks. You do not need to fuss over it, but you should make sure it has not become damp or rotten. A dormant amaryllis should feel asleep, not abandoned in a swamp.
Light is often the hidden difference between success and disappointment. Many homes are darker than they appear to human eyes. A room may feel bright, but the plant may still be getting weak light, especially in winter. If your amaryllis grows leaves but refuses to bloom again, improve the recharge stage. A bright window, summer outdoors, or even a grow light can make a major difference. The stronger the leaves, the stronger the bulb becomes.
Patience also matters. After flowers fade, the plant may look plain for months. This is where many gardeners lose interest. But those quiet months are the real investment. The bulb is storing food, building strength, and preparing the next flower bud. In a way, amaryllis is a great reminder that spectacular results often come from boring consistency. Water when needed. Feed lightly. Give it sun. Let it rest. Repeat.
Finally, do not be afraid to experiment with timing. If holiday blooms feel stressful, aim for late winter instead. An amaryllis blooming in February can be just as joyful, especially when the weather is gray and the garden outside looks like it forgot its password. Once you understand the cycle, you can adjust the schedule to fit your home. That is the real charm of growing amaryllis: it rewards care, forgives small mistakes, and occasionally makes you look like a houseplant genius.
Note: This article is written for healthy, potted amaryllis bulbs grown in standard indoor or patio conditions. Waxed bulbs, rotted bulbs, and very small bulbs may not rebloom reliably without extra recovery time.