Table of Contents >> Show >> Hide
- Why Cleaning a Milk Frother Matters
- What You’ll Need Before You Start
- How to Clean a Milk Frother: 15 Steps
- Step 1: Turn Off and Unplug the Frother
- Step 2: Let Hot Parts Cool Slightly, but Do Not Wait Too Long
- Step 3: Empty Any Leftover Milk Immediately
- Step 4: Disassemble the Removable Parts
- Step 5: Rinse Milk-Contact Parts With Warm Water
- Step 6: Wash the Parts With Mild Dish Soap
- Step 7: Use a Small Brush for Tight Spaces
- Step 8: Wipe the Base and Exterior Only With a Damp Cloth
- Step 9: Clean the Interior Gently if You Have a Nonstick Jug
- Step 10: For Steam Wands, Purge and Wipe Carefully
- Step 11: Soak Stubborn Parts if Milk Has Dried On
- Step 12: Rinse Thoroughly to Remove Soap
- Step 13: Dry Everything Completely
- Step 14: Reassemble the Frother Correctly
- Step 15: Deep Clean and Descale on a Regular Schedule
- Cleaning Tips by Frother Type
- Common Mistakes to Avoid
- How Often Should You Clean a Milk Frother?
- Troubleshooting: Signs Your Frother Needs Better Cleaning
- Experience Notes: What Cleaning a Milk Frother Teaches You Over Time
- Final Thoughts
- SEO Tags
If your morning latte tastes amazing but your milk frother smells faintly like yesterday’s cappuccino and poor decisions, this guide is for you. Cleaning a milk frother is not difficult, but it does need to be done properly. Milk leaves behind proteins, fats, and mineral residue that can harden fast, dull your foam, and make a perfectly innocent coffee taste weirdly haunted.
The good news is that most frothers are easy to maintain once you know the routine. Whether you use a handheld frothing wand, an electric jug-style frother, a steam wand on an espresso machine, or a milk carafe system, the same rule applies: clean it before milk residue turns into kitchen cement.
This guide walks you through 15 practical steps to clean a milk frother the right way, plus smart maintenance tips, common mistakes to avoid, and real-life experience notes that make the whole job easier. If you want better foam, better flavor, and fewer “why does this smell off?” moments, you are in the right place.
Why Cleaning a Milk Frother Matters
A milk frother works in a harsh little world of heat, motion, air, and dairy. That means leftover milk can dry quickly inside tiny parts like whisk coils, frothing tips, nozzles, tubes, and steam holes. Once that buildup starts, your frother may foam less efficiently, heat unevenly, or develop clogs that make it sputter instead of froth.
Regular cleaning helps your machine last longer and keeps your drinks tasting fresh. It also saves you from the miserable task of scraping off old milk residue later, which has roughly the same emotional energy as trying to peel dried oatmeal off a pan with a butter knife.
What You’ll Need Before You Start
- Warm water
- Mild dish soap
- A soft sponge or microfiber cloth
- A small bottle brush, straw brush, or detail brush
- A clean dry towel
- A bowl for soaking removable parts
- A non-abrasive cleaning pad if needed
- Your product manual for model-specific warnings
Skip steel wool, harsh scouring powders, and anything that feels like it belongs in a garage instead of a coffee station. If your frother has a nonstick interior, rough scrubbing can damage it fast.
How to Clean a Milk Frother: 15 Steps
-
Step 1: Turn Off and Unplug the Frother
Start with the obvious but important move: power the unit down. If you have an electric milk frother, unplug it before cleaning. If you are working with a steam wand or attached frothing system, switch the machine off and let the steaming function stop fully. Cleaning around hot metal or live electrical parts is a fast way to turn coffee time into regret.
-
Step 2: Let Hot Parts Cool Slightly, but Do Not Wait Too Long
You want the frother cool enough to handle safely, but not so cold that dried milk has already locked itself in place. The sweet spot is a short pause. Let the temperature drop, then clean it while residue is still soft. This is especially important for steam wands and heated frothing jugs.
-
Step 3: Empty Any Leftover Milk Immediately
Do not leave unused milk sitting in the jug or carafe while you enjoy your drink, answer emails, scroll social media, and accidentally enter a new phase of life. Pour out leftovers right away. Milk that sits in a frother gets stubborn quickly and can create odor, film, and clogs.
-
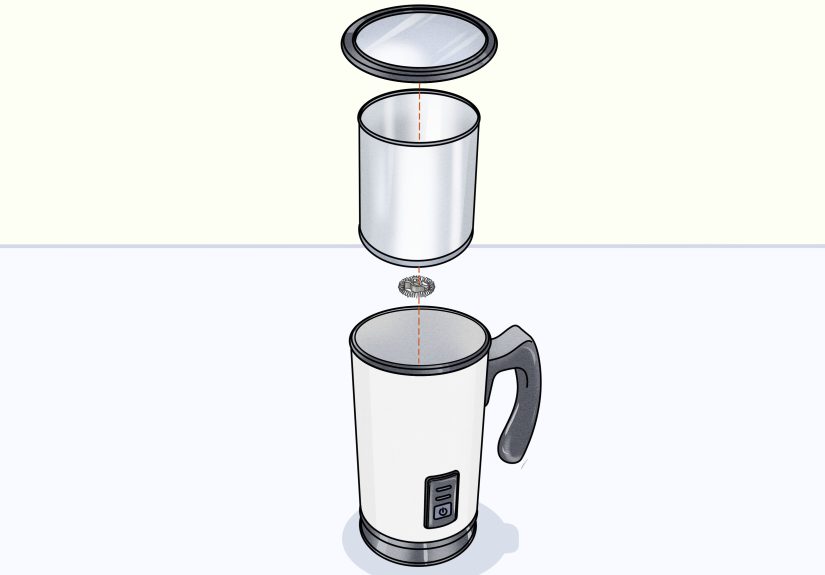
Step 4: Disassemble the Removable Parts
Take apart anything your model allows you to remove: lids, seals, whisks, springs, frothing disks, milk tanks, tubes, nozzles, and carafe tops. The smaller the part, the more likely it is hiding a tiny dairy crime scene. Lay everything out on a clean towel so you do not lose the whisk piece, which is usually small enough to disappear the second you look away.
-
Step 5: Rinse Milk-Contact Parts With Warm Water
Give all removable parts a warm rinse before using soap. This loosens fresh residue and helps prevent smearing milk fats all over the surface. For handheld frothers, rinse only the whisk end unless your model specifically says the whole tool is washable. Never assume the motor handle is water-friendly just because it survived one reckless rinse.
-
Step 6: Wash the Parts With Mild Dish Soap
Use a small amount of gentle dish soap and wash every removable piece with a soft sponge or cloth. Focus on the underside of lids, around silicone seals, inside carafe openings, and around metal whisk coils. These are prime hiding spots for milk film. A quick wash is fine for daily cleaning, but make it thorough enough that the parts actually feel squeaky clean instead of “probably okay.”
-
Step 7: Use a Small Brush for Tight Spaces
This step is where many people go from “I cleaned it” to “I cleaned the visible parts and ignored the tiny stuff.” Use a small bottle brush, straw brush, or soft detail brush to clean narrow channels, tubing, frothing nozzles, and around whisk connectors. If your frother has a steam tip or small holes, check carefully for residue or mineral crust.
-
Step 8: Wipe the Base and Exterior Only With a Damp Cloth
For electric frothers, clean the base, power area, and outside surfaces with a damp cloth only. Do not immerse the base in water. Do not hold it under the faucet. Do not give it “just a quick rinse.” Water and powered components do not become friends just because you are in a hurry.
-
Step 9: Clean the Interior Gently if You Have a Nonstick Jug
Many automatic milk frothers have a coated interior. Treat it kindly. Use a soft sponge, warm soapy water, and light pressure. Abrasive cleaners can scratch the surface, making it easier for milk residue to stick in the future. If you notice a cooked-on ring, let warm soapy water sit inside for a few minutes before wiping again.
-
Step 10: For Steam Wands, Purge and Wipe Carefully
If your milk frother is a steam wand on an espresso machine, wipe it with a clean damp cloth after steaming. Then purge the wand briefly according to your machine’s instructions to clear milk from inside the tube. This simple habit is one of the best ways to prevent clogs. Just keep your hands clear of hot steam and metal, because the wand is not interested in your skin-care goals.
-
Step 11: Soak Stubborn Parts if Milk Has Dried On
When residue refuses to budge, soak removable parts in warm soapy water for 10 to 20 minutes. This works well for whisks, lids, seals, and detachable nozzles. Do not soak electric handles, bases, or components that the manual says must stay dry. If the buildup is on a steam tip, loosen it gently with the appropriate cleaning tool or a soft brush rather than aggressive poking.
-
Step 12: Rinse Thoroughly to Remove Soap
Soap left behind in a milk frother can ruin the next drink in a spectacularly disappointing way. Rinse every washed part thoroughly with clean water. Pay special attention to seals, springs, and whisk components, since suds like to cling there. If your next cappuccino tastes like a lemon-scented plate, this step was not finished.
-
Step 13: Dry Everything Completely
Use a clean towel to dry each part, then let them air-dry fully before reassembling if needed. Moisture trapped in sealed pieces, hoses, or carafes can lead to odor and funky residue over time. Drying also helps protect metal parts from spotting and keeps your frother ready for the next use instead of feeling suspiciously damp.
-
Step 14: Reassemble the Frother Correctly
Put the frother back together carefully, making sure seals sit properly, lids lock into place, and the whisk or frothing disk is seated exactly where it should be. Misaligned parts can cause poor foam, rattling, leaking, or a machine that acts personally offended when you press the button.
-
Step 15: Deep Clean and Descale on a Regular Schedule
Daily cleaning handles fresh milk residue, but deeper maintenance matters too. If your model supports it, run the manufacturer’s recommended milk-system clean cycle or deep-clean process on a regular basis. If your frother or espresso machine also develops mineral buildup from water, descale it only with a method approved for that model. Some machines allow descaling solutions or vinegar-based cleaning in certain parts, while others do not. The manual is the boss here.
Cleaning Tips by Frother Type
Handheld Milk Frother
These are usually the easiest to clean. Rinse the whisk end right after use, then run it briefly in a cup of warm soapy water. Rinse again in clean water and wipe the handle. Keep the battery or motor section dry unless your specific model says otherwise.
Electric Jug-Style Milk Frother
Remove the whisk or magnetic frothing accessory, wash all removable parts, and wipe the interior gently. Avoid soaking the base. If the jug has a nonstick coating, use only soft materials.
Steam Wand Frother
Wipe and purge after every use. Deep clean the tip regularly if you notice weak steam, sputtering, or uneven froth. Steam wand neglect is the kind of problem that starts small and ends with sad foam and loud kitchen sighing.
Milk Carafe or Automatic Milk System
These systems often include lids, intake tubes, connectors, and internal passages. Rinse right away, clean removable parts thoroughly, and run any built-in cleaning cycle the machine provides. If the manual recommends a special milk-system cleaner, use it.
Common Mistakes to Avoid
- Waiting until tomorrow to clean it
- Putting the power base under running water
- Using abrasive scrubbers on coated interiors
- Forgetting tiny parts like springs, seals, or nozzle caps
- Ignoring the steam wand after one milk drink
- Using random cleaners not approved for food-contact appliance parts
- Assuming every removable part is dishwasher safe
In other words, most milk frother problems are not dramatic engineering failures. They are usually just buildup, missed rinses, or that one tiny part nobody remembered existed.
How Often Should You Clean a Milk Frother?
After every use: rinse, wash milk-contact parts, and wipe exposed surfaces.
Every few days to weekly: inspect for hidden residue, especially in tubing, whisk connections, steam tips, and lid undersides.
Periodically: deep clean or descale based on how often you use the appliance and what your manufacturer recommends.
If you make milk drinks every day, your frother deserves daily attention. It is a tiny machine doing a very messy job.
Troubleshooting: Signs Your Frother Needs Better Cleaning
- The foam is thinner than usual
- The frother smells sour, stale, or cooked
- The whisk spins weakly or sticks
- The steam wand sputters or has uneven output
- There is visible film, crust, or discoloration
- The machine starts making unusual noises during frothing
When these signs show up, your frother is basically sending a strongly worded email.
Experience Notes: What Cleaning a Milk Frother Teaches You Over Time
The funny thing about learning how to clean a milk frother is that the lesson usually begins with overconfidence. The first time most people use one, they focus on the foam. They admire the silky texture, pour the milk into coffee, take a triumphant sip, and think, “I am basically a barista now.” Then they leave the frother in the sink for an hour and discover that milk residue hardens with astonishing speed. Suddenly, that dreamy little coffee tool feels like a science experiment.
One of the biggest real-world discoveries is that fast cleaning is easier than deep cleaning. People tend to think they are saving time by postponing it, but the opposite is usually true. A 90-second rinse-and-wash routine right after making a drink is effortless. A delayed cleanup requires soaking, brushing, muttering, and possibly reconsidering your life choices. Once you have scraped dried milk off a whisk coil with a tiny brush while your coffee gets cold, you become a believer in immediate cleanup.
Another common experience is realizing that every milk frother has one sneaky problem area. On handheld frothers, it is often the little whisk connector. On electric frothers, it is usually the lid underside or the ring around the whisk hub. On steam wands, it is the tip and the inside passage. On milk carafes, it is the tubing and cap assembly. You can clean 95 percent of the unit and still have odor or poor performance because 5 percent of it is quietly collecting yesterday’s latte. Once you figure out your model’s “trouble spot,” maintenance gets much easier.
There is also a texture lesson. Clean equipment produces better foam. That may sound obvious, but it becomes truly noticeable over time. A frother with residue buildup often gives weaker bubbles, uneven heating, or foam that collapses too quickly. A clean frother feels sharper, smoother, and more consistent. Your cappuccino looks better, your latte tastes cleaner, and the whole drink feels more intentional. It is one of those small kitchen habits that creates a surprisingly big payoff.
People also learn that the manual matters more than expected. It is tempting to treat all frothers the same, but they are not all built the same way. Some removable parts are dishwasher safe. Some are not. Some systems can run a built-in cleaning cycle. Others need careful hand-washing. Some machines tolerate specific descaling methods. Others absolutely do not. Experience tends to humble even confident home coffee fans into checking the manual before trying a “genius hack” they found online at midnight.
And finally, cleaning a milk frother teaches a broader kitchen truth: the best maintenance routines are boring, repeatable, and wonderfully unglamorous. There is no dramatic secret. Just rinse, wash, dry, reassemble, and repeat. The routine may not be exciting, but it protects flavor, prevents buildup, and keeps your coffee ritual pleasant instead of annoying. In a kitchen full of gadgets that promise to make life easier, the milk frother is honest. It gives you beautiful foam, and in return it asks for a little daily respect. Frankly, that is a fair deal.
Final Thoughts
If you want your lattes, cappuccinos, and flat whites to taste fresh, cleaning your milk frother is not optional. It is part of making good coffee. The best routine is simple: clean it right after use, treat delicate parts gently, deep clean when needed, and always follow your model’s care instructions. Do that, and your frother will stay cleaner, smell better, and perform like it is actually happy to be there.
In other words, the path to excellent foam is not just technique. It is also soap, warm water, and the discipline to clean the thing before milk turns into a stubborn little monument.