
Table of Contents >> Show >> Hide
- Fast Ways to Change the Volume (a.k.a. “Make It Louder Right Now”)
- 1) Use the volume keys on your keyboard
- 2) Use Control Center (the slider you can’t lose… usually)
- 3) Add the Sound control to the menu bar (quick access, zero scrolling)
- 4) Adjust volume in System Settings (macOS Ventura / Sonoma and later)
- 5) Adjust volume in System Preferences (macOS Monterey and earlier)
- 6) Don’t forget per-app volume (because apps love being “special”)
- Power-User Volume Tricks (for people who can hear 0.5 dB differences)
- When Volume Won’t Change (Common Causes That Make Macs Feel Haunted)
- Troubleshooting Checklist: Fix Mac Volume Problems Step-by-Step
- Step 1: Confirm it’s not just one app
- Step 2: Check Sound settings (Output device, volume, mute)
- Step 3: Disconnect external devices (yes, even that “harmless” dongle)
- Step 4: Check Bluetooth and AirPlay routing
- Step 5: Restart your Mac (the boring fix that works suspiciously often)
- Step 6: Restart Core Audio (without rebooting the whole Mac)
- Step 7: Use Audio MIDI Setup for stubborn device issues (especially HDMI)
- Step 8: Update macOS (because bugs also have feelings, and Apple keeps changing them)
- Step 9: Run Apple Diagnostics (when you suspect hardware)
- Step 10: Reset NVRAM/PRAM (Intel Macs only) and consider an SMC reset (Intel Macs)
- Prevent Future Volume Drama (Small Habits, Big Peace)
- Experience-Based Tips ( of Real-World “Why Is My Mac Doing This?”)
You’d think “turn the volume up” would be the simplest task on Earthright up there with “drink water” and “don’t reply-all.” And yet, Macs occasionally decide they’re artists, not appliances, and your volume slider becomes a greyed-out suggestion. This guide covers every sane way to change volume on a Mac (keyboard, Control Center, menu bar, Sound settings, Siri), plus the real fixes for the most common audio headaches: grayed-out volume, “no output controls,” HDMI weirdness, Bluetooth betrayals, and the classic “my Mac is definitely playing sound… just not to the dimension I live in.”
Fast Ways to Change the Volume (a.k.a. “Make It Louder Right Now”)
1) Use the volume keys on your keyboard
Most Mac keyboards have dedicated audio keys: Mute (often F10), Volume Down (F11), and Volume Up (F12). Tap once for a small change; hold for repeated steps. If you’re on an older MacBook Pro with a Touch Bar, the volume control lives there (and yes, it’s still technically a keyboardjust one that can judge you).
If the keys don’t change volume: you may have enabled “Use F1, F2, etc. keys as standard function keys.” When that’s on, you’ll typically need to hold Fn (or the Globe key) while pressing the volume keys. This is especially common after pairing a new external keyboard.
2) Use Control Center (the slider you can’t lose… usually)
Click Control Center in the top-right menu bar (the two-toggle icon). Open Sound and drag the slider. This method is great when your hands are already on the trackpad and your brain refuses to remember which F-key is which.
3) Add the Sound control to the menu bar (quick access, zero scrolling)
If you want a permanent speaker icon in the menu bar, enable it in: System Settings > Control Center (or Menu Bar, depending on macOS version) > Sound > choose Show in Menu Bar (Always or When Active). Then you can click the speaker icon anytime and drag the volume slider instantly.
4) Adjust volume in System Settings (macOS Ventura / Sonoma and later)
Go to Apple menu > System Settings > Sound, then open Output. Here you can:
- Drag Output volume to set the overall system volume.
- Toggle Mute (the “I need silence, not a debate” option).
- Adjust Balance if audio is heavier on one side.
- Select the correct Output device (internal speakers, AirPods, HDMI display, USB interface, etc.).
5) Adjust volume in System Preferences (macOS Monterey and earlier)
Open Apple menu > System Preferences > Sound. You’ll see similar tabs/options (Output, Input, Sound Effects). Same idea, slightly different outfit.
6) Don’t forget per-app volume (because apps love being “special”)
Many apps have their own volume controls that can override your expectations: browsers (YouTube players), video conferencing apps, music players, games, and some websites. If system volume is up but you still hear nothing, check the app’s slider or mute icon. Also note: system alert volume (notification “ding”) can be separate from media volume depending on macOS settings.
Power-User Volume Tricks (for people who can hear 0.5 dB differences)
Fine-tune volume in smaller steps
Want micro-adjustments instead of big jumps? Hold Option + Shift while pressing Volume Up or Volume Down. This changes volume in smaller incrementsperfect for late-night listening when “one bar louder” is suddenly a neighborhood event.
Switch audio output devices quickly (AirPods, speakers, HDMI, docks)
The “volume” problem is often an “output device” problem. Fast ways to switch:
- Control Center > Sound → pick an output device.
- System Settings > Sound > Output → select the device you actually want.
- If you have the Sound icon in the menu bar, click it and choose an output device from the list.
Use Siri for precise volume (yes, really)
Sliders are great until you want “exactly 37%.” If you use Siri on your Mac, try: “Set volume to 35 percent.” You can also ask: “What’s my volume?” It’s oddly satisfying, like putting your audio in a spreadsheet.
When Volume Won’t Change (Common Causes That Make Macs Feel Haunted)
Cause #1: Your Mac is playing sound to the wrong device
Bluetooth headphones, AirPlay speakers, an HDMI monitor, or a USB dock can silently steal your audio. The fix is simple: open Sound > Output and select Internal Speakers (or your intended device). As a quick test, temporarily turn Bluetooth off to see if your Mac “comes back” to local speakers.
Cause #2: Volume is grayed out / “The selected device has no output controls”
This message usually means macOS cannot control the volume in software for that output device. Common examples:
- HDMI / DisplayPort audio: many monitors/TVs/receivers handle volume themselves. You change volume on the display, not the Mac.
- Digital/optical output: often fixed-level output; volume control is external.
- Some USB audio interfaces: professional gear may require using the hardware knob.
What you can do:
- If you want Mac-controlled volume, switch output to Internal Speakers, headphones, or a device that supports software volume.
- For HDMI setups, try adjusting volume on the monitor/TV/receiver.
- If your audio is routed through a dock, try plugging headphones/speakers directly into the Mac to test whether the dock is the culprit.
Cause #3: Your function keys are behaving like… function keys
If your volume keys suddenly “stopped working,” it might be a keyboard setting. If “Use F1, F2, etc. keys as standard function keys” is enabled, you’ll likely need to hold Fn while using volume. On non-Apple keyboards, you may also have a hardware toggle (some keyboards use Fn + Esc) that changes media-key behavior.
Cause #4: The app is muted (or the tab is muted, or the site is muted… you get the idea)
Before you blame the universe, check:
- The app’s internal volume slider (YouTube, Spotify, Apple TV, games).
- Browser tab mute controls (Chrome/Edge allow tab muting; Safari can mute site audio).
- Meeting apps (Zoom/Teams) that separate “speaker volume” from “system volume.”
Troubleshooting Checklist: Fix Mac Volume Problems Step-by-Step
Start at the top. Do not skip ahead to “advanced resets” unless you enjoy unnecessary drama.
Step 1: Confirm it’s not just one app
- Try audio in a different app (Music, a different browser, a system alert).
- On websites, check the player’s own volume.
- If only one app is silent, quit and reopen it.
Step 2: Check Sound settings (Output device, volume, mute)
- Open System Settings > Sound > Output.
- Select Internal Speakers (or your intended device).
- Make sure Mute is off and the Output volume slider isn’t at zero.
Step 3: Disconnect external devices (yes, even that “harmless” dongle)
Unplug anything that could route audio: headphones, USB audio devices, HDMI cables, docks, monitors, adapters. Then test audio again. If sound returns, reconnect devices one-by-one to find the troublemaker.
Step 4: Check Bluetooth and AirPlay routing
If you recently used AirPods or a Bluetooth speaker, your Mac may have auto-reconnected. Turn Bluetooth off briefly as a test, or switch your output back to internal speakers.
Step 5: Restart your Mac (the boring fix that works suspiciously often)
Restarting resets a lot of audio weirdness, especially after sleep/wake glitches or device switching. If you’re in the middle of something important, save firstaudio problems love to arrive during deadlines.
Step 6: Restart Core Audio (without rebooting the whole Mac)
Core Audio is the macOS sound engine. If it’s confused, restarting it can help. Two common approaches:
- Activity Monitor method: Open Activity Monitor > search coreaudiod > select it > click the X > Force Quit. macOS will relaunch it automatically.
- Terminal method (advanced): Use a command that restarts audio services. This can briefly cut audio and may require admin credentials. If you’re on a managed/work Mac, check with IT policies first.
Step 7: Use Audio MIDI Setup for stubborn device issues (especially HDMI)
If sound fails only on a specific output (like HDMI), open Audio MIDI Setup (Applications > Utilities). Select your output device and confirm the format is reasonable for typical speakers (for example, stereo instead of an odd multi-channel mode). Misconfigured channel formats can cause “no sound” even when everything looks connected.
Step 8: Update macOS (because bugs also have feelings, and Apple keeps changing them)
If your audio issues started after an updateor you haven’t updated in a whileinstall the latest compatible macOS update. Audio fixes often arrive quietly in updates, like a ninja patch.
Step 9: Run Apple Diagnostics (when you suspect hardware)
If your built-in speakers never work (even after device checks), run Apple Diagnostics to look for hardware issues. The startup steps vary by model, but many Macs use a startup key (often D) to launch diagnostics. If diagnostics reports an issue, follow Apple’s recommended repair path.
Step 10: Reset NVRAM/PRAM (Intel Macs only) and consider an SMC reset (Intel Macs)
These resets can help if your Mac gets stuck with odd audio routing or settings. Important notes:
- Intel Macs can reset NVRAM/PRAM using a key combo at startup (commonly Option-Command-P-R).
- Apple silicon (M-series) Macs do not use the same manual NVRAM reset process; troubleshooting typically relies on normal restarts and macOS recovery tools.
- SMC reset instructions depend heavily on the Intel Mac model (laptop vs desktop, removable battery vs not). If you go this route, follow model-specific instructions from a trusted source.
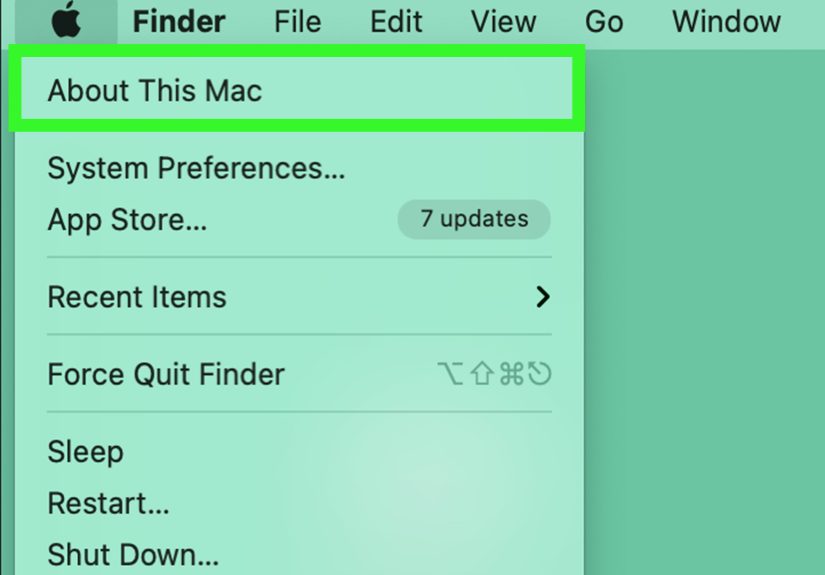
If you’re not sure which chip you have, go to Apple menu > About This Mac. When in doubt (or if your Mac is under warranty), it’s totally fair to skip the deepest resets and contact Apple Support.
Prevent Future Volume Drama (Small Habits, Big Peace)
- Keep the Sound icon in the menu bar so you can spot output changes instantly.
- Name your devices clearly (e.g., “Desk Speakers” vs “USB Audio Device 2.0” which sounds like a robot witness).
- After using Bluetooth headphones, glance at your output device before your next meeting.
- Be careful with docks/adapters: great for ports, occasionally chaotic for audio routing.
Experience-Based Tips ( of Real-World “Why Is My Mac Doing This?”)
Let’s talk about the stuff that doesn’t show up in tidy checklists: the real-life moments when you’re sure your Mac is broken, but it’s actually just being a Mac. Here are a few composite scenarios that happen constantly in homes, offices, and coffee shops where someone is definitely trying to work and not watching cat videos (no judgment).
Scenario 1: The “Silent AirPods” mystery. You used AirPods yesterday, put them back in the case, and today your Mac is silent. You crank the volume to max. Nothing. Then you realize the audio is still routing to the AirPods… which are now happily whispering your podcast from inside a closed case like tiny audio gremlins. The fix is almost always to open Sound > Output (or Control Center > Sound) and switch back to Internal Speakers. If you’re in a hurry, toggling Bluetooth off for a second is the fast “snap out of it” trick.
Scenario 2: HDMI audio and the greyed-out volume slider. You plug into a monitor or TV, and suddenly the volume icon shows the “nope” symbol. This is where macOS is basically saying: “I’m sending digital audio out. I’m not your TV remote.” Many displays and receivers control volume on their own, so you adjust volume on the monitor/TV/receiver instead. The emotional arc is always the same: confusion → mild anger → acceptance → rummaging for the TV remote like it’s an ancient relic.
Scenario 3: The USB audio interface that ignores your keyboard. A lot of creators (and plenty of regular folks with nicer speakers) use USB interfaces. Some interfaces expose software volume control; others expect you to use the physical knob. When macOS can’t control it, volume keys appear to “stop working,” but the system is functioning exactly as designed. The best habit is to treat the interface like a mini amplifier: set macOS volume to a healthy level, then adjust on the hardware. If you bounce between internal speakers and the interface often, keeping the Sound menu bar icon visible saves you from guessing.
Scenario 4: The “It works in one app but not the other” trap. YouTube is loud, but a Zoom call is silent. Or Music plays fine, but Safari is mute. This is rarely a system-wide volume problem; it’s usually an app-level slider, a muted tab, or a meeting app output setting that’s pointing to the wrong device. The fastest strategy is to check three places in order: (1) the app’s own volume/mute, (2) macOS output device, (3) Bluetooth/AirPlay routing. Ninety percent of the time, the answer is sitting in one of those three spots, sipping coffee, waiting for you to notice it.
The bigger lesson: Mac audio issues often look dramatic, but most are routing problems, device limitations, or one sneaky mute setting. If you train yourself to check output first (before panic), you’ll fix volume problems in under a minuteand keep your blood pressure in the human range.


