Table of Contents >> Show >> Hide
- What Makes a Shelf “Floating” (and Why It Matters)
- Tools and Materials Checklist
- Step 1: Plan Your Shelf Size and Placement
- Step 2: Find Studs and Mark Everything (Yes, Everything)
- Option A: Install Premade Floating Shelves the “Won’t Fall Down” Way
- Option B: Build Simple DIY Floating Shelves (Cleat + Hollow Box Method)
- Step 3: Build the Hidden Cleat Frame
- Step 4: Mount the Cleat to the Wall (Studs = Best Friends)
- Step 5: Build the Hollow Shelf Box
- Step 6: Finish the Shelf Before Installing (Your Future Self Will Thank You)
- Step 7: Install the Shelf Box Over the Cleat
- How Strong Are Simple Floating Shelves?
- Common Floating Shelf Mistakes (and How to Avoid Them)
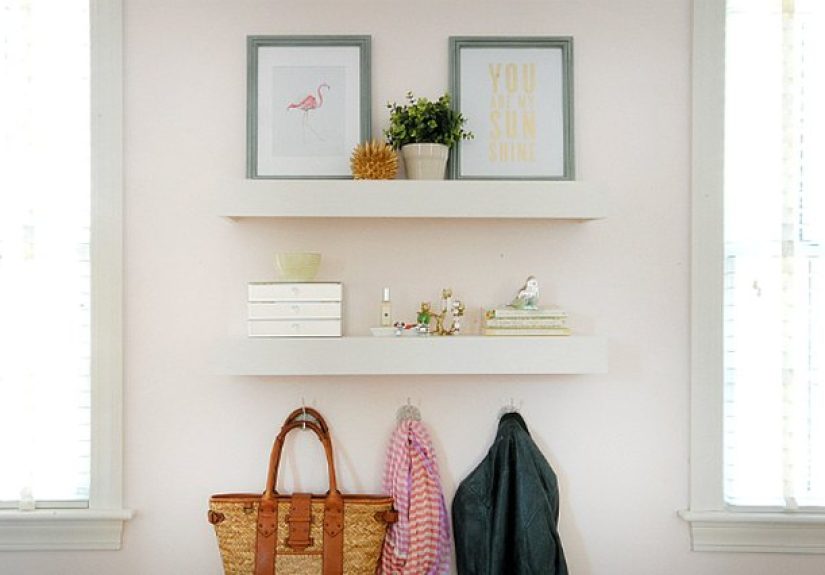
- Design Ideas for Simple Floating Shelves
- Extra: Real-World DIY “Experiences” and Lessons Learned (So Your Shelf Story Ends Happily)
- Conclusion
Floating shelves are the home-improvement equivalent of a magic trick: your stuff appears to levitate, guests say “wow,” and you quietly accept the applause while pretending you didn’t spend 20 minutes arguing with a stud finder. The good news? You can absolutely build simple DIY floating shelves with basic tools, beginner-friendly materials, and a plan that doesn’t require a woodworking degree (or a dramatic montage).
In this guide, you’ll learn two reliable approaches:
- Option A (Easiest Install): Install store-bought floating shelves properly (still counts as DIYdon’t let anyone gatekeep you).
- Option B (Build-Your-Own): Build a clean, classic hollow “box” floating shelf over a hidden cleat (strong, affordable, and customizable).
Along the way, we’ll cover how to find studs, choose anchors when studs don’t cooperate, avoid saggy shelves, and get that crisp “built-in” look that makes your wall feel like it has its life together.
What Makes a Shelf “Floating” (and Why It Matters)
A floating shelf uses hidden mounting hardware so you don’t see brackets. That hidden support can be:
- A metal bracket system (often included with premade shelves)
- A wooden cleat frame (a simple DIY skeleton screwed into studs)
- Steel rods/dowels that slide into drilled holes (great, but more precision-heavy)
For a “simple” build, the most forgiving choice is the wood cleat + hollow shelf method. It’s sturdy, uses common lumber, and lets you adjust for walls that are… let’s say, “full of personality.”
Tools and Materials Checklist
Must-have tools (for either option)
- Stud finder (bonus points if it detects live wires)
- Level (2 ft is fine; longer is nicer)
- Tape measure
- Drill/driver + drill bits
- Pencil + painter’s tape
- Safety glasses (your eyes are not replaceable parts)
Materials for Option B: DIY cleat + hollow shelf
- 2x2s or ripped 2×4 for the cleat frame
- 1/2″ or 3/4″ plywood for the shelf box (top/bottom/sides)
- 1×2 face trim (optional, for a thicker “chunky” look)
- Wood screws (2 1/2″ to 3″ for studs)
- 1 1/4″ wood screws or brad nails for assembly
- Wood glue
- Wood filler + sandpaper (120/180/220 grit)
- Paint or stain + polyurethane (if staining)
Anchors (only if you can’t hit studs)
If your shelf hardware can’t land on studs, choose anchors rated for your load. For heavier shelves, toggle bolts usually beat basic plastic anchors. Keep in mind: shelves act like levers, so “it held my picture frame” doesn’t mean it’ll hold your cookbook collection.
Step 1: Plan Your Shelf Size and Placement
Before you cut anything, decide what the shelf is supposed to do. A floating shelf holding a tiny plant has very different job stress than one holding a microwave. (Yes, people try. No, I’m not endorsing it.)
Simple, reliable shelf dimensions
- Depth: 6″–10″ for most rooms; 10″–12″ for kitchens (if you want plates or larger decor)
- Length: 24″–48″ is a sweet spot for beginner builds
- Thickness: 2″–3″ looks substantial and hides the cleat nicely
Example: A 36″ long, 8″ deep, 2 1/2″ thick shelf works great above a desk for books + decor, or in a bathroom for towels and toiletries.
Step 2: Find Studs and Mark Everything (Yes, Everything)
Floating shelf success is basically 60% “find the studs,” 30% “level it,” and 10% “try not to invent new swear words.” Use a stud finder and mark stud centers with pencil on painter’s tape so you can see them clearly.
Safety note you should actually read
Walls may hide wiring, pipes, ductwork, and other surprises. Use a stud finder with electrical detection if possible, especially near outlets, switches, and plumbing fixtures.
Pro tip: Draw a reference line
Use a level to draw a light line where the top of your cleat (or bracket) will sit. This keeps your layout consistent, especially when installing multiple shelves.
Option A: Install Premade Floating Shelves the “Won’t Fall Down” Way
If you bought floating shelves, you’re not cheatingyou’re optimizing. Here’s how to install them so they look clean and feel solid.
1) Dry-fit the bracket
Hold the bracket/backplate to your wall at your marked height. Check level. Mark screw holesaim for studs whenever possible.
2) Drill pilot holes
Pre-drill into studs to prevent splitting and make driving screws easier (and straighter). If you’re using anchors, follow the anchor instructions for hole size.
3) Fasten the bracket securely
Screw the bracket into studs with appropriate screws (often provided, but upgrade if they’re flimsy). Re-check level before fully tightening.
4) Slide shelf onto bracket and lock it
Most systems use set screws underneath to “pin” the shelf to the bracket. Tighten firmly. If the shelf wiggles, something is off: not enough stud engagement, anchors not rated, or the shelf interior isn’t fitting the bracket snugly.
Quick reality check
If your shelf is intended for heavy objects, prioritize stud mounting. Anchors can work, but shelves create leverage that can rip anchors out over timeespecially when people bump shelves, kids climb, or gravity decides it’s in a mood.
Option B: Build Simple DIY Floating Shelves (Cleat + Hollow Box Method)
This is the classic DIY approach used in many kitchens, living rooms, and home offices because it’s strong, customizable, and doesn’t require ultra-precise metalwork. You’re basically building a sturdy wall-mounted “skeleton,” then sliding a hollow shelf box over it.
Overview of the build
- Build a hidden cleat frame that screws into studs.
- Build a hollow shelf box that fits snugly over the cleat.
- Slide shelf onto cleat, then secure from underneath.
Step 3: Build the Hidden Cleat Frame
The cleat is what actually holds the weight. Don’t skimp hereyour shelf is only as strong as the hardware and the studs behind it.
Cut list (example: 36″ long shelf, 8″ deep, ~2 1/2″ thick)
- Back rail: 1 piece at 34″–35″ (leave a little room for sliding the box on)
- Side arms: 2 pieces at ~7″ (slightly shorter than shelf depth)
- Interior braces: 1–2 pieces at ~7″ (optional but recommended for longer shelves)
Use 2×2 material or rip a straight 2×4 into strips. Straight matterscrooked cleats create wobbly shelves.
Assemble the cleat
Form a “ladder” shape: the back rail sits against the wall, and the arms/braces extend outward. Pre-drill and screw the arms into the back rail. Add glue for extra rigidity.
Step 4: Mount the Cleat to the Wall (Studs = Best Friends)
Hold the cleat to your level line and align it so at least two screws hit studs (more is better). Pre-drill into studs and drive 2 1/2″–3″ screws through the cleat into stud centers.
Make it ridiculously level
Check level as you goafter the first screw, after the second, and again when everything is tight. A tiny tilt looks huge once you put objects on the shelf.
If studs are awkwardly placed
If stud spacing doesn’t line up perfectly with your shelf length, you have options:
- Adjust shelf length slightly (customization is your superpower).
- Add a wider back rail so you can catch more studs.
- Use heavy-duty anchors for secondary holes, but don’t rely on anchors alone for heavy loads.
Step 5: Build the Hollow Shelf Box
Now you build the pretty part: a three- or four-sided box that slides over the cleat frame like a sleeve.
Simple plywood box approach
- Top and bottom panels: 36″ x 8″
- Side panels: 8″ x 2 1/2″ (or whatever thickness you want)
- Front face: 36″ x 2 1/2″
Assembly tips:
- Dry-fit around the cleat dimensionsyour goal is a snug slide-on fit, not a wrestling match.
- Use glue + brad nails or countersunk screws.
- If your wall is wavy (many are), leave a hair of tolerance and plan to caulk the top edge after install.
Make it look “expensive” with small details
- Fill nail holes and seams with wood filler.
- Sand progressively (120 → 180 → 220) for a smooth finish.
- Lightly round the front edges for a softer, furniture-like look.
Step 6: Finish the Shelf Before Installing (Your Future Self Will Thank You)
Painting or staining is easier when the shelf is on a table, not floating on a wall while you try not to drip onto your carpet. Prime and paint, or stain and topcoat, and let it cure properly.
Common finishes:
- Painted shelves: Great for crisp, modern looks (semi-gloss or satin cleans easily).
- Stained shelves: Warm, natural vibeuse polyurethane for durability.
Step 7: Install the Shelf Box Over the Cleat
Slide the shelf box over the cleat frame. It should sit flush to the wall. If it stops short, check for:
- Screws protruding from the cleat
- Cleat arms slightly too long
- Box interior too tight (sand the inside edges if needed)
Lock it in place
From underneath, drive a few screws up through the shelf bottom into the cleat arms/braces. This prevents the shelf from sliding forward or shifting over time.
How Strong Are Simple Floating Shelves?
This depends on three things:
- Stud engagement: Screws into studs are the #1 strength multiplier.
- Hardware/cleat design: Thicker, wider cleats distribute load better.
- Shelf depth and leverage: Deeper shelves increase leverage on the wall.
As a general rule, if you want to display heavy items (cookbooks, ceramics, small appliances), build with studs in mind and keep the design stout: more braces, thicker materials, and solid screws. If you’re installing purely with drywall anchors, treat the shelf like a display ledge for lighter decor.
Common Floating Shelf Mistakes (and How to Avoid Them)
Mistake #1: Trusting drywall anchors with “heavy shelf energy”
Anchors can work, but only if they’re rated and installed correctlyand even then, deep shelves can pry them loose over time. If it’s heavy, aim for studs.
Mistake #2: Not leveling at every stage
Level the line, level the bracket/cleat, and level after tightening. Walls and floors are rarely perfect, so your level becomes your best friend.
Mistake #3: Building the shelf box before measuring the cleat
Build the cleat first, then size the box to it. That way, the fit is intentional, not hopeful.
Mistake #4: Skipping pilot holes
Pilot holes reduce splitting and help screws bite straight into studsespecially near board ends.
Design Ideas for Simple Floating Shelves
- Kitchen: Two 36″ shelves stacked for mugs, jars, and cookbooks (keep heavier stuff closer to brackets/studs).
- Bathroom: One 24″ shelf above the toilet for towels and baskets.
- Living room: A long 48″ shelf as a minimalist gallery ledge for framed photos.
- Home office: A shelf above a desk for notebooks, a small plant, and the illusion of being organized.
Extra: Real-World DIY “Experiences” and Lessons Learned (So Your Shelf Story Ends Happily)
If you ask a room full of DIYers about building floating shelves, you’ll hear the same theme: the shelf part is funthe wall part is where the plot twist happens. Below are common, very real experiences people run into when building simple floating shelves, plus how to handle them without turning your Saturday into a wall-repair documentary.
1) “My studs are nowhere near where I want the shelf.”
This is the classic floating-shelf origin story. You choose the perfect spot visually, then discover the studs are doing their own thingoften just far enough away to be annoying. The most practical fix is to slightly adjust shelf length or placement so at least two mounting points hit studs. If your shelf must stay exactly where you planned (symmetry demands it!), many DIYers widen the back cleat so it can reach more studs, then hide that extra width inside a thicker shelf box.
And yes, some people rely heavily on anchors herebut the most satisfying “I can breathe again” moment is when you hear that screw bite into stud. It’s the DIY version of a plot resolution.
2) “My wall is not flat. At all.”
Even in newer homes, walls can bow slightly. When you slide a shelf box onto the cleat, you might see tiny gaps along the top edge or ends. This doesn’t mean you failed; it means drywall is drywall. Many builders plan for this by leaving a hair of tolerance, then using a neat bead of paintable caulk along the top edge after install. The shelf suddenly looks built-in, and the wall’s weirdness becomes a private secret between you and your caulk gun.
3) “It’s level… but it doesn’t look level.”
Sometimes floors, ceilings, or nearby trim are out of level, and your perfectly level shelf looks “off” because the room is lying to your eyes. In these cases, experienced DIYers trust the level for functionbut they also consider visual alignment. If you’re installing multiple shelves, aligning them to each other matters more than aligning to a crooked ceiling line. For a single shelf, you can split the difference: stay close to level but position it so it looks right relative to nearby features (like a window casing).
4) “The shelf slides on… but it wiggles.”
A wiggly floating shelf usually comes down to fit: the shelf box interior is too roomy, the cleat arms aren’t stiff enough, or the bracket/cleat isn’t fully secured. Many DIYers fix this by adding an extra brace on the cleat, tightening set screws (for premade hardware), or shimming inside the shelf box so it fits snugly over the cleat. Once it’s locked down from underneath with a few screws, the wiggle usually disappearslike a nervous puppy finally realizing it’s safe.
5) “I underestimated how much finishing matters.”
Floating shelves are basically a spotlight for your craftsmanship. Nail holes, seams, and rough edges show up fastespecially under kitchen lighting. People often report that the biggest upgrade is simply sanding more carefully, using wood filler well, and painting/staining before installation. Even a basic shelf looks high-end when the finish is smooth and the corners are clean.
6) “I learned the hard way: shelves are levers.”
One of the most valuable lessons DIYers share is that deeper shelves create more leverage on your mounting points. A shelf that’s 12″ deep holding heavy items is working your hardware harder than a 6″ deep shelf holding the same weight. The fix isn’t fearit’s smarter design: keep heavy loads closer to the wall, use studs, add braces, and choose reasonable depths for the job. Your shelf isn’t just decorit’s a physics project that wants to stay on the wall.
Bottom line: the “simple” in how to build simple floating shelves isn’t about cutting cornersit’s about choosing a method that’s forgiving, sturdy, and easy to tune as you go. With solid stud attachment, careful leveling, and a snug shelf-to-cleat fit, your shelves will look clean, hold strong, and give your wall that “effortlessly stylish” vibewithout the wall knowing how many times you re-checked your measurements.
Conclusion
Building simple floating shelves is one of the best DIY projects for leveling up a room fastpun intended. Whether you install premade shelves the right way or build your own cleat-and-box version, the formula is the same: plan the load, find studs, level carefully, and secure the shelf so it can’t shift. Do that, and your shelves won’t just look like they’re floatingthey’ll also feel rock-solid, which is the kind of magic trick your future self will appreciate every single day.