
Table of Contents >> Show >> Hide
- Before You Bend Anything: What “Wrought Iron” Do You Actually Have?
- Safety Setup (Because Band-Aids Don’t Work on Pride)
- Pick Your Method: Cold Bend, Hot Bend, or Machine Bend
- Tools You’ll Use (Choose Your Own Adventure)
- Step-by-Step: How to Cold Bend Wrought Iron (or Mild Steel) Cleanly
- 1) Decide the bend type: angle, radius, S-curve, or scroll
- 2) Mark your bend zone (and avoid stress-raisers)
- 3) Clamp or trap the stock so it can’t slip
- 4) Bend graduallysmall bites beat big regrets
- 5) Plan for springback (metal’s favorite prank)
- 6) Check alignment in two directions
- Example: Cold-bending a garden arch rib
- Step-by-Step: How to Hot Bend Wrought Iron (Best for Tight Curves)
- Jigs That Make Bending Easier (and Your Results Nicer)
- Design Math That Saves Material (and Tears)
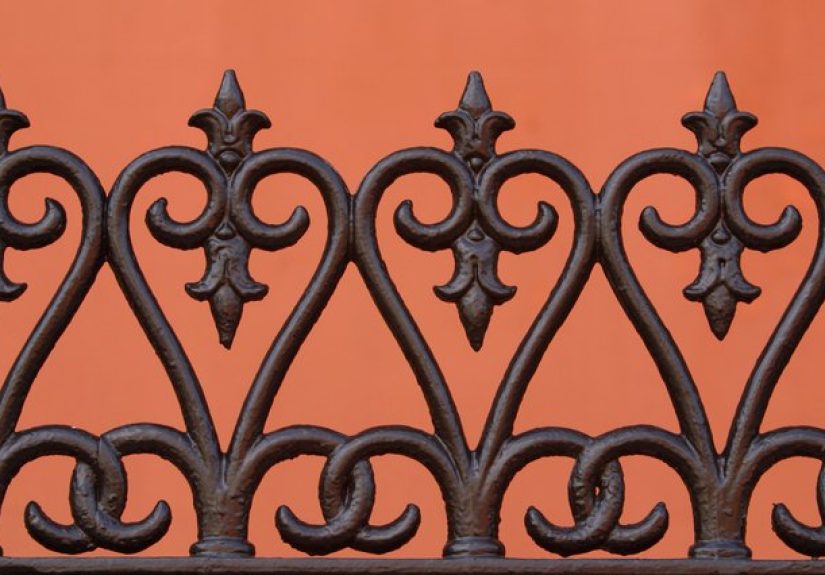
- Common Shapes and How to Bend Them
- Troubleshooting: Fix the Usual Ugly Stuff
- Finish Work: Make It Look Like You Meant To Do That
- When to Call a Pro
- Experience Notes (Real-World Lessons People Learn the Hard Way)
- Conclusion
If you’ve ever looked at a curvy “wrought iron” gate and thought, “How hard can it be?”congratulations.
You’re one optimistic step away from owning three new clamps, a longer cheater bar, and a healthy respect for springback.
This guide walks you through how to bend wrought iron safely and accurately, whether you’re doing quick cold bends for a DIY trellis
or heating stock for tighter radii and scrollwork. You’ll learn how to plan bends, choose tools, build simple jigs, avoid common mistakes,
and get clean, repeatable results without turning your project into modern art (unless that’s the vibe).
Before You Bend Anything: What “Wrought Iron” Do You Actually Have?
True wrought iron vs. “wrought iron” (aka mild steel)
Here’s the twist: a lot of products sold as “wrought iron” today are really mild steel made to look like traditional ironwork.
That’s not a bad thingmild steel bends predictably and is widely available. But true wrought iron (the historic material) behaves a bit differently
because of its fibrous structure and slag inclusions.
In plain terms: wrought iron is low-carbon, soft, ductile, and very workable, especially when heated.
Historically, it was valued because it could be heated and reheated and worked into many shapes.
Mild steel is also bendable, but it may feel “springier” depending on the specific stock and size.
Quick ways to tell what you’re working with
- Age and origin: Antique railings, hardware, and architectural salvage may be real wrought iron. New “wrought iron” panels and pickets are often steel.
- Look for a “grain” in old pieces: True wrought iron can show a wood-like grain or fibrous texture in worn, etched, or fractured areas.
- How it bends when hot: Real wrought iron often forges and bends smoothly at heat, but old pieces can have localized flaws, corrosion, or laminations.
Practical takeaway: the bending process is mostly the same for wrought iron and mild steelplan the bend, support the work, bend gradually, and account for springback.
The difference is that vintage wrought iron deserves extra care: fewer sharp marks, gentler forcing when cold, and more “let’s not rush this” energy.
Safety Setup (Because Band-Aids Don’t Work on Pride)
Cold bending can pinch, slip, and whip a bar around. Hot bending adds burns, UV/IR eye hazards, and fire risks.
Treat bending like a serious shop operation, even if your “shop” is a driveway and your workbench is a stubborn picnic table.
Minimum safety checklist
- Eye protection: Safety glasses for cold work; proper shaded protection for torch/forge work.
- Gloves: For handling stock (but don’t rely on gloves to save you from red-hot metalheat wins).
- Long sleeves and non-synthetic clothing: Sparks and scale don’t care about your favorite hoodie.
- Ventilation: Especially if heating, grinding, or removing coatings/paint.
- Clear area + fire readiness: Keep flammables away; have a fire extinguisher nearby if using heat.
Pick Your Method: Cold Bend, Hot Bend, or Machine Bend
Cold bending (best for light stock and gentle curves)
Cold bending is simple and clean: no heat tint, no scale, less setup. It’s great for thinner flat bar, small round/square stock,
and large-radius curves (arches, hoops, sweeping rails). The tradeoff is effort: thicker stock needs leverage, and tight bends can kink or crack.
Hot bending (best for tight radii, thick stock, and scrollwork)
Heating the bend zone makes the metal far easier to move, helps prevent cracking in older wrought iron, and allows tighter radii and ornate shapes.
You can heat with a propane forge, coal forge, or an oxy-acetylene “rosebud” style torch tip, depending on what you have.
Machine bending (best for repeatability and professional-looking consistency)
If you’re making multiple identical partsbalusters, scrolls, rings, railsmachines and purpose-built benders shine:
rotary draw benders, universal benders, ring rollers, and press fixtures can save you time and reduce variability.
The common theme is control: consistent radius + consistent stop points = consistent results.
Tools You’ll Use (Choose Your Own Adventure)
DIY-friendly cold-bend toolkit
- Sturdy bench vise (the heavier, the better)
- Clamps and a solid work surface
- Cheater bar (a pipe that fits over the stock for leverage)
- Bending fork or bending wrench (optional, but extremely useful)
- Measuring tape, marker/soapstone, square
- Angle grinder + flap disk (for cleanup and final fit)
Hot-bend toolkit
- Forge or torch setup
- Tongs/pliers suitable for hot metal
- Anvil (or a heavy steel block) with a horn or bending surface
- Bending fork/hardy tools/jigs
- Wire brush for scale (hot brushing is very effective)
Jig materials (the secret sauce)
The fastest path to “wow, that looks professional” is a jig. You can build one from plywood, a thick steel plate,
angle iron, bolts/pins, or even ground stakes for big arches. A jig turns bending from “wrestling” into “guiding.”
Step-by-Step: How to Cold Bend Wrought Iron (or Mild Steel) Cleanly
1) Decide the bend type: angle, radius, S-curve, or scroll
Start by sketching the shape at full size if you can. For curves, a paper or plywood template helps.
For angles, decide if you need a crisp corner or a gentle inside radius (most ironwork looks better with a radius than a sharp kink).
2) Mark your bend zone (and avoid stress-raisers)
Mark where the bend should begin and end. If you’re working with older wrought iron, avoid deep scratches, chisel marks,
or notches on the inside or outside of the bend areathose can concentrate stress and invite cracks.
3) Clamp or trap the stock so it can’t slip
In a vise: clamp the bar with the bend line just above the jaws. Use vise jaws or sacrificial plates to reduce marring.
For larger radii: clamp the stock against a template or pin-based jig so the curve forms where you want it.
4) Bend graduallysmall bites beat big regrets
Apply steady pressure. If you’re using a cheater bar, keep your body positioned so a sudden slip won’t send you flying.
For large curves, bend a little, reposition, bend a little more. This “incremental” approach keeps the curve smooth.
5) Plan for springback (metal’s favorite prank)
Most steelsand many wrought-iron-like productswill spring back slightly when you release force.
That means you often need to overbend a little so it relaxes into the target shape.
The stiffer the stock, the more noticeable the springback.
6) Check alignment in two directions
A bend can be the right shape but twisted out of plane. Lay the piece on a flat surface and verify it doesn’t “rock.”
If it does, correct gently in the opposite directionpreferably with controlled pressure, not rage.
Example: Cold-bending a garden arch rib
To form a wide arch (like a garden feature), many DIYers build a simple ground jig: stakes or pins placed to guide the curve.
The bar is pulled around the pins little by little until the arch matches the desired radius. This gives smooth, repeatable results without heat.
Step-by-Step: How to Hot Bend Wrought Iron (Best for Tight Curves)
1) Heat the correct lengthlonger than you think
Heat spreads, and bends “flow.” For a tight bend, heat a short zone; for a gentle curve, heat a longer zone.
Aim for even heat across the section so you don’t create a sharp hinge point.
2) Use color as a guide (and don’t overcook it)
You generally want the bend zone hot enough to move smoothlyoften a red to orange heat depending on the setup and stock size.
Avoid overheating to a sparking, crumbly state (that’s your metal trying to leave the conversation).
3) Bend with support: horn, fork, jig, or form
For classic blacksmith bending, place the hot bar over the anvil horn or a rounded form.
A bending fork in the hardy hole (or held in a vise) helps control radius and keeps the bend in one plane.
If you’re hammering, keep blows controlled and as square as possible to avoid corkscrewing the bend.
4) Reheat often; don’t force it cold
If the metal drops to a dark, non-glowing state, it becomes much harder to move cleanlyespecially older wrought iron.
Reheat and continue. Forcing it cold is how you get cracks, flat spots, and the kind of “character” nobody asked for.
5) Let it cool smart
For many decorative pieces, slow air cooling is a good default. Quenching can introduce internal stresses even in low-carbon materials
and can slightly change how the piece feels and behaves. If you need to handle it sooner, quench only the very end you’re holdingkeep the bend zone cooling naturally when possible.
Jigs That Make Bending Easier (and Your Results Nicer)
The “pins on a plate” bending jig
One of the most versatile DIY jigs is a thick plate (steel or sturdy plywood) with pins/bolts placed to create a bending path.
You trap the bar between pins and pull it around them to form a controlled radius. Move the pins and you’ve got a new radius.
The plywood template jig
For repeated curves, cut a plywood form to the desired shape and bend against it.
Because springback varies by material and thickness, you may need to tweak the template until the released curve matches your target.
Once dialed in, you can make duplicates that match like siblings (not twins, but close).
Scroll jigs (for classic wrought iron scrolls)
Scrolls look fancy but they’re really just controlled, progressive curves. The key is a jig with a center pin (the scroll “eye”)
and guide pins that force the bar to wrap smoothly. Leave extra length, form the scroll, and trim to final size.
Design Math That Saves Material (and Tears)
Measure from the centerline, not the inside or outside
When you bend a bar, the inside compresses and the outside stretches. The most reliable reference is the bar’s central axis
(think of it as the “middle path” through the metal). If you calculate length from the inside radius you’ll come up short; from the outside radius you’ll end up long.
Rule of thumb for first-time projects
- Leave extra length (especially for scrolls and S-curves), then trim.
- Prototype once in cheap stock if the part is critical or repeated.
- Expect springback and plan an overbend test.
Common Shapes and How to Bend Them
90-degree corners (flat bar or square bar)
For crisp corners: heat helps a lot. For cold bends: use a form or corner block to avoid kinking.
A slightly rounded inside radius often looks more “craft” and less “I fought a vise and lost.”
S-curves (rail details, braces, decorative pickets)
Make the first curve, then flip the work and make the second curve in the opposite direction.
Use a template and check often to keep the S symmetrical. If you hammer on the wrong spot, you can accidentally create an unwanted “lazy snake” shape.
Rings and hoops
For consistent rings, a ring roller or bending around a solid mandrel is ideal.
If you’re doing it by hand, form the curve in stages around a round form (pipe, post, or jig pins).
Try not to “hinge” the bar at one pointsmooth curve beats polygon masquerading as a circle.
Scrolls
Start by forming a tight initial curl (the eye), then continue wrapping with steady pressure.
For hot scrolls, keep the bend zone evenly heated so the scroll doesn’t develop flats. For cold scrolls, go slow and accept that thicker stock may need heat.
Troubleshooting: Fix the Usual Ugly Stuff
Problem: Cracks or splits at the bend
- Cause: Too tight a radius, bending old wrought iron with stress marks, forcing cold, or bending across defects/corrosion.
- Fix: Increase bend radius, use heat, avoid notches/marks in the bend zone, and consider replacing badly corroded sections.
Problem: Kinked bend or flat spots
- Cause: Unsupported bending, too sharp of a bend done too quickly, or using the wrong form.
- Fix: Use a radius form/mandrel, bend in increments, or hot bend for tighter curves.
Problem: Twist or “corkscrew” in the bend
- Cause: Uneven force, off-angle hammer blows, or bending without controlling the plane.
- Fix: Use a bending fork/jig to keep the work in-plane; correct twist with controlled counter-twist while warm (or with a vise and wrench when cold).
Problem: It looks right clamped, wrong when released
- Cause: Springback.
- Fix: Overbend slightly, or adjust the jig/template until the released part matches your target.
Finish Work: Make It Look Like You Meant To Do That
Clean up and straighten
After bending, check the piece on a flat surface and correct any out-of-plane wobble.
Remove burrs, sharp edges, and tool marks. If you hot bent, brush off scale and smooth the surface with a flap disk (lightlydon’t grind away the profile).
Protect the metal
For outdoor decorative ironwork, a good coating system matters: clean, prime, and paint (or use an appropriate finish for your environment).
If you’re repairing historic wrought iron, be mindful of matching appearance and avoiding overly aggressive removal methods that can damage original material.
When to Call a Pro
If the piece is structural (handrails, balcony guards, stair safety components), or if you suspect antique wrought iron with significant corrosion,
it’s smart to consult a metal fabricator or restoration specialist. Code compliance and safe anchoring matter more than perfect scroll symmetry.
Experience Notes (Real-World Lessons People Learn the Hard Way)
The first “experience” most people have with bending wrought iron is discovering that the metal does not care how confident you feel.
The second experience is learning that the bend you see under pressure is not the bend you get when you let go.
Springback is the unofficial mascot of metalworkingespecially when you’re bending bar stock cold. A common trick is to make one test bend,
measure how far it rebounds, and then overbend the next one by that amount. Once you do this, bending stops feeling like guesswork and starts feeling like a process.
Another shop-floor reality: jigs are not optional if you want matching parts. People often start with “I’ll just eyeball it,” and end with
three pieces that are “basically the same” in the way that three different dogs are basically the same. A plywood template can be a game-changer.
Many fabricators shape the first successful curve, then immediately use it to refine the template so the next bends land closer to perfect.
The fun part is that you don’t need fancy toolingjust something repeatable. A board, a few screws/bolts as pins, and a clamp can turn chaos into consistency.
If you heat bend, the most common lesson is about heat size. Beginners heat a tiny spot, create a sharp hinge, and wonder why the curve looks kinked.
More experienced hands heat a longer, even section for a smooth radius. The second hot-bend lesson is pacing: the metal moves beautifully at heat,
but it also cools faster than your optimism. Instead of forcing it at a dull color, experienced smiths reheat and keep the bend clean.
This is especially true with older wrought iron, where forcing a cold bend after heating can invite small cracks or delamination in weak areas.
People also learn quickly that marking and measuring matters. A tiny error in where you start a bend becomes a big error at the end of a railing segment.
A common “pro” habit is to mark reference lines and check the work cold on a flat surface before committing to final trimming.
Many metalworkers purposely leave extra length on scrolls and S-curves so they can tune the shape and then cut to the final endpoint.
This reduces the emotional damage of realizing you made the world’s most beautiful scroll… that is two inches too short.
Lastly, there’s the “humbling moment” that almost everyone shares: a bar slipping in the vise, a clamp shifting, or a cheater pipe rotating unexpectedly.
After that moment, people start positioning their body so the bar can’t swing into them, they keep their hands out of pinch points,
and they stop standing directly in the line of fire. The work goes faster when you’re not bracing for impact.
The best bending sessions feel calm: controlled pressure, small adjustments, frequent checks, and a willingness to make a quick test piece
instead of betting the whole project on one heroic pull.
Conclusion
Bending wrought iron is equal parts planning and technique: identify your material, choose cold or hot bending based on thickness and radius,
control the work with a jig or fork, and account for springback. Start with simple curves, build repeatable forms, and you’ll quickly move from
“bent-ish” to “built on purpose.” And if your first attempt is imperfectwelcome to metalworking. That’s not a failure; that’s a prototype.


