Table of Contents >> Show >> Hide
- What Is DeoxIT, Exactly?
- Choose the Right DeoxIT Before You Spray Anything
- How to Apply Deoxit: 6 Steps
- Step 1: Power Down, Unplug, and Let the Device Be Boring for a While
- Step 2: Find the Actual Contact Point
- Step 3: Apply a Small Amount, Not a Heroic Amount
- Step 4: Work the Control or Connection Repeatedly
- Step 5: Wipe Off Excess and Let It Dry
- Step 6: Test the Gear and Decide Whether You Need a Second Pass
- Where DeoxIT Works Best
- Common Mistakes to Avoid
- What Results Should You Expect?
- Real-World Experiences With DeoxIT: What People Usually Learn After the First Try
- Conclusion
If you have ever turned a volume knob and heard a sound like a robot chewing aluminum foil, congratulations: you have met oxidation, dirt, or worn contacts. That is exactly why people reach for DeoxIT. Used correctly, it can help clean noisy connections, revive scratchy controls, and improve unreliable plugs, jacks, switches, and sockets. Used incorrectly, it can turn a simple cleanup into a sticky overspray festival.
The good news is that learning how to apply DeoxIT is not hard. The trick is not brute force. This is not a “more spray, more victory” situation. In most cases, the right method is simple: use the correct formula, apply a very small amount, work the control or connection, wipe away any excess, and then test. Think precision, not chemical thunderstorm.
This guide breaks the process down into six practical steps. It also explains which version of DeoxIT to use, where it works best, which mistakes to avoid, and what real-world users usually discover after their first cleaning session. If you want a cleaner signal and less crackle without guessing your way through the job, this is the place to start.
What Is DeoxIT, Exactly?
DeoxIT is a contact treatment used to clean, protect, and improve electrical connections. It is commonly used on metal contacts such as plugs, jacks, switches, sockets, relay contacts, and many potentiometers. The product is popular in audio repair, guitar maintenance, vintage stereo restoration, AV work, and general electronics troubleshooting because many “mystery problems” are not mysterious at all. They are just dirty or oxidized connections wearing tiny little crowns of chaos.
That said, not every DeoxIT product is the same. This matters more than people expect. If you spray the wrong formula into the wrong part, you might clean it, but you may also strip away lubrication that the component depends on. So before we get to the steps, let’s sort out the lineup.
Choose the Right DeoxIT Before You Spray Anything
DeoxIT D-Series
This is the version most people mean when they say “DeoxIT.” It is generally used for metal contacts and connectors. It is a strong all-around choice for RCA plugs, quarter-inch jacks, cable ends, battery contacts, switches, sockets, and many noisy metal-contact controls. If the issue is oxidation or a flaky metal-to-metal connection, D-Series is usually the first place to look.
DeoxIT Fader
This formula is better for conductive-plastic and carbon-based faders or controls that need lubrication as well as cleaning. Mixers, sliders, some faders, and certain pots fall into this category. If a control relies on a smooth sliding feel, Fader products are often the smarter choice. In plain English: if the part is more “glide” than “click,” do not assume D5 is automatically your best friend.
DeoxIT Gold
This version is often used as a follow-up treatment or for high-quality plated contacts where protection and conductivity improvement matter. It is not usually the first thing you grab for a filthy, scratchy control. Think of it as the finishing move, not the opening scene.
If you are unsure which formula fits your component, look up the control type before applying anything. That ten-second check can save you from turning a scratchy control into a scratchy, dry, annoyed control.
How to Apply Deoxit: 6 Steps
Step 1: Power Down, Unplug, and Let the Device Be Boring for a While
Before applying DeoxIT, turn the equipment off and unplug it. If you are opening up a receiver, amplifier, mixer, or another device with internal components, let it sit for a while so stored charge can dissipate. Some gear can hold voltage longer than expected, so do not rush in like an action-movie electrician.
If the job only involves an exposed connector, such as a cable tip or removable plug, the safety risk is lower. Even then, it is still smart to disconnect power first. A clean contact is nice. A surprise shock is less charming.
Step 2: Find the Actual Contact Point
This is where many people go wrong. They spray where the knob is, not where the electrical contact actually lives. The outer face of a volume knob is usually not the target. The opening on the back or side of the potentiometer body is. The same principle applies to switches and jacks: you want the cleaner to reach the contact surface, not just the scenery around it.
For pots and switches inside equipment, remove the cover carefully and identify the access opening. For jacks, plugs, and cable connectors, you can usually treat the metal contact area directly. For sensitive boards or cramped spaces, a straw, swab, pen applicator, or cloth is often better than spraying freely into the general zip code.
The best rule here is simple: aim for the contact, not the neighborhood.
Step 3: Apply a Small Amount, Not a Heroic Amount
This is the step that separates a smart repair from a slippery mess. Apply a short burst or a light, controlled amount of DeoxIT. That is usually enough. The product works best as a thin layer, not a dripping bath. If you are treating a plug or connector, a little on a lint-free cloth or swab may be all you need. If you are treating the inside of a switch or pot, one quick shot through the access opening is typically plenty.
DeoxIT is not one of those products where the can should feel half-empty after one knob. Overapplication wastes product, creates cleanup work, and can carry grime where you do not want it. Your goal is a whisper of treatment, not a chemical monsoon.
Step 4: Work the Control or Connection Repeatedly
After applying DeoxIT, move the part. Twist the knob from stop to stop. Flip the switch over and over. Insert and remove the plug several times. Slide the fader back and forth. This mechanical action helps spread the treatment across the contact surface and break up oxidation or contamination.
Do not do this once and call it a day. Work it repeatedly and deliberately. Many scratchy controls improve during this phase because the treatment and the motion are doing the real job together. DeoxIT loosens the mess; movement helps scrub it away. Team effort. Beautiful stuff.
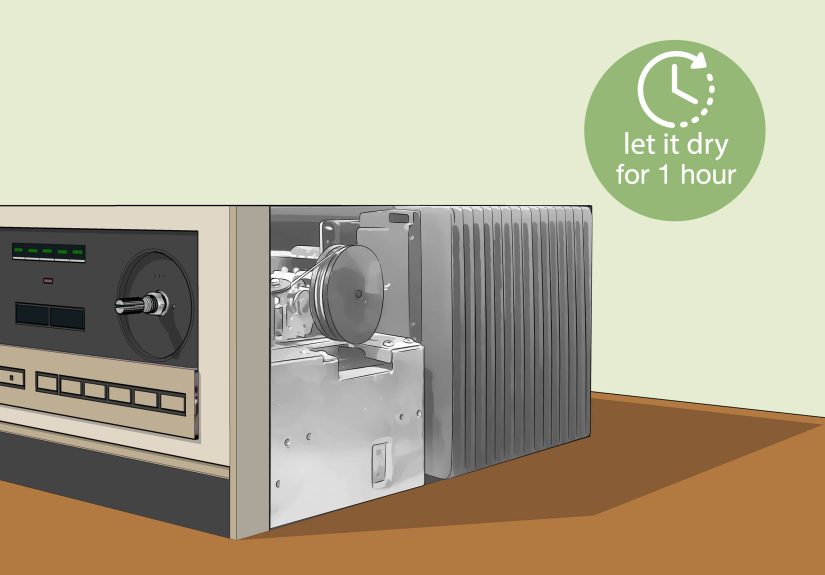
Step 5: Wipe Off Excess and Let It Dry
If any liquid is visible on an accessible surface, wipe away the excess with a lint-free cloth or swab. For external connectors, this is especially important because you want a thin, even film, not a wet, dust-attracting blob. If you sprayed inside a device, give the treated area time to dry before powering up.
In many cases, a couple of minutes is enough before testing, but if you used more product than intended or worked inside a tight assembly, give it longer. Patience is cheaper than replacing a board because you got impatient and hit the power switch while your contact cleaner was still throwing a tiny solvent pool party.
Step 6: Test the Gear and Decide Whether You Need a Second Pass
Once the area is dry, reconnect power and test the control or connection. In the best-case scenario, the noise is gone, the signal is stable, and you feel like an electronics wizard. In other cases, the improvement is partial. That does not always mean the product failed. It may mean the contact was heavily oxidized, contaminated, or mechanically worn.
If the control improves but still acts up, a second light treatment may help. If the problem returns quickly, the part may be damaged or worn out and need repair or replacement. DeoxIT is excellent at cleaning and improving contacts. It is not a miracle cure for broken hardware, cracked solder joints, or controls that have already lived three dramatic lives.
Where DeoxIT Works Best
DeoxIT is most useful when the problem is caused by dirty or oxidized electrical contact surfaces. Common examples include:
Scratchy volume and tone controls
This is the classic use case. Vintage receivers, guitar amps, stereos, and mixers often develop noisy pots over time. A proper application can make a control sound and feel dramatically better.
Intermittent jacks and cable connections
If a cable only works when held at a weird angle that looks spiritually unsustainable, the contact surfaces may be dirty or oxidized. Cleaning the plug and jack can restore a stable connection.
Toggle switches and selector switches
Input selectors, tape monitor switches, and similar controls often get flaky long before they fail completely. A light treatment plus repeated operation can clear them up.
Battery contacts and removable connectors
Where metal surfaces meet and electrical reliability matters, DeoxIT often earns its keep.
Common Mistakes to Avoid
Using the wrong formula
Do not treat every control the same. A metal connector and a conductive-plastic fader may need different products. This is probably the most important mistake to avoid.
Spraying blindly
If you cannot reach the actual contact, spraying more will not fix that. It will only make the inside of your gear smell like determination and solvents.
Using too much
This one deserves repeating. More is not better. DeoxIT is designed to work in very small amounts.
Ignoring mechanical wear
If a control is physically worn out, loose, cracked, or damaged, cleaning may help only temporarily or not at all. At that point, replacement is the smarter solution.
Skipping cleanup
Excess product on accessible surfaces should be wiped away. You want a thin coating, not residue collecting lint and dust like it is building a tiny sweater.
What Results Should You Expect?
When DeoxIT is applied correctly, the most common result is immediate improvement. Crackling often disappears, dropouts become less frequent, and controls feel more responsive. In some cases, that fix lasts a very long time. In others, it buys you time before a part eventually needs replacement.
What DeoxIT does especially well is reveal the truth. If the problem was dirt or oxidation, the control often improves fast. If the problem is deeper, such as mechanical wear, a cracked contact, or internal damage, the symptoms may come back. That is still useful information. A good cleaner can help you separate “dirty” from “dead,” which is half the battle in troubleshooting.
Real-World Experiences With DeoxIT: What People Usually Learn After the First Try
One of the most common experiences with DeoxIT happens in old stereo receivers. Someone buys a vintage unit, hooks it up, turns the volume knob, and gets a soundtrack made entirely of static and regret. After opening the case, finding the rear access point on the volume pot, and applying one small burst, they rotate the knob back and forth a few dozen times. The result is often surprisingly dramatic. The noise drops fast, the music returns, and the owner immediately begins speaking about “restoration” like they now host a repair show in a garage. That kind of quick win is a big reason DeoxIT has such a loyal following.
Guitar players often have a similar story, but with jacks, pedals, and amp controls. A cable crackles when moved, the input jack cuts in and out, or a tone knob sounds scratchy every time it turns. In those cases, a careful DeoxIT application on the plug tip, jack contacts, or noisy pot can solve a problem that felt much larger than it really was. Many people are surprised that what sounded like a failing amplifier was actually just oxidation on a very small metal surface. Electronics can be dramatic like that.
Another common experience comes from people who use too much product the first time. They assume a stubborn control needs a long spray because a short spray did not feel satisfying enough. Then they learn the hard way that DeoxIT is a precision product, not a pressure washer. The control may still improve, but now there is overspray to wipe up, dust waiting to stick, and maybe a little regret. After that first lesson, most users become strict members of the “tiny amount only” club.
Mixer owners and synth users often discover a different lesson: not every noisy control wants the same formula. A rotary metal-contact control may respond nicely to D-Series, while a fader or conductive-plastic slider may need Fader product instead. This is usually the moment people realize that “contact cleaner” is not one universal category. The experience is useful because it changes how they approach future maintenance. They stop treating all controls alike and start matching the product to the part.
There is also the reality-check experience. Sometimes a scratchy pot gets quieter, then starts acting up again a week later. That does not automatically mean DeoxIT failed. Often, it means the cleaning worked, but the part itself is worn or damaged. In practice, many repairers use DeoxIT as both a fix and a diagnostic tool. If the symptoms improve temporarily, the control is at least partially the culprit. If nothing changes at all, the problem may be somewhere else in the chain.
Perhaps the best real-world lesson is that success usually comes from patience, not aggression. The people who get the best results tend to unplug the gear, find the right opening, use a small amount, work the control thoroughly, wipe away excess, and test carefully. The people who get messy results usually skip one of those steps. DeoxIT can be impressively effective, but it rewards calm hands more than heroic spraying. In electronics maintenance, the quiet method usually wins.
Conclusion
If you want to know how to apply DeoxIT the right way, the method is refreshingly straightforward: choose the correct formula, power down the device, reach the actual contact point, apply a very small amount, work the control or connector, wipe away excess, and test after it dries. That is the whole strategy. No magic. No ritual. No need to baptize your receiver in solvent.
Used with care, DeoxIT can be one of the most useful tools in audio and electronics maintenance. It can restore scratchy knobs, improve unreliable connectors, reduce signal dropouts, and help you figure out whether a part is dirty or genuinely worn out. And once you see a noisy control come back to life after a proper cleaning, it is very hard not to feel a little smug about it.