
Table of Contents >> Show >> Hide
- Why the Chrome Bookmarks Bar Matters
- The Fastest Trick: Use the Bookmarks Bar Shortcut
- Method 1: Always Show the Bookmarks Bar via the Chrome Menu
- Method 2: Use Chrome’s Appearance Settings to Keep the Bar On
- Show the Bookmarks Bar Only on New Tab vs. Always
- Device-by-Device: Windows, Mac, Chromebooks, and Mobile
- Tidy Up: Organizing a Busy Bookmarks Bar
- Troubleshooting: When the Bookmarks Bar Won’t Stay Visible
- Real-World Experiences: Living with the Bookmarks Bar Always On
- Conclusion
If you feel like half your day is spent typing the same URLs over and over, it’s time to befriend the
Google Chrome bookmarks bar. This slim little strip under the address bar can save you dozens of clicks a dayif you actually see it. By default, Chrome sometimes hides it, shows it only on the New Tab page, or mysteriously makes it disappear when you least expect it.
The good news: once you know where the settings are, you can make Chrome always show the bookmarks bar on your computer, so your favorite sites are one click away at all times. In this guide, we’ll walk through every methodkeyboard shortcuts, menu options, settings screensplus a few pro tips for keeping that bar tidy instead of turning it into a digital junk drawer.
Why the Chrome Bookmarks Bar Matters
Think of the bookmarks bar as your personal shortcut dock for the web. Instead of hunting through your history or typing full addresses, you just tap a button:
- One-click access to email, project tools, banking, and social media.
- Fewer typos in long URLs (looking at you, complex analytics dashboards).
- Less cognitive load: you “see” your workflow laid out as clickable icons and text.
When the bookmarks bar is always visible, your browser feels customized to you. When it randomly disappears, it feels like your desk drawer got locked shut in the middle of the workday. Let’s fix that.
The Fastest Trick: Use the Bookmarks Bar Shortcut
Before we dive into settings menus, remember the number one shortcut for showing (or hiding) the bookmarks bar:
- Windows, Linux, ChromeOS:
Ctrl + Shift + B - Mac:
Command + Shift + B
Pressing this key combo toggles the bar on and off instantly. It’s the quickest way to bring your bookmarks back if you’ve accidentally hidden them with a stray shortcut press.
However, this shortcut just toggles the current visibility; it doesn’t control whether Chrome prefers showing the bar only on the New Tab page or on all pages. For that, we’ll go into Chrome’s settings.
Method 1: Always Show the Bookmarks Bar via the Chrome Menu
This method works on both Windows and Mac and is perfect if you like clicking through menus rather than memorizing shortcuts.
Step-by-step (Windows, Mac, and Chromebooks)
- Open Google Chrome.
- Click the three-dot More menu in the upper-right corner of the browser window.
- Hover over Bookmarks (or Bookmarks and lists in newer versions).
- Click Show bookmarks bar.
If the bookmarks bar was hidden, it appears immediately. Click the same menu item again and the bar hides. Behind the scenes, this option is tied to the same setting you see in Chrome’s Appearance sectionwhich we’ll tweak next so it stays visible the way you want.
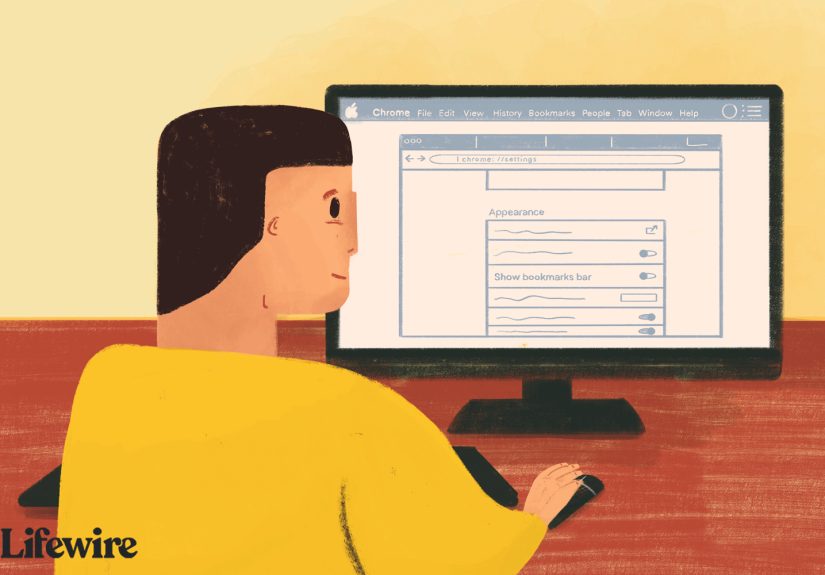
Method 2: Use Chrome’s Appearance Settings to Keep the Bar On
For more control, especially if Chrome is behaving oddly, go straight to the Appearance settings. This is where Chrome decides whether the bar shows:
- On all pages
- Only on the New Tab page
- Not at all
How to Always Show the Bookmarks Bar from Settings
- Open Chrome and click the three-dot menu in the top-right corner.
- Choose Settings.
- In the left sidebar, click Appearance.
- Look for Show bookmarks bar.
- Choose the option that shows the bookmarks bar always (in many builds this is simply a toggle that, when turned on, keeps it visible on all pages).
If you see a dropdown instead of a simple toggle, the wording may be similar to:
- Always – bookmarks bar appears on every page.
- Only on New Tab page – bookmarks bar appears only when you open a blank tab.
- Never – bookmarks bar is completely hidden.
To always show the bookmarks bar, select the “Always” option (or keep the toggle ON if that’s your interface). From now on, whether you’re on your email, a news article, or a random meme site, that bar should stay put.
Show the Bookmarks Bar Only on New Tab vs. Always
While this article focuses on keeping the bookmarks bar always visible, it’s useful to understand the “only on New Tab” behavior:
- Always show: Best for power users, multitaskers, and anyone who lives in their browser. Your most-used sites are always one click away.
- Only on New Tab: Great if you want a cleaner look on active pages but still want a visual bookmark hub whenever you open a new tab.
Many users accidentally land in the “New Tab only” setting and think Chrome is being moodyshowing the bar sometimes and hiding it other times. In reality, Chrome is just following that preference. Switching to “Always” removes the confusion.
Device-by-Device: Windows, Mac, Chromebooks, and Mobile
On Windows, Linux, and ChromeOS
The experience is almost identical:
-
Use
Ctrl + Shift + Bto toggle the bar. - Use the three-dot menu → Bookmarks → Show bookmarks bar.
- Use Settings → Appearance → Show bookmarks bar to choose whether it’s always visible.
Chromebooks use Chrome as their primary browser, so the settings feel very familiar. The Appearance section and bookmarks bar behavior are nearly the same.
On macOS
On a Mac, Chrome’s behavior is basically the same as on Windows; the main differences are shortcuts and the presence of the macOS menu bar:
-
Use
Command + Shift + Bto show or hide the bookmarks bar. - Go to the top of the screen and use Chrome’s menu: Chrome → Settings or click the three-dot icon in the window to reach the same settings.
- In Settings → Appearance, turn on Show bookmarks bar so it’s always visible.
On Android and iOS (Important Reality Check)
Here’s where expectations meet reality: the classic bookmarks bar that sits under the address bar does not exist in the same way on mobile Chrome.
On phones and tablets:
- You can still create and organize bookmarks.
- You access them via the menu (three dots) → Bookmarks.
- Chrome may sync your bookmarks from desktop if you’re signed into the same Google account.
But you cannot make a persistent horizontal bookmarks bar appear at the top or bottom of the screen like on desktop. Mobile Chrome focuses on maximizing screen space, so you’ll need to live with bookmark menus and the “star” icon instead of a fixed bar.
Tidy Up: Organizing a Busy Bookmarks Bar
Once you’ve forced Chrome to always show the bookmarks bar, there’s a good chance it looks like a crowded train at rush hour. The bar is only helpful if you can actually see and recognize your bookmarks. Try these clean-up tricks:
1. Use Short Names or Only Icons
Right-click a bookmark on the bar and choose Edit. You can:
- Shorten the name to something tiny like “Mail,” “Bank,” or “PM.”
- Delete the bookmark’s name completelyleaving just the favicon icon. This is perfect for instantly recognizable sites like Gmail, YouTube, or your task manager.
2. Group Bookmarks into Folders
Instead of letting individual bookmarks stretch off the edge, group them into themed folders:
- Work – project tools, company dashboards, documentation.
- Personal – banking, shopping, social networks.
- Learning – courses, tutorials, reading lists.
- Travel / Fun – flight trackers, hotel sites, news, hobbies.
Right-click the bar, choose Add folder…, name it, and drag bookmarks into it. You’ll transform a cluttered strip into a neat set of dropdown menus.
3. Take Advantage of Bookmark Manager
For serious organization, open the Bookmark Manager:
- Windows/Linux/ChromeOS:
Ctrl + Shift + O - Mac:
Command + Option + B(or use the menu: Bookmarks → Bookmark Manager)
There, you can drag and drop bookmarks and folders, rename them in bulk, or clean out old links you never use. The more intentional you are here, the more powerful your always-visible bookmarks bar becomes.
Troubleshooting: When the Bookmarks Bar Won’t Stay Visible
Sometimes Chrome doesn’t behave exactly as you expect. Here are a few common hiccups and fixes:
1. The Bar Shows on New Tabs but Disappears on Other Pages
This usually means Chrome is set to show the bookmarks bar only on the New Tab page. Go to:
Settings → Appearance → Show bookmarks bar and choose the “Always” option (or keep the toggle turned on, depending on your version). Then reload any open pages.
2. The Shortcut Isn’t Working
If Ctrl + Shift + B (or Command + Shift + B on Mac) doesn’t toggle the bar:
- Make sure Chrome is the active window when you press the shortcut.
- Check if another app or system-level shortcut is intercepting that key combo.
- Try toggling via the menu: three dots → Bookmarks → Show bookmarks bar.
3. Bookmarks Bar Looks Different in Incognito Mode
Chrome treats incognito as a separate browsing session. In some versions, your bookmarks bar visibility can behave differently there, and shortcuts may not seem to have the same effect. If the bar doesn’t match your normal window:
- Open a regular (non-incognito) window and confirm your bookmarks bar setting first.
- Close and reopen any incognito windows after you adjust the Appearance settings.
4. Sync Issues Across Devices
If you have multiple computers:
- Sign into the same Google account in Chrome on each device.
- Turn on sync for Bookmarks in Chrome’s sync settings.
The content of your bookmarks and folders will sync across devices, but the visibility preference of the bookmarks bar itself can sometimes feel device-specific. To be safe, set Show bookmarks bar to “Always” on each computer where you want it visible.
Real-World Experiences: Living with the Bookmarks Bar Always On
So what is it actually like to live with the Chrome bookmarks bar always visible? Once you get past the initial setup, it can seriously upgrade your daily browsing flow. Here’s what that looks like in practice.
Turning the Bookmarks Bar into a “Web Control Panel”
Many people treat the bookmarks bar as a random parking lot for whatever they saved last month. A better approach is to think of it as your control panel for the internet. Instead of asking, “What do I want to bookmark?” ask, “What do I use every single day?”
For example, your always-visible bar might include:
- Gmail or Outlook for email
- Your calendar
- Your main project management tool (Asana, Trello, ClickUp, etc.)
- Cloud storage (Drive, Dropbox, OneDrive)
- Communication tools like Slack or Teams
- A “Daily” folder with your morning reading list or dashboards
Once this is set, opening Chrome feels like logging into a cockpiteverything essential is one click away, with no searching or typing required.
Using Folders to Match Your Brain, Not the Browser
One of the underrated “experiences” with the bookmarks bar is how much it can reduce mental friction if the folders match how you think. Instead of organizing by technical categories (like “Productivity,” “News,” “Tools”), try categories that reflect life roles:
- Work – Today for current projects and temporary resources.
- Work – Reference for docs and wikis you use often.
- Home & Life for bills, banking, and household accounts.
- Health & Fitness for workout plans, trackers, or health portals.
- Just for Fun for comics, hobbies, or “break” sites.
You’ll find that when the bookmarks bar layout mirrors how you think about your day, you hesitate less and focus more. Clicking into “Work – Today” feels like starting your shift; clicking into “Just for Fun” feels like clocking out.
Balancing Minimalism with Convenience
Some people love a super-clean browser with nothing visible; others want a permanent parade of icons and text. Keeping the bookmarks bar always visible doesn’t mean it has to look cluttered. A popular compromise is:
- Use icons only for your top 5–7 sites (no text labels).
- Use short names for less frequent but important bookmarks.
- Hide rarely used bookmarks in folders that don’t live on the bar at all, but in the main bookmarks menu.
The result: you still have one-click access, but the bar looks neat and minimal. It fades into the interface until you need it.
How the Bookmarks Bar Changes Productivity Over Time
The real magic of always showing the bookmarks bar appears after a few weeks. You stop thinking about URLs altogether. Your muscle memory handles the rest:
- Your cursor naturally drifts to the same few icons whenever you start work.
- You open your bank or utility accounts in seconds instead of hunting through search results.
- You spend less time in your history and more time getting things done.
Over time, you’ll refine what lives on the bar. Some sites will “graduate” onto the bar because you use them daily; others will be demoted into folders or deleted. That’s normalyour bookmarks bar should evolve with your workflow.
Knowing When to Hide the Bar (Yes, Sometimes)
Even if you love having the bookmarks bar always visible, there are times when hiding it temporarily makes sense:
- Screensharing during a presentation and you don’t want to reveal your personal bookmarks.
- Recording a video or taking screenshots where a clean interface looks more professional.
- Focusing on a single task where every bit of vertical space helps.
This is where that trusty shortcut (Ctrl/Command + Shift + B) shines. Think of it as “presentation mode” for your browseroff when you’re sharing, always back on when you return to your normal work.
Ultimately, the best “experience” with the Chrome bookmarks bar is the one that feels invisible and effortless: it’s just there, quietly supporting you in the background. Once you’ve set Chrome to always show the bar and organized it in a way that matches your life, you’ll wonder how you ever lived with it disappearing at random.
Conclusion
Making Chrome always show the bookmarks bar takes only a few clicks: tweak the Appearance setting, toggle the bookmarks bar on, and learn the quick shortcut to control it on demand. The real payoff comes from how you use that spacecurating a small, focused set of bookmarks and folders that reflect your daily needs.
Once you’ve done that, the bookmarks bar stops being a decoration and turns into a command center for your online life. Your future selfwho spends less time typing URLs and digging through historywill be very grateful.
SEO JSON TAGS


