
Table of Contents >> Show >> Hide
- What Does “Hide the Ugly Vent for $6” Really Mean?
- Safety First: Do Not Block the Vent
- The Best $6 Method: Paint the Vent to Blend With the Wall
- Other Cheap Ways to Make an Ugly Vent Look Better
- Common Mistakes to Avoid
- Best Rooms for This DIY Vent Makeover
- Design Ideas for Different Home Styles
- When a $6 Fix Is Not Enough
- Experience Notes: What This $6 Ugly Vent Makeover Feels Like in Real Life
- Conclusion
Every home has at least one design villain. Sometimes it is a mystery cable. Sometimes it is a thermostat placed exactly where art should go. And sometimes, it is an ugly vent sitting on the wall like it pays rent. The good news? You do not need a contractor, a custom grille, or a “luxury architectural airflow solution” that costs more than your coffee table. You can hide the ugly vent for $6 with a smart, simple, and safe DIY vent makeover.
Before we get too excited and start taping baskets, rugs, or picture frames over every register in the house, let’s be clear: hiding a vent should never mean blocking airflow. Your HVAC system needs supply vents and return air grilles to breathe properly. When vents are sealed, covered, or jammed behind furniture, your heating and cooling system may work harder, rooms may feel stuffy, and indoor air quality can suffer. The goal is not to suffocate the vent. The goal is to make it stop looking like a sad metal waffle on your wall.
This guide shows you how to transform an old vent cover using a low-cost paint-and-refresh method, plus a few renter-friendly tricks, style ideas, and safety notes. It is budget home improvement with a tiny price tag and a surprisingly big visual payoff.
What Does “Hide the Ugly Vent for $6” Really Mean?
The phrase sounds dramatic, but the best version of this project is wonderfully practical. Instead of physically covering the vent, you make it visually disappear. That usually means cleaning it, smoothing rough spots, painting it to match the wall or trim, and reinstalling it neatly.
Think of it as camouflage, not concealment. A bright white vent on a charcoal wall screams, “Look at me!” A painted vent in the same wall color quietly steps into the background. A yellowed plastic grille on fresh white trim looks old and neglected. Clean it, paint it, and suddenly it looks intentional. No magic. No complicated tools. No expensive decorative grille required.
The $6 Budget Breakdown
Prices vary by store and location, but the basic budget can look like this:
- Small paint sample, craft paint, or leftover wall paint: about $3 to $6
- Foam brush or small angled brush: about $1 to $2
- Fine-grit sandpaper or sanding sponge: about $1
- Dish soap, rag, old toothbrush, and screwdriver: usually already at home
If you already have paint, this project may cost almost nothing. If you buy one small sample pot and a cheap foam brush, you can often keep the makeover around the famous $6 mark. The point is not to win an accounting award. The point is to fix an eyesore without turning a tiny vent into a major renovation.
Safety First: Do Not Block the Vent
Some online “vent hiding” ideas look cute for exactly seven seconds, then become a bad idea. A basket over a return grille, a canvas mounted too tightly over a supply vent, or a magnetic sheet that seals airflow can interfere with your HVAC system. It may also make the room less comfortable. If the vent is connected to a dryer, bathroom exhaust fan, range hood, or combustion appliance, blocking it can create serious safety problems.
Use this simple rule: air should still move freely. If the vent was designed to pull air in or push air out, your makeover must respect that job. Paint is fine. Cleaning is fine. Replacing an old cover with the correct size is fine. A decorative screen can work only if it is open enough and installed with enough space for airflow. A sealed cover is not a design hack; it is a problem wearing a cute outfit.
The Best $6 Method: Paint the Vent to Blend With the Wall
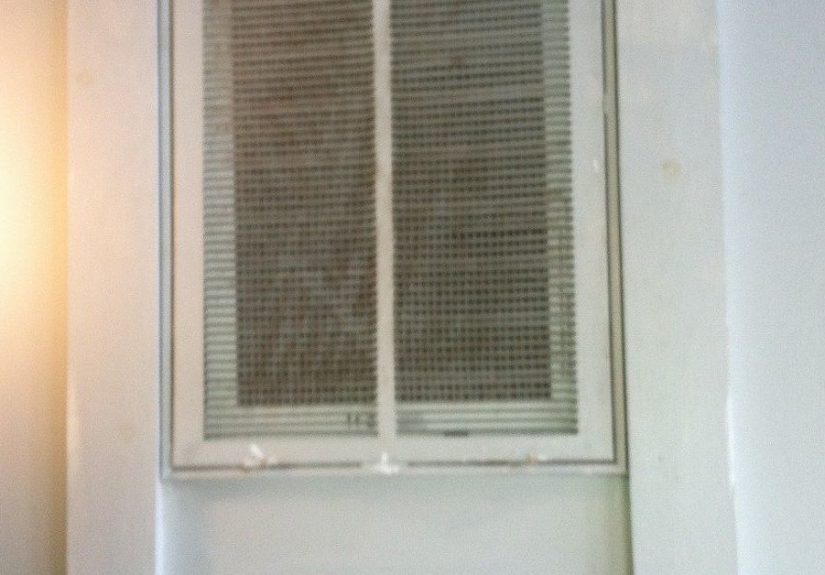
The easiest way to hide an ugly wall vent is to paint the vent cover the same color as the surface around it. This works especially well on return air grilles, wall registers, ceiling vents, and older metal covers that still function properly but look dated.
Step 1: Identify the Vent Type
Before removing anything, figure out what kind of vent you are working with. A supply register pushes heated or cooled air into the room. A return grille pulls air back into the HVAC system. A bathroom exhaust grille removes moisture. A dryer vent exhausts hot, lint-filled air outdoors. For this DIY project, focus on standard HVAC room vents and grilles. Do not paint or decorate anything that looks damaged, overheated, moldy, or connected to a dryer exhaust.
Step 2: Remove the Vent Cover Carefully
Most wall and ceiling vent covers are held in place with screws. Hold the cover with one hand while loosening the screws with the other. Ceiling covers can drop unexpectedly, so wear eye protection and keep your face out of the fall zone. Floor registers may simply lift out. Place the screws in a cup or small bag so they do not vanish into the same dimension where missing socks live.
Step 3: Clean Like You Mean It
Paint does not love dust, grease, pet hair, or mystery fuzz. Wash metal or plastic covers with warm water and a little dish soap. An old toothbrush is perfect for scrubbing between slats. If the cover is greasy, add a splash of white vinegar to the cleaning water. Rinse well and dry completely. Do not reinstall a wet cover, especially if it is metal, because trapped moisture can encourage rust.
Step 4: Sand Lightly
If the cover is glossy, rusty, or flaky, give it a light sanding with fine-grit sandpaper. You are not trying to reshape metal. You are simply giving the paint something to grip. Wipe away sanding dust with a damp cloth and let the cover dry again.
Step 5: Paint Thin Coats
Use thin coats rather than one thick glob of paint. Thick paint can collect in the slats, drip, or make the cover look homemade in the wrong way. A foam brush works well for flat areas, while a small angled brush helps around louvers. If using spray paint, work outdoors or in a very well-ventilated area, follow the product label, and protect surrounding surfaces. For a teen DIYer, ask an adult to help with spray paint, ladders, and overhead vent removal.
For the best “hidden” effect, match the vent to the wall color. For a more decorative look, match it to trim, door hardware, or cabinet pulls. A black vent on a black accent wall can look sleek. A soft white vent on white shiplap looks clean. A bronze or matte black floor register can look intentional in a room with warm wood floors and dark hardware.
Step 6: Let It Cure
Dry paint and cured paint are not the same thing. The cover may feel dry after an hour, but it can still scratch easily. Give it as much curing time as the paint label recommends. If you rush, the screws may twist through fresh paint and leave tiny scars. Patience is free, which fits beautifully into our $6 budget.
Step 7: Reinstall and Check Airflow
Put the cover back in place, tighten the screws gently, and turn on the HVAC system. Feel for airflow. If the vent has adjustable louvers, make sure they still move. If paint has sealed any openings, remove the cover and clear them carefully. The finished vent should look better while still doing its job.
Other Cheap Ways to Make an Ugly Vent Look Better
Painting is the star of the $6 vent makeover, but it is not the only budget-friendly option. Depending on the vent location, room style, and whether you rent or own, you can choose a few different approaches.
Use the Same Wall Color for a Disappearing Effect
This is the most reliable design trick. When the vent cover matches the wall, your eye does not stop there. It becomes background texture instead of visual clutter. This is especially helpful in small rooms, hallways, and living rooms where every detail feels noticeable.
Choose Contrast on Purpose
Sometimes hiding means making something look intentional. If you have black door handles, black curtain rods, or dark light fixtures, a black vent cover may feel coordinated rather than random. The key is repetition. One black vent in a room with no other black accents can look accidental. A black vent in a room with matching hardware can look like part of the design plan.
Swap the Screws
Old screws can make a freshly painted cover look tired. If the screw heads are rusty, stripped, or painted into little blobs, replace them with matching screws. This tiny detail costs very little and makes the project look cleaner.
Frame Around It, Not Over It
If your vent sits in an awkward location, you can add visual balance around it. For example, hang art nearby, place a console table below it with several inches of clearance, or use a gallery wall layout that includes the vent as part of the spacing. Just do not cover the grille. The goal is to distract the eye, not trap the air.
Replace Only When Necessary
If the vent cover is bent, broken, badly rusted, or the wrong size, painting may not be enough. In that case, measure the duct opening, not just the outside of the old cover. Vent covers are sized by the opening they fit, while the outside frame is larger. Buying the wrong size is a classic DIY mistake, right up there with “I definitely do not need to label these screws.”
Common Mistakes to Avoid
A cheap DIY project should not create an expensive HVAC problem. Avoid these common vent makeover mistakes.
Mistake 1: Covering the Vent With Fabric
Fabric may look soft and decorative, but it collects dust and can reduce airflow. If it is near a heat source, it may also be unsafe. Skip curtains, scarves, canvas, and upholstery directly over vents.
Mistake 2: Using a Closed Magnetic Cover on a Working Vent
Magnetic covers are sometimes sold as draft blockers, but they can restrict airflow. They may be useful in very specific situations, but they are not the right solution for a vent your HVAC system actively uses. When in doubt, keep the vent open.
Mistake 3: Painting the Vent While It Is Still Installed
It is tempting to brush paint over the vent in place, but removing the cover gives you a cleaner finish and prevents paint from getting inside the duct or sealing the edges to the wall. It also lets you clean hidden dust behind the cover.
Mistake 4: Ignoring Rust or Mold
A little surface rust on an old metal register can often be sanded and painted. But heavy rust, moisture stains, musty smells, or visible mold deserve more attention. Those may point to condensation, leaks, or ventilation problems. A pretty paint job should not be used to hide a real home maintenance issue.
Mistake 5: Forgetting the Filter
If your return grille holds an air filter, make sure the filter fits correctly after reinstalling the cover. A warped, blocked, or missing filter can allow dust to move through the system. A clean vent cover looks nice, but a properly maintained filter helps the whole system perform better.
Best Rooms for This DIY Vent Makeover
This project works almost anywhere, but a few rooms benefit the most.
Living Room
Living rooms often have wall vents in highly visible areas. Painting the cover to match the wall can make the room feel more polished without buying new decor.
Bedroom
A yellowed vent near the bed can make an otherwise cozy bedroom look unfinished. A soft wall-matched color helps it fade into the background.
Hallway
Hallways are narrow, so every visual interruption stands out. A freshly painted return grille can make the entire hallway feel cleaner.
Kitchen
Kitchen vents collect grease and dust faster than vents in other rooms. Cleaning alone can make a big difference. If you paint a kitchen vent, make sure it is fully clean first, or the finish may peel.
Bathroom
Bathroom exhaust grilles need to move humid air out of the room. You can clean and refresh the visible grille, but do not block the fan opening. If the fan is noisy, weak, or dusty inside, maintenance may be more important than decoration.
Design Ideas for Different Home Styles
A vent makeover should match the room, not fight it. Here are a few style directions that work well.
Modern Minimalist
Use the exact wall color and keep the finish smooth. The vent should practically disappear. This works beautifully with white, beige, gray, and deep accent walls.
Farmhouse
Choose warm white, soft black, or oil-rubbed bronze tones. Pair the vent color with door hinges, cabinet pulls, or light fixtures for a coordinated look.
Boho
Keep the vent subtle so natural textures can shine elsewhere. Paint it to match the wall, then bring personality through baskets, plants, and textiles placed safely away from airflow.
Traditional
Match trim color for a crisp, classic finish. If your home has detailed molding, a clean white or cream vent cover often feels more natural than a high-contrast color.
Industrial
Matte black, dark gray, or metal-look finishes can work well, especially if the room already includes exposed hardware, metal shelving, or dark lighting.
When a $6 Fix Is Not Enough
Sometimes an ugly vent is only ugly. Other times, it is trying to tell you something. If you notice weak airflow, whistling sounds, black streaks, recurring dust, rust, moisture, or rooms that never feel comfortable, the issue may be bigger than the cover. You may need to replace the register, seal gaps around the duct connection, change the filter, or call an HVAC professional.
Also, do not use this project to cover a dryer vent problem. Dryer exhaust vents must remain clear because lint buildup and restricted airflow can create fire risks. If clothes take longer than usual to dry, the dryer feels unusually hot, or you see lint around the vent opening, cleaning and inspection matter more than appearance.
Experience Notes: What This $6 Ugly Vent Makeover Feels Like in Real Life
The funny thing about an ugly vent is that you may ignore it for years, then suddenly see nothing else. You walk into the room, and there it is: a beige, dusty rectangle interrupting your fresh paint, new curtains, or carefully chosen wall art. It is not dramatic enough to justify a renovation, but it is annoying enough to bother you every time the sunlight hits it.
The $6 makeover is satisfying because it gives you a quick win. You remove the cover and immediately feel like a capable homeowner, even if the rest of the room still contains a laundry chair with a full-time job. Then you clean the grille and realize the “old color” was partly dust. This is the humbling part. Vents are basically tiny dust museums, and yours may have been curating an exhibit for years.
Once the cover is clean, the project starts feeling fun. Sanding takes only a few minutes. Painting thin coats feels almost too easy. The biggest challenge is waiting. DIY projects have a way of making people impatient, especially when the finish looks dry but is still soft enough to scratch. Give it time. A clean, cured finish is what makes the difference between “budget upgrade” and “I attacked this with paint during a commercial break.”
When the cover goes back on the wall, the room often looks calmer. The vent does not vanish completely, of course. It is still there, doing its important little airflow job. But it no longer yells for attention. On a white wall, it looks fresh. On a dark wall, it blends into the drama. In a hallway, it stops breaking up the sightline. In a bedroom, it feels less like a utility object and more like part of the background.
One of the best experiences with this project is how it changes your eye for small details. After fixing one vent, you may notice switch plates, outlet covers, doorstops, cabinet hinges, and other tiny home features that could use a refresh. This is both empowering and dangerous, because suddenly a $6 project becomes a weekend of “while I’m at it” improvements. But that is the charm of budget DIY. Small upgrades build momentum.
The most important lesson is restraint. You do not need to disguise every functional object with elaborate decor. Sometimes the cleanest solution is the simplest one: clean it, paint it, reinstall it, and let it work. A home does not have to hide every practical feature. It just needs those features to look cared for.
So yes, you can hide the ugly vent for $6. Not by blocking it. Not by pretending airflow is optional. Not by buying a designer grille that costs more than dinner. You hide it by making it blend in, behave, and stop stealing attention from the rest of the room. That is the kind of tiny home improvement that deserves a victory lap, or at least a proud glance every time the HVAC kicks on.
Conclusion
Hiding an ugly vent for $6 is one of the simplest budget home improvement projects you can do. The secret is not to cover the vent, but to refresh it so it blends with your room. Clean the cover, sand lightly, paint thin coats, let it cure, and reinstall it without restricting airflow. The result is a cleaner, calmer, more intentional space without a pricey renovation.
Whether you are dealing with a yellowed return grille, a scratched floor register, or a wall vent that interrupts your decor, this easy DIY vent cover makeover can make a real difference. Just remember: pretty is good, but airflow is essential. Let the vent breathe, and your room can look better without making your HVAC system grumpy.
Note: This article is for decorative DIY guidance only. Do not block, seal, or restrict active HVAC vents, dryer vents, bathroom exhaust fans, or range hood vents. If you notice poor airflow, rust, mold, unusual heat, or moisture issues, contact a qualified professional.


