
Table of Contents >> Show >> Hide
- Start Smart: The 20-Minute Planning Routine That Saves Weeks
- Project #1: Build a Raised Bed Garden That Actually Produces
- Project #2: Compost Bin (a.k.a. Turning Scraps Into “Garden Gold”)
- Project #3: Drip Irrigation (Stop Watering Like It’s 1847)
- Project #4: Rain Barrel (Free WaterWith a Few Grown-Up Rules)
- Project #5: Pollinator Garden That Looks Intentional (Not Like “Oops, I Forgot to Mow”)
- Project #6: Vertical Supports (Trellises, Arbors, and the Art of Getting Plants Off the Ground)
- Project #7: Mulch Upgrade (The Unsexy Project That Makes Everything Better)
- Project #8: Seed-Starting Station (Raise Your Own Plants Like a Backyard Wizard)
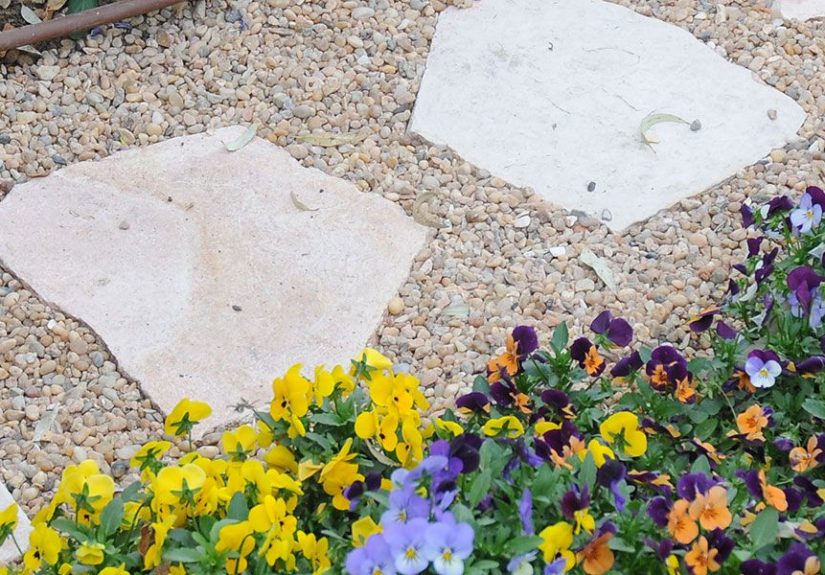
- Project #9: DIY Garden Path and Edging (Instant “Designed” Vibes)
- Common Garden Project Mistakes (So You Don’t Have to Learn the Hard Way)
- Conclusion: Your Best Garden Projects Are the Ones You’ll Repeat
- Field Notes: of Real-World Garden Project Experience
Garden projects are basically the adult version of building blanket fortsexcept your fort grows tomatoes, attracts butterflies,
and occasionally humbles you with a surprise zucchini the size of a small canoe. Whether you’ve got a suburban backyard, a tiny
patio, or one determined windowsill, the right DIY garden projects can make your space prettier, more productive, and
dramatically more satisfying than doom-scrolling plant memes.
Below is a practical, step-by-step guide to high-impact DIY garden projects you can actually finish, plus the
“why it works” behind each one. You’ll get specific examples, realistic costs, and a few hard-earned lessons (including the
universal truth that mulch is never as “done” as you think it is).
Start Smart: The 20-Minute Planning Routine That Saves Weeks
The best garden projects aren’t the fanciestthey’re the ones that fit your sunlight, your schedule, and your tolerance for
hauling bags of soil like you’re training for a gardening-themed CrossFit event.
1) Map your light (and be brutally honest)
Most vegetables and many flowering plants want “full sun,” which typically means about 6–8+ hours of direct sun. Before you
build anything, watch your yard for a day (or use a phone note): where is bright sun at 9am, noon, 3pm? If your “sunny spot”
turns into shade by lunchtime, plan a shade-friendly project (herbs, leafy greens, container gardening) instead of forcing
tomatoes to live a sad, leggy life.
2) Do one quick soil check
If you’re planting in the ground, a basic soil test helps you avoid the classic “Why are my plants miserable?” mystery.
A simple approach: take small samples from multiple spots, mix them, and test that composite. Many gardeners sample about the
top 6 inches where roots feed and where amendments matter most.
3) Pick your “project theme”
- Food: raised bed garden, trellis, seed-starting station, drip irrigation
- Low-maintenance beauty: pollinator garden, mulched beds, edging/pathways
- Water-wise: rain barrel, drip line, mulch upgrades
- Small space: container gardening, vertical garden, window boxes
Project #1: Build a Raised Bed Garden That Actually Produces
A raised bed is one of the best “foundation” garden projects because it improves drainage, warms up earlier in spring,
and gives you control over soil quality. It’s also a polite way of telling your yard’s weeds: “We’re not negotiating.”
Recommended size (why 4×8 is a classic)
A 4×8-foot bed is popular because you can reach the center from either side without stepping on the soil (and compacting it).
If you’re shorter, consider 3–4 feet wide max. Height matters too: many productive beds run roughly 6–12 inches of soil depth
(more depth can be nicer for roots and for your back, but costs more to fill).
Materials checklist
- Untreated, rot-resistant lumber (or metal kit)
- Exterior screws
- Cardboard (optional weed-smother layer)
- Soil blend (see below)
- Hardware cloth (optional if you have burrowing pests)
Build steps (simple version)
- Square it up: assemble the frame, check corners, tighten screws.
- Set the base: remove grass or smother with cardboard; level the bed.
- Fill with a practical mix: aim for a fluffy, well-draining blend.
- Plant intentionally: group crops by water needs and sunlight needs.
Soil mix that doesn’t turn into a brick
You want structure + drainage + nutrition. Many gardeners use a combination of topsoil, compost, and an aeration component
(like coarse material that helps keep things loose). The exact recipe depends on what’s available locally, but the principle
is consistent: avoid pure compost as a “soil” and avoid pure bagged “topsoil” that compacts.
Example planting plan for one 4×8 bed
- North side: trellised cucumbers or pole beans (they won’t shade shorter plants)
- Center: peppers or bush tomatoes (with cages)
- South edge: basil, lettuce, scallions (quick wins)
Time & cost reality check: 2–4 hours to build; filling is the expensive part. The bed frame may be the cheap date. The soil is the bill.
Project #2: Compost Bin (a.k.a. Turning Scraps Into “Garden Gold”)
Composting is the most satisfying kind of recycling because the payoff is literal: dark, crumbly material that boosts soil
and helps it hold moisture. It also reduces food wasteso you can feel virtuous while you dramatically stir a pile with a
shovel like you’re in an intense cooking show.
The balance that prevents stink
Compost works best with a balance of carbon-rich “browns” (dry leaves, shredded paper, straw) and nitrogen-rich “greens”
(vegetable scraps, coffee grounds, fresh grass clippings). A common rule of thumb is roughly 2–3 parts browns to 1 part greens by volume.
What to put in (and what to skip)
- Yes: fruit/veg scraps, coffee grounds, eggshells, leaves, shredded cardboard (non-glossy)
- Skip: meat, dairy, greasy foods (invites pests and odors)
Two easy bin designs
- Wire ring bin: fast and cheap. Great for leaves + garden trimmings. Add kitchen scraps carefully (bury them).
- Lidded bin: better for pest control and tidy yards. Look for good airflow and a secure lid.
Troubleshooting like a pro
- Smells bad: add browns, turn the pile, and bury fresh scraps deeper.
- Not breaking down: chop inputs smaller, add greens, keep it lightly damp.
- Too dry: water lightly while turning (think “wrung-out sponge,” not “swamp”).
Project #3: Drip Irrigation (Stop Watering Like It’s 1847)
If you only do one “upgrade” garden project, make it water efficiency. A drip irrigation system delivers water near
roots, reduces evaporation, and can be automated with a timermeaning your garden won’t punish you for going on a weekend trip.
Why drip beats sprinklers for many gardens
- Water goes where roots can use it (less wasted spray)
- Leaves stay drier (often fewer fungal issues)
- You can tune watering by bed or zone
Simple raised-bed drip setup
- Filter + pressure regulator: keeps emitters from clogging and prevents blowouts.
- Mainline tubing: runs along the bed edge.
- Emitter tubing (drip line): common options have emitters spaced about 9–12 inches apart.
- Timer: the secret weapon for consistency.
Example: watering strategy that avoids plant drama
Instead of daily sprinkles, many gardens do better with deep, less frequent watering that encourages roots to go down.
Your actual schedule depends on soil type, heat, and plant stage. The point is to water deliberately, not anxiously.
Pro tip: Run drip early morning. Your plants hydrate, your evaporation stays low, and you’re not standing outside at noon holding a hose like it’s a microphone.
Project #4: Rain Barrel (Free WaterWith a Few Grown-Up Rules)
A rain barrel captures roof runoff and stores it for later use in the yard. It’s a smart water-saving garden project
and also helps reduce stormwater runoff from your property.
What to know before you install
- Capacity: many common barrels hold roughly 40–60 gallons.
- Weight: water is heavyso place the barrel on a stable, level base.
- Screened inlet + tight lid: helps keep mosquitoes and debris out.
- Overflow plan: direct overflow away from foundations.
Best uses for captured rainwater
Rainwater is great for lawns and ornamental beds. For edible gardens, many gardeners use it to water the soil (not the leaves),
and still wash produce with clean, potable water. If your roof is treated with chemicals or you’re unsure, play it safe and use
stored rainwater on ornamentals.
Quick install outline
- Pick a downspout near your garden
- Set a sturdy platform (pavers or a stand)
- Install diverter or cut and route the downspout
- Add overflow hose, test during a rain
Project #5: Pollinator Garden That Looks Intentional (Not Like “Oops, I Forgot to Mow”)
A pollinator garden is a feel-good project with real impact: it supports bees, butterflies, and beneficial insects.
The trick is making it thrive and look like a design choiceespecially if you have neighbors, an HOA, or a personal preference
for “charming” over “abandoned lot chic.”
Three design rules that work almost everywhere
- Use native plants when you can: they’re adapted to local conditions and often better for local pollinators.
- Plan for season-long blooms: include early, mid, and late-season flowers.
- Plant in clumps: groups of the same flower are easier for pollinators to find than single scattered plants.
Make it tidy on purpose
- Add a crisp edge (stone, metal, or a simple trench)
- Use a clear path or stepping stones through/around it
- Put taller plants behind shorter ones for structure
Skip the pesticide “nuke it from orbit” approach
Pollinator gardens pair beautifully with integrated pest management (IPM): scout, identify, and start with cultural
controls before reaching for sprays. Healthy plants, good spacing, mulch, and watering at the soil line solve more problems than
most people expect.
Project #6: Vertical Supports (Trellises, Arbors, and the Art of Getting Plants Off the Ground)
Vertical gardening is the cheat code for small spaces. It also improves airflow and keeps fruits cleaner. Plus, it makes you feel
like you built a tiny plant skyscraper, which is objectively cool.
Easy trellis options
- Cattle panel arch: sturdy for beans, cucumbers, even some squash varieties.
- String trellis: simple and cheap for peas and indeterminate tomatoes (with good anchoring).
- Stake + tie: classic for peppers and tomatoes; use soft ties to avoid stem damage.
Common mistake
Building a support that’s too weak. Plants are adorable until they’re wet, fruit-loaded, and basically demanding structural engineering.
Project #7: Mulch Upgrade (The Unsexy Project That Makes Everything Better)
Mulch is not glamorous. Mulch is not trendy. Mulch is, however, the reason some gardens look lush while others look like a thirsty
science experiment. It reduces weeds, moderates soil temperature, and slows evaporation.
How to mulch correctly
- Weed first (mulch is not a magic eraser; it’s a blanket)
- Apply an even layer (often a couple inches for many organic mulches)
- Keep mulch pulled back a bit from stems and trunks to reduce rot and rodent issues
Mulch choices that work
- Shredded leaves: cheap, effective, breaks down into soil
- Straw: great for vegetable beds (seed-free straw is best)
- Wood chips: excellent for paths and around shrubs (less ideal mixed into veggie rows unless managed well)
Project #8: Seed-Starting Station (Raise Your Own Plants Like a Backyard Wizard)
Starting seeds indoors is a high-reward garden project: more varieties, earlier harvests, and the smug satisfaction of saying,
“Oh, this tomato? I started it from seed.” (You are required by law to say it at least twice.)
Basic setup
- Seed-starting mix (lighter than garden soil)
- Trays or small pots with drainage
- Grow light (bright, close, consistent)
- Labeling system (because “mystery pepper” is not a plan)
Hardening off (don’t skip this)
Seedlings need a gradual transition to outdoor lifesun, wind, temperature swings. Plan about a week (often 7–10 days)
of gradually increasing outdoor exposure so they don’t suffer transplant shock.
Project #9: DIY Garden Path and Edging (Instant “Designed” Vibes)
Want your yard to look like you hired someone? Add a path and clean edging. It organizes space, reduces muddy shoes, and signals
“This is intentional.” It also makes maintenance easier because you’re not guessing where the bed ends and the lawn begins.
Easy materials
- Wood chips over landscape fabric (or cardboard) for quick paths
- Stepping stones set in gravel
- Brick or pavers with a simple sand base for a more permanent route
Small detail, big impact
Give paths a slight crown or a firm base so water doesn’t pool. Soggy paths turn into the kind of mud that steals shoes and dignity.
Common Garden Project Mistakes (So You Don’t Have to Learn the Hard Way)
Overbuilding on day one
Start with one or two high-impact projectslike a raised bed and mulchthen expand. A garden that’s easy to maintain wins.
A garden that’s “ambitious” becomes a guilt hobby.
Ignoring water logistics
If your hose doesn’t reach, your motivation won’t either. Plan water access early: drip irrigation, rain barrels, and soaker zones
make gardening predictable instead of chaotic.
Planting without a purpose
“I bought six basil plants because they were cute” is how people end up giving away pesto by the gallon. Pick plants you’ll use,
and match them to your space and light.
Conclusion: Your Best Garden Projects Are the Ones You’ll Repeat
Garden projects don’t have to be complicated to be impressive. A raised bed with good soil, a simple compost setup, a basic drip
system, and a pollinator-friendly corner can transform your yard into something that feeds you, calms you down, and gives you
a reason to step outside even when your inbox is being feral.
Pick one project you can finish this week. Then pick the next one that makes the first one easier. That’s how great gardens are built:
not in one heroic weekend, but in smart, satisfying layers.
Field Notes: of Real-World Garden Project Experience
The first “real” garden project I ever did was a raised bed, and I was absolutely convinced I had cracked the code of nature.
I measured carefully, built a tidy rectangle, and felt like a responsible adult who definitely had their life together. Then I
went to fill it with soil and discovered the secret truth of gardening: the bed is the easy partthe dirt is the commitment.
I tried to be economical and used a bargain “topsoil” that looked fine in the bag. After the first rain, it settled into something
with the texture of wet concrete. My seedlings didn’t so much “grow” as “attempt to negotiate.” That’s when I learned to treat soil
like a recipe, not a single ingredient. When I started mixing in compost and paying attention to structure, everything changed.
The bed drained better, roots pushed deeper, and plants looked less like they were filing complaints with HR.
Next came composting, which I approached with optimism and a complete lack of respect for physics. I tossed in kitchen scraps,
forgot to add enough dry “browns,” and accidentally invented a smell that could scare away both pests and visitors. The fix was simple:
more leaves, more turning, and burying scraps deeper. Composting taught me the value of balancegardening’s version of “eat your veggies,”
except the veggies are for microbes.
The biggest quality-of-life upgrade was drip irrigation. I used to water with a hose in the evening, which sounds peaceful until you
realize it becomes a daily obligation with zero days off. Drip plus a timer turned watering into background infrastructurelike plumbing,
but for plants. The garden got more consistent moisture, and I got my evenings back. Consistency also reduced stress on plants, which
meant fewer weird issues that start with “Why are the leaves doing that?”
I also learned that pollinator gardens don’t have to look wild to be useful. The key was adding “signals of care”: a clean edge,
a small path, and planting in intentional groups. Suddenly it looked like a designed space instead of a forgotten corner. Even better,
it brought in bees and butterfliesand noticeably more activity from beneficial insects. That had a ripple effect: fewer pest outbreaks,
and less temptation to do anything dramatic with sprays.
Finally, mulch became my quiet obsession. Once I mulched properlyconsistent depth, refreshed when needed, kept off plant stemsweed
pressure dropped and moisture stayed in the soil longer. It’s the kind of boring project you only appreciate after you’ve lived without it.
Now, when someone asks what garden project to start with, I’m torn between “raised bed” and “mulch,” which is the least exciting debate
imaginable… but also the most accurate.


