Table of Contents >> Show >> Hide
- Why a Curio Cabinet Makeover Is Worth It
- Start With a Quick “Cabinet Diagnosis”
- Tools and Materials That Make This Easier (Not Harder)
- Step-by-Step: Curio Cabinet Makeover That Looks Professional
- Step 1: Empty it like you’re moving out
- Step 2: Clean like paint depends on it (because it does)
- Step 3: Safety check for older finishes
- Step 4: Degloss and scuff sand for adhesion
- Step 5: Repair the little stuff that will bother you forever
- Step 6: Prime for a finish that lasts
- Step 7: Paint in thin coats (your patience will be rewarded)
- Step 8: Consider a refreshed back panel (the “secret weapon”)
- Step 9: Seal it (optional, but smart for high-touch areas)
- Step 10: Upgrade hardware for an instant “new cabinet” effect
- Step 11: Add lighting the safe, simple way
- Common Mistakes That Make a Makeover Look “DIY” (in the Bad Way)
- Styling Your “New” Curio Cabinet Like a Designer
- What a Curio Cabinet Makeover Costs (and How to Keep It Reasonable)
- Final Reveal: The Cabinet You Wanted All Along
- My Real-Life Curio Cabinet Makeover Experience (The Part No One Glamourizes)
Every home has that piece of furniturethe one that’s technically functional, emotionally complicated, and visually… loud.
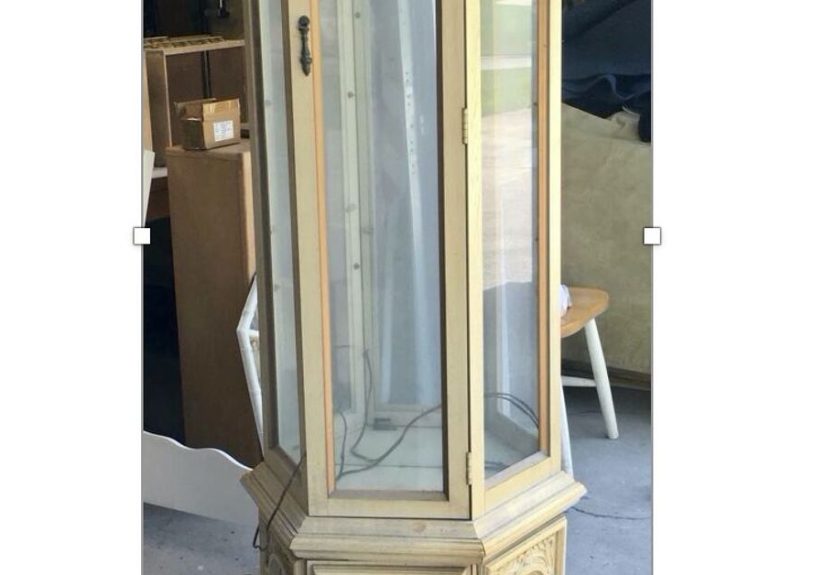
In my case, it was a curio cabinet. A towering, glass-fronted time capsule that looked like it was auditioning for a Victorian
museum exhibit titled “Dust: The Collection.”
But here’s the thing: curio cabinets are secretly awesome. They’re built to showcase the good stufffamily heirlooms, travel finds,
pretty bowls you swear you’ll use “someday,” and that one sentimental item you can’t explain without tearing up a little.
The problem isn’t the cabinet’s purpose. It’s that many older curios have dated finishes, yellowed interiors, sticky hardware,
and lighting that feels like a sad refrigerator bulb.
This makeover is about keeping the charm while upgrading the vibe. Think: cleaner lines, a brighter interior, smoother doors,
modern hardware, and styling that makes your display feel curatednot crowded. Bonus: you’ll also make the cabinet safer, sturdier,
and way easier to live with. Let’s get into it.
Why a Curio Cabinet Makeover Is Worth It
A curio cabinet makeover is one of the most satisfying DIY upgrades because the before-and-after is dramatic without requiring a
full room renovation. A refreshed display cabinet can:
- Update your style instantly (even if the rest of the room isn’t ready for a glow-up).
- Make collections look intentional instead of “I put this here because I ran out of shelves.”
- Brighten dark corners with lighter finishes, mirrors, or simple LED lighting.
- Improve function with smoother hinges, better door alignment, and less sticky paint-on-paint drama.
- Save money compared to buying a new glass display cabinetespecially if the bones are solid.
- Keep a quality piece out of the landfill (and keep your home from becoming a fast-furniture graveyard).
Start With a Quick “Cabinet Diagnosis”
Before you pick up a paintbrush like you’re starring in your own home makeover show, take five minutes to figure out what you’re
working with. This step saves time, money, and at least one frustrated sigh that echoes through the house.
1) What is it made of?
Most curio cabinets are a mix of materials: solid wood frames, veneer panels, glass doors, and sometimes laminate sections.
Your prep depends on the surface.
- Solid wood: forgiving, sands well, takes stain or paint beautifully.
- Veneer: paint-friendly, but sand gentlyveneer is thin and easy to damage.
- Laminate: needs excellent cleaning and a bonding primer for long-term durability.
- Previously finished (shiny): likely needs deglossing/scuff sanding plus primer for adhesion.
2) Is it stable and safe?
Curio cabinets are often tall and top-heavyespecially when loaded with glassware. If it wobbles, fix that first. Tighten joints,
adjust feet, and consider anchoring it to the wall if kids, pets, or high-traffic chaos are part of your household reality.
3) Are you painting, staining, or doing a hybrid?
Here’s the quick decision guide:
- Paint if the finish is dated, blotchy, overly orange, or you want a modern look fast.
- Stain if the wood is gorgeous and you want to highlight grain (and you’re willing to do more prep).
- Hybrid if you want a painted exterior but a stained interior shelf, or vice versa.
Tools and Materials That Make This Easier (Not Harder)
You don’t need a garage full of tools. You do need the right basicsespecially for prep. Prep is the part that makes the paint job
look “custom” instead of “craft-time.”
- Microfiber cloths, mild detergent or degreaser
- Painter’s tape and drop cloth
- Sanding sponge (fine) and sandpaper (common: 120/180/220 grit)
- Vacuum with brush attachment + a tack cloth or lint-free wiping cloth
- Wood filler (optional), putty knife
- Bonding primer (especially for glossy or laminate surfaces)
- Paint: cabinet/furniture enamel for durability (satin or semi-gloss is common)
- Quality angled brush + small foam roller (or a sprayer if you’re experienced)
- Topcoat (optional): water-based protective finish for extra durability
- New hardware (knobs/pulls), bumpers, felt pads
- Optional: peel-and-stick wallpaper or a thin panel to refresh the back
- Optional: plug-in LED puck lights or LED strip lighting (follow product directions)
Step-by-Step: Curio Cabinet Makeover That Looks Professional
Step 1: Empty it like you’re moving out
Take everything outyes, everything. Then take a quick photo of your arrangement if you liked it. Remove glass shelves carefully,
set them aside on a soft towel, and label hardware in a zip bag. This is also a great moment to decide what you actually want to keep
on display (and what belongs in storage or the donation pile).
Step 2: Clean like paint depends on it (because it does)
Cabinets collect invisible grimekitchen grease, old furniture polish, and dust that has basically earned a lease.
Wipe all surfaces with a mild detergent or degreaser, especially around handles and door edges. Let it dry fully.
Step 3: Safety check for older finishes
If your curio cabinet is older and you don’t know what’s on the surface (especially if it’s from decades ago), be cautious.
Older finishes can include materials you don’t want to sand or scrape casually. When in doubt, use safer prep methods,
avoid creating dust, and follow trusted renovation safety guidance.
Step 4: Degloss and scuff sand for adhesion
The goal isn’t to remove the entire finishit’s to give primer something to grab. Lightly scuff sand shiny areas and smooth out
rough spots. Use a sanding sponge for trim details and corners. After sanding, vacuum thoroughly and wipe with a tack cloth
so dust doesn’t sabotage your finish.
Step 5: Repair the little stuff that will bother you forever
Fill dents and chips with wood filler, tighten loose hinges, and check door alignment. If the doors drag, fix that nowpaint will
not magically solve physics. Replace missing shelf clips or worn bumpers so doors close quietly (your future self will thank you).
Step 6: Prime for a finish that lasts
Primer is not optional if you want durabilityespecially on glossy finishes, laminate, or stained wood. A bonding primer helps paint
stick and reduces chipping later. Apply a thin, even coat. When it dries, lightly sand any rough texture and wipe clean again.
Step 7: Paint in thin coats (your patience will be rewarded)
Use thin coats and let them dry properly. Thick coats cause drips, sticky doors, and that “why does this feel rubbery?” situation.
For a smoother finish, many people like a small foam roller on flat areas and a quality angled brush for corners and trim.
- Order of operations: inside first (if painting), then doors, then exterior.
- Tip: Paint the door edges carefullythick paint here is the #1 reason doors stick later.
- Between coats: Lightly sand if needed, remove dust, then recoat.
Step 8: Consider a refreshed back panel (the “secret weapon”)
The back of the cabinet is what makes your display pop. Even if you do nothing else, a fresh back panel can change everything.
Options:
- Paint it a contrasting color (deep green, navy, warm white, or a soft greige are popular choices).
- Add peel-and-stick wallpaper for pattern and personality.
- Try a faux beadboard look using thin panels for texture.
- Mirror effect (if you’re upgrading later) to make the cabinet feel larger and brighter.
Step 9: Seal it (optional, but smart for high-touch areas)
If your cabinet will be opened often, a protective topcoat can help prevent scuffsespecially on shelves and door frames.
Use a water-based clear finish if you want low odor and easy cleanup. Apply thin coats and follow the product instructions
for dry time and recoat windows.
Step 10: Upgrade hardware for an instant “new cabinet” effect
New knobs and pulls are the easiest upgrade with the biggest payoff. A few style pairings that work especially well on curios:
- Black hardware + warm white paint = clean modern farmhouse.
- Brushed brass + deep color (navy/green) = modern vintage.
- Polished nickel + soft gray = classic, bright, and timeless.
If you keep the original hardware, clean it and consider a subtle refresh (but avoid finishes that chip easily on high-touch pieces).
Step 11: Add lighting the safe, simple way
Lighting is what turns “storage” into “display.” The easiest option is plug-in LED puck lights or LED strips designed for cabinets.
Choose low-heat LEDs, follow the manufacturer’s instructions, and route cords neatly so doors still close smoothly.
Even one light at the top can make glass shelves sparkle.
Common Mistakes That Make a Makeover Look “DIY” (in the Bad Way)
A great curio cabinet makeover is mostly about avoiding a few classic pitfalls:
- Skipping cleaning: Paint doesn’t stick to old polish and mystery grime.
- Rushing dry time: “Dry to the touch” is not the same as “ready for life.”
- Using thick coats: Drips, brush marks, and sticky doors love thick coats.
- Forgetting prep between coats: A quick dust removal step prevents gritty finishes.
- Painting hardware in place: It’s faster… and it looks faster.
- Overstuffing the display: The cabinet isn’t a closet with glass doors. Let it breathe.
Styling Your “New” Curio Cabinet Like a Designer
Once the paint is cured and the glass shelves are back in, styling is the fun part. This is where your cabinet goes from
“I own objects” to “I have a curated collection.”
Use the rule of threes (because your brain likes it)
Group items in threes or fives, vary heights, and mix textures. A stack of books + a small bowl + a sculptural object looks intentional.
Ten tiny figurines lined up like they’re waiting for a bus looks… organized, but not styled.
Create “moments,” not a single mega-display
Treat each shelf as its own mini vignette. Give your eye a focal pointone larger piecethen add supporting items around it.
Leave some negative space so the cabinet feels airy, not crowded.
Make glass work for you
Glass shelves reflect light and show fingerprints. Clean them well, then plan displays that don’t require constant rearranging.
If you have small items, use risers or trays to lift them so they don’t visually disappear.
What a Curio Cabinet Makeover Costs (and How to Keep It Reasonable)
Costs vary based on what you already have, but a typical budget might include primer, paint, sandpaper, and new hardware.
Lighting and wallpaper are optional upgrades that can be added later. If you’re trying to keep it affordable:
- Refresh only the back panel and hardware first (big impact, low cost).
- Use what you have: a good brush and careful coats beat cheap tools every time.
- Upgrade lighting laterpaint alone can dramatically change the look.
Final Reveal: The Cabinet You Wanted All Along
A curio cabinet makeover isn’t about erasing the past. It’s about making the piece fit your life now.
When you clean, prep, prime, and paint with intentionand then style with a little restraintyou end up with a cabinet that looks
custom, modern, and genuinely useful.
And the best part? Every time you walk past it, you’ll see your favorite things displayed like they matter… because they do.
(Also: less dust. Always a win.)
My Real-Life Curio Cabinet Makeover Experience (The Part No One Glamourizes)
Let me tell you what it’s actually like to give a curio cabinet a much needed makeover: it starts with confidence and ends with
you negotiating with a hinge that hasn’t moved smoothly since flip phones were cool.
The first surprise was how much stuff came out of the cabinet. I thought I was a minimalist collector. Reader, I was not.
I removed glass shelves one by one like I was defusing a bomb made of fingerprints. Then I found the back cornerswhere dust
goes to retire. I’m pretty sure I discovered an entire ecosystem in there. If you ever need proof that time is real, clean a curio cabinet.
Next came the “simple wipe-down,” which turned into a full-on cleaning montage. I used a gentle cleaner, scrubbed around the
handles, and realized the cabinet had been politely holding onto decades of furniture polish. The cloth came away the color of
“old candle,” which is not a color you want to discover on anything you touch daily.
The sanding step was where my optimism tried to leave my body. Not because sanding is hardbecause curio cabinets have
approximately fourteen thousand tiny corners, grooves, and decorative details that were clearly designed by someone who hated
future DIYers. A sanding sponge saved the day. I put on music and treated it like a weird spa experience for wood: exfoliate,
cleanse, repeat. After vacuuming, I wiped everything down again because dust has a talent for teleportation.
Priming felt like crossing a threshold. Once that first coat went on, the cabinet stopped looking “vintage” and started looking
“project.” I kept coats thin and tried not to overwork the primer. The hardest part was patiencewaiting for it to dry when I
desperately wanted to keep going. So I cleaned the glass shelves instead, which is a task that rewards you immediately. Suddenly
they looked like glass again, not like frosted “memory panels.”
Painting was the most satisfying part, but also the easiest place to mess up. The first coat always looks a little suspicious.
I had a brief moment of, “Did I just ruin a perfectly good cabinet?” Then the second coat went on, and the color evened out, and
the whole thing started to look like something you’d actually buy on purpose. I learned quickly that door edges are the danger zone.
Too much paint there and the doors stick, which transforms your elegant display cabinet into a slapstick comedy prop.
The real glow-up moment was the back panel. I painted it a slightly different tone than the exteriorjust enough contrast to make
my display items pop. Instantly, the cabinet looked deeper and brighter, like it gained architectural cheekbones. I reinstalled the
shelves, added simple LED puck lights, and suddenly the cabinet went from “grandma’s formal living room” to “curated home gallery.”
The last step was styling, and I had to remind myself: negative space is not a moral failure. I didn’t have to fill every
inch. I grouped items, varied heights, and left breathing room. The cabinet finally felt intentionallike a display of things I love,
not a storage unit with glass doors. And yes, I still have sentimental weirdos in there (hello, tiny souvenir spoon), but now they
look like part of a story instead of clutter with a security system.
Would I do it again? Absolutely. Would I do it faster the second time? Also yesmainly because I now respect prep work the way
you respect a thunderstorm: you don’t ignore it, and you definitely don’t rush it.