
Table of Contents >> Show >> Hide
- First: know what you’re cleaning (because brick is not a plastic chair)
- Brick-cleaning rules that save brick (and your weekend)
- Tools and supplies you’ll actually use
- How to clean interior brick walls
- How to clean a brick fireplace (soot, smoke stains, and “winter happened”)
- Efflorescence: the white chalky film that keeps coming back
- Mold, mildew, and algae on brick
- Exterior brick cleaning: “gentle” is not a personality flaw
- Stain-specific playbook
- Should you seal brick after cleaning?
- Maintenance schedule: the lazy way to keep brick looking great
- When DIY stops being charming
- Real-life experiences: brick cleaning lessons you only learn the hard way (500-ish words)
- Conclusion
Brick is the friend who looks low-maintenance, shows up to the party in a classic outfit, and then quietly collects soot, mildew, and mysterious “what even is that?” streaks like it’s building a scrapbook. The good news: most brick can be cleaned safely and brought back to its warm, textured glory. The tricky news: brick is porous, mortar can be delicate, and the fastest “blast it and hope” methods are also the fastest way to turn your charming wall into a crumbly regret.
This guide walks you through how to clean interior and exterior brick the smart waystarting gentle, matching the method to the stain, and avoiding the common mistakes that make pros sigh dramatically into their coffee. We’ll cover fireplaces, efflorescence (the white powdery stuff), mold and mildew, and when to stop DIY-ing and call in reinforcements.
First: know what you’re cleaning (because brick is not a plastic chair)
Brick + mortar = a team sport
Brick faces are relatively tough. Mortar joints are often the first thing to get damaged by aggressive cleaning. Older mortar can be softer than modern mixes, and historic brick can have a more fragile outer “fired skin.” If you scrub too hard, use harsh acids, or pressure wash like you’re removing graffiti from a bank vault, you can etch the brick face and erode joints.
Start with a test patch (yes, even if you’re “good at cleaning”)
Pick a small, hidden spot. Clean it using your mildest approach. Let it dry fully. Brick changes as it dries, so your “it’s perfect!” moment at minute 10 can become “why is it blotchy?” by tomorrow morning. Testing also tells you whether the stain is surface-level or connected to a bigger moisture issue.
Identify the stain before you pick the cleaner
- Dust and general grime: dull film, dark smudging near hands or traffic areas.
- Soot (fireplaces): black/gray powdery residue; sometimes oily or sticky if creosote is involved.
- Efflorescence: white, chalky, powdery crystalsoften after rain or seasonal humidity swings.
- Mold/mildew/algae: green, black, or dark specklingoften on shaded exterior walls or damp basements.
- Rust, oil, tannins: orange streaks (metal), greasy dark spots (grills), brownish stains (plants/wood).
Brick-cleaning rules that save brick (and your weekend)
Rule 1: Use the gentlest method that works
Brick rewards patience. Start mild and step up only if needed. Over-cleaning causes more damage than under-cleaning.
Rule 2: Pre-wet porous brick before most wet cleanings
Saturating brick with clean water first helps keep the cleaner working at the surface instead of soaking deep into the masonry. It also helps reduce streaking and “cleaner outlines” where solution dries unevenly.
Rule 3: Avoid wire brushes and harsh abrasives
Metal bristles can scar the brick face and shred mortar. Stick with nylon brushes or a natural-bristle scrub brush.
Rule 4: Don’t trap water in your wall
Many brick problems are moisture problems wearing different hats. Efflorescence, mildew, and spalling often trace back to waterleaky gutters, sprinklers hitting the wall, poor drainage, missing flashing, or interior humidity.
Tools and supplies you’ll actually use
- Vacuum with brush attachment (interior brick and fireplaces)
- Nylon-bristle scrub brush + smaller toothbrush-style brush for joints
- Two buckets (clean rinse water and cleaning solution)
- Spray bottle or pump sprayer
- Microfiber cloths / sponges
- Drop cloths and painter’s tape (especially indoors)
- Gloves and eye protection; a mask for dusty soot or efflorescence
How to clean interior brick walls
Step-by-step: everyday dirt and fingerprints
- Dry clean first. Vacuum dust from the surface and mortar lines. This prevents turning dust into mud.
- Pre-wet lightly. Mist the brick with plain water (don’t flood indoor walls).
- Use a mild solution. Mix warm water with a few drops of gentle dish soap.
- Scrub small sections. Work top to bottom to avoid drip streaks.
- Rinse carefully. Wipe with a clean damp sponge/cloth. Change rinse water often.
- Dry fully. Use towels and ventilation. Brick hates staying damp indoors.
Pro tip: If you’re cleaning an exposed brick wall near a kitchen, oily residues can cling. A slightly stronger degreasing dish soap solution often worksjust rinse well so you don’t leave sticky soap behind that attracts new grime like a magnet with a snack problem.
How to clean a brick fireplace (soot, smoke stains, and “winter happened”)
Before you start: prep like you mean it
- Let the fireplace cool completely (like, fully).
- Lay drop cloths. Soot has a talent for traveling.
- Vacuum loose soot and ash with a brush attachment.
- Open a window if you’re using any strong cleaner.
Method A: dish soap + water (the gentle baseline)
Pre-wet the brick with clean water. Then scrub with warm water and dish soap. Work in small sections, rinse, and dry. Many fireplaces clean up surprisingly well with this aloneespecially if you do it regularly instead of waiting until the brick looks like it auditioned for a chimney sweep biography.
Method B: vinegar-and-water for stubborn soot (use thoughtfully)
If soap doesn’t cut it, a mild vinegar-and-water mix can help loosen soot on brick. Use it sparingly, and be cautious with older or delicate mortar. Always test first. Scrub gently, rinse well, and let it dry completely before you judge the result.
Method C: when creosote is involved, know your limits
Creosote is not just “extra soot.” It’s a flammable buildup that can become hardened or glazed. If you suspect heavy buildup, prioritize safety and professional inspection/cleaning. DIY scrubbing is for surface mess on the visible brick surroundnot for serious chimney hazards.
Painted brick fireplaces: a different universe
Painted brick can be cleaned, but the goal is “remove soot without dulling or stripping the finish.” Start with warm soapy water and a soft sponge. For the tiny brick divots, a soft brush or a gentle “soot sponge”/dry cleaning sponge can lift residue without saturating the paint. If you move to stronger cleaners, test carefully because some products can dull paint sheen.
Efflorescence: the white chalky film that keeps coming back
What it is (and what it means)
Efflorescence is mineral salt residue carried to the surface by moisture. When water evaporates, salts remain as a powdery white deposit. The deposit itself is usually more of a cosmetic issuebut recurring efflorescence is your clue to investigate moisture sources.
How to remove efflorescence safely
- Choose a dry day. Warm, dry weather is ideal.
- Dry brush first. Use a stiff nylon brush to sweep away powder. Wear a maskthis stuff becomes airborne easily.
- Rinse if needed. A gentle water rinse can remove remaining residue, but avoid over-saturating the wall.
- Use a masonry efflorescence cleaner for stubborn deposits. Follow label directions exactly, use protective gear, and rinse thoroughly.
Avoid the “random acid experiment.” Strong acids can discolor brick and etch mortar. If you’re tempted to go nuclear, pause and consider a masonry-specific product or professional helpespecially for older brick or decorative interior brick.
How to keep efflorescence from returning
- Fix gutter leaks and downspout drainage (water should move away from the foundation).
- Adjust sprinklers so they don’t spray brick.
- Check for cracks and failed caulk at windows/doors where water can enter.
- Consider a breathable water-repellent sealer once brick is clean and fully dry (and only if appropriate for your masonry).
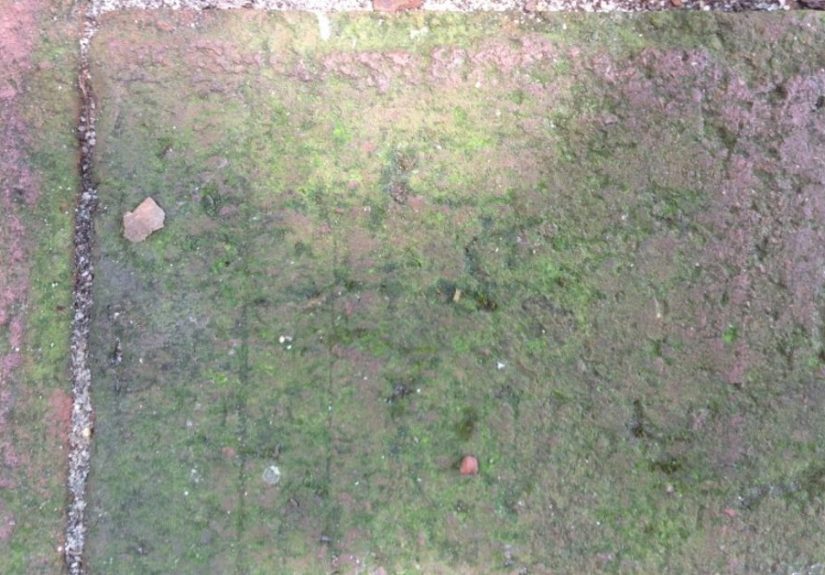
Mold, mildew, and algae on brick
Step one: fix the moisture conditions
Scrubbing without moisture control is like mopping a floor while your dog drags muddy paws in circles. Look for shade + dampness: overgrown shrubs, poor airflow, clogged gutters, basement humidity, or exterior grading that slopes toward the house.
Step two: clean with a mild approach first
- Dry brush loose growth and dirt.
- Wash with water + mild detergent using a nylon brush.
- Rinse gently and allow to dry fully.
About bleach and biocides: use caution
For some situations, disinfectants are usedbut they’re not always recommended as routine practice, and they must be handled carefully. Never mix bleach with ammonia or other cleaners. If you decide to use a stronger product, follow reputable safety guidance, wear proper gloves and eye protection, ventilate the area, and use the minimum effective strength.
When to call a pro: If you have widespread mold, recurring indoor mold, or a hidden leak, focus on diagnosing the moisture source and consider professional remediation. Brick can be the visible symptom, not the root cause.
Exterior brick cleaning: “gentle” is not a personality flaw
Method 1: garden hose + brush
This is the safest starting point for most exterior brick. Wet the wall, apply mild soapy water, scrub, then rinse from top to bottom. It’s slower than a pressure washer, but it’s also less likely to turn mortar joints into sand.
Method 2: pressure washing (only if you do it carefully)
Pressure washing can help with grime, but it can also damage brick and mortarespecially older brick, already-cracked joints, or soft historic masonry. If you choose to pressure wash:
- Start with the lowest pressure that works.
- Keep the nozzle at a safe distance and avoid aiming directly into mortar joints.
- Use a wider spray pattern rather than a pinpoint jet.
- Work top to bottom and keep the wand moving to avoid etching lines.
- Stop if you see mortar eroding or brick face flaking.
Method 3: “special problems” and why pros do test panels
Historic masonry guidance emphasizes testing and using the gentlest successful method. That’s not bureaucracyit’s how you avoid permanent surface damage. If your brick has heavy staining, paint overspray, thick biological growth, or years of neglect, a professional assessment may save money compared to fixing damage caused by an overly aggressive DIY cleaning.
Stain-specific playbook
Grease stains (grill zone, driveway edges)
Start with a degreasing dish soap solution and a nylon brush. Rinse well. For stubborn grease, a masonry-appropriate degreaser may be needed. Avoid soaking the wall; repeated light cleanings beat one aggressive chemical bath.
Rust stains (metal planters, railings)
Rust often needs a cleaner designed for masonry-safe rust removal. Test first, protect nearby metal from further corrosion, and rinse thoroughly. If the metal source remains (like an uncoated steel bracket), the stain will likely come back until the source is addressed.
Paint on brick
Accidental paint drips are one thing; stripping an entire painted brick wall is another. Paint removal on brick can be complicated, messy, and risky for the substrate. For small drips, careful spot removal may work. For full paint removal, consider professional products and methods tailored to masonry so you don’t gouge the brick face.
Should you seal brick after cleaning?
Sometimes, sealing is helpfulespecially for exterior brick exposed to wind-driven rain, or brick that repeatedly shows efflorescence after moisture issues are corrected. But “seal” is not one-size-fits-all. Breathable water repellents are different from waterproof coatings that can trap moisture. Trapped moisture can cause spalling, peeling, or interior dampness. If your brick is historic, already damp, or part of a chimney/fireplace system, get guidance before applying any coating.
Maintenance schedule: the lazy way to keep brick looking great
- Monthly (or seasonally): quick dust/vacuum for interior brick; check for new stains.
- Twice a year: inspect exterior brick near gutters, downspouts, and sprinklers; adjust water sources.
- Annually: clean fireplace brick surround (end of winter is a popular time) and schedule chimney inspection/maintenance as appropriate.
- After big storms: watch for new efflorescence or damp patches that suggest water intrusion.
When DIY stops being charming
Call a professional if you notice any of the following:
- Crumbly mortar, loose bricks, or flaking/spalling brick faces
- Recurring efflorescence that returns quickly after cleaning
- Heavy creosote concerns, chimney performance issues, or smoke drafting problems
- Large areas of mold or persistent dampness indoors
- Historic brick where “one mistake” becomes “a permanent feature”
Real-life experiences: brick cleaning lessons you only learn the hard way (500-ish words)
I’ve noticed brick cleaning tends to follow a universal storyline: confidence, enthusiasm, a bucket of soapy water… and then the moment you realize brick is basically a sponge wearing a tuxedo. The first lesson most people learn is that pre-wetting changes everything. One homeowner I know cleaned a living-room brick accent wall without misting it first. The cleaner soaked in unevenly, and the wall dried with faint drip shadowslike the brick had watched a sad movie and refused to talk about it. A second pass, this time pre-wetting and working in small sections, fixed most of it. The moral: brick likes consistency, not surprise baths.
The second lesson is that pressure washers are not magic wands. Someone tried to “freshen up” an older brick patio by cranking up the pressure to speed things along. They succeededat removing grime and also a noticeable amount of mortar. The patio didn’t collapse, but the joints became rough, pitted, and more likely to collect water and dirt afterward. They ended up paying for repointing in the spots that took the worst hit. Now their advice is simple: if you’re tempted to speed-run brick cleaning, at least speed-run a test patch first.
Fireplaces bring their own sitcom. A classic move is scrubbing soot with a cleaner that’s too strong, too soon. One family started with an aggressive product because the brick looked “really bad.” The soot lifted, yesbut so did the charm, because the mortar looked lighter and patchier afterward. The better approach, they learned, was staged: vacuum, mild soap scrub, rinse, dry, re-check, and only then step up to a slightly stronger method. Brick fireplace cleaning is a marathon, not a one-song montage.
Efflorescence is the sneakiest teacher because it returns like a sequel nobody asked for. A neighbor kept brushing off white powder on an exterior wall, feeling accomplished… until it came back after every rainy stretch. The real fix wasn’t a stronger brushit was redirecting a downspout that was dumping water too close to the foundation and splashing the wall. Once the water was moved away and the brick had time to dry out properly, the efflorescence stopped auditioning for a comeback tour. That’s the big brick-cleaning truth: if moisture is the cause, cleaning is only the cosmetic part of the solution.
The final lesson is the most comforting one: brick doesn’t have to be perfect to be beautiful. A little variation is part of the character. Clean it enough that it’s healthy, stable, and not shedding soot onto your couchthen let the brick be brick. If you want sterile perfection, you’re looking for glossy tile. Brick is here to provide texture, warmth, and the occasional reminder that houses are living systems, not museum displays.
Conclusion
Cleaning your home’s brick is equal parts technique and restraint. Start gentle, match your method to the stain, protect mortar, and remember that recurring issues usually point to moisture. Whether you’re brightening an interior accent wall, restoring a fireplace surround, or tackling exterior grime, the best results come from small test patches, patient scrubbing, and smart preventionso you’re not doing this all over again next month with the same brick and a new set of feelings.


