
Table of Contents >> Show >> Hide
- Why Black Cocoa Makes These Moon Cookies Special
- Black Cocoa Moon Cookies Recipe
- What These Cookies Taste Like
- Tips for the Best Black Cocoa Moon Cookies
- Fun Variations to Try
- Common Mistakes to Avoid
- How to Store and Make Ahead
- Why This Black Cocoa Moon Cookies Recipe Works for SEO and for Real Life
- Experiences Related to Black Cocoa Moon Cookies Recipe
- Conclusion
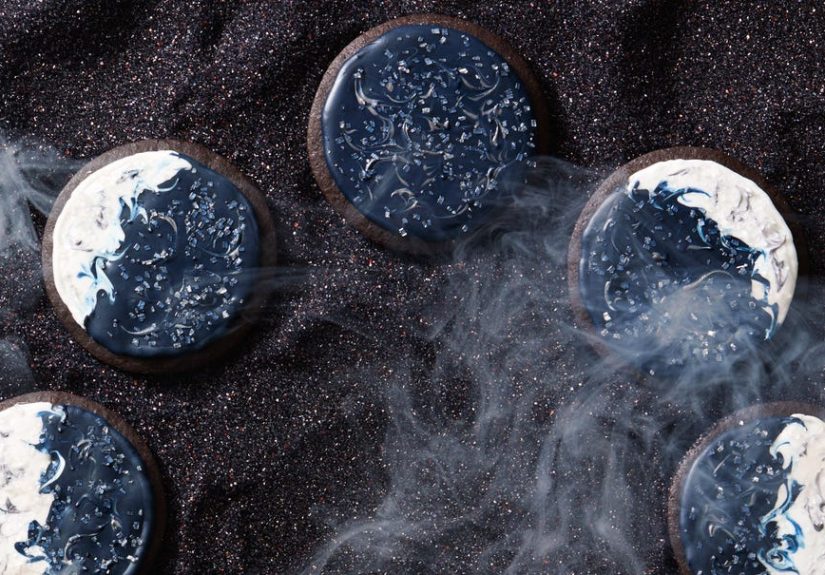
If you’ve ever looked at a sleeve of dark sandwich cookies and thought, “I wish these were moodier, prettier, and homemade,” welcome to your moment. This Black Cocoa Moon Cookies Recipe is for bakers who like their desserts dramatic, their chocolate deep, and their cookie trays just a little celestial. These cookies are dark as a moonless sky, gently crisp at the edges, tender in the center, and finished with a pale, cratered glaze that makes each one look like a tiny edible moon.
The real star here is black cocoa powder. It gives the cookies that nearly-black color and the smooth, bittersweet flavor people often associate with classic chocolate wafer cookies. But because black cocoa can taste flatter and less rounded than regular cocoa on its own, this recipe balances it with a little Dutch-process cocoa for depth. The result is a cookie that looks bold without tasting like a spoonful of charcoal sadness. That would be a very different recipe, and frankly, not one I’d recommend serving at parties.
This article gives you the full recipe, explains why the ingredients work, shares decorating ideas, and includes practical baking tips so your moon cookies come out beautiful instead of mysteriously lopsided. Let’s make a batch worthy of a midnight coffee, a Halloween platter, a winter cookie box, or an ordinary Tuesday that needs more personality.
Why Black Cocoa Makes These Moon Cookies Special
It creates that striking dark color
Regular cocoa powder can make chocolate cookies brown and lovely, but black cocoa cookies have a totally different look. They bake up with a dramatic dark finish that turns a simple round cookie into something that feels bakery-level, especially when you top it with a pale icing or a dusting of sparkling sugar. If you want cookies that look like lunar art with almost no extra effort, black cocoa is your kitchen sidekick.
It brings a smooth, nostalgic chocolate flavor
Black cocoa has a mellow, low-acid flavor that often reads as “familiar chocolate cookie” rather than aggressively bitter dark chocolate. That makes it perfect for a recipe like this, where the visual style matters but the cookie still needs to taste great. By pairing black cocoa with a smaller amount of Dutch cocoa, you get the best of both worlds: striking color and fuller chocolate flavor.
It works beautifully in cutout and round cookies
Moon cookies need to hold their shape. Nobody wants a crater-inspired design on a cookie that spread into a vague continent. This dough is built like a dependable chocolate sugar cookie: enough butter for tenderness, enough flour for structure, and a chill time that makes rolling and cutting easier. Whether you use a round cutter or simply scoop and flatten the dough, the cookies stay neat and handsome.
Black Cocoa Moon Cookies Recipe
Yield: About 24 medium cookies
Prep time: 25 minutes, plus chilling
Bake time: 10 minutes per batch
Ingredients for the cookies
- 2 1/4 cups all-purpose flour
- 1/3 cup black cocoa powder
- 2 tablespoons Dutch-process cocoa powder
- 1/2 teaspoon fine salt
- 3/4 cup unsalted butter, softened
- 3/4 cup granulated sugar
- 1 large egg
- 1 1/2 teaspoons vanilla extract
- 1 to 2 tablespoons milk, as needed
Ingredients for the moon glaze
- 1 3/4 cups powdered sugar
- 3 to 4 tablespoons milk
- 1/2 teaspoon vanilla extract
- Pinch of salt
- 1 teaspoon black cocoa powder, optional, for gray shading
- Silver sanding sugar or edible shimmer, optional
How to make the cookie dough
- Whisk the dry ingredients. In a medium bowl, whisk together the flour, black cocoa, Dutch cocoa, and salt. Break up any cocoa lumps so you do not end up with random black freckles in the dough. Freckles are charming on people, less useful in cookie dough.
- Cream the butter and sugar. In a large mixing bowl, beat the softened butter and granulated sugar until the mixture looks lighter and slightly fluffy, about 2 to 3 minutes. This step helps create a tender texture without making the cookies puff too much.
- Add the egg and vanilla. Beat in the egg and vanilla until fully combined. Scrape down the bowl so everything mixes evenly.
- Add the dry ingredients. Mix in the flour-cocoa mixture on low speed just until the dough starts coming together. If it looks dry or crumbly, add 1 tablespoon of milk. Add the second tablespoon only if needed. The dough should be soft but not sticky.
- Chill the dough. Divide the dough into two disks, wrap well, and chill for at least 45 minutes. This rest makes the dough easier to roll and helps the cookies keep their shape during baking.
Roll, cut, and bake
- Preheat the oven to 350°F. Line two baking sheets with parchment paper.
- Roll one disk of dough between two sheets of parchment to about 1/4-inch thickness. Chill it briefly again if it starts acting soft and dramatic.
- Cut rounds using a 2 1/2-inch cookie cutter. Transfer to the prepared baking sheets, spacing them about 1 inch apart.
- Freeze or chill the cut cookies for 10 minutes before baking. This extra cold step is a secret weapon for clean edges.
- Bake for 9 to 11 minutes, until the tops look matte and the edges are set. Because the dough is so dark, visual cues can be tricky. The cookies should smell deeply chocolatey and feel set on the surface.
- Cool on the pan for 5 minutes, then transfer to a wire rack to cool completely.
Make the moon glaze
- Whisk together the powdered sugar, 3 tablespoons milk, vanilla, and salt until smooth. Add more milk a little at a time until the glaze is thick but spreadable.
- If you want subtle moon shading, divide off a small amount of glaze and stir in the optional black cocoa powder to create a pale gray accent glaze.
- Spread or spoon the white glaze over each cooled cookie, leaving a little of the dark edge visible. Dot on tiny amounts of the gray glaze and swirl lightly with a toothpick or the tip of a spoon to create a cratered moon effect.
- Finish with a tiny pinch of silver sugar or edible shimmer, if desired. Let the glaze set completely before stacking.
What These Cookies Taste Like
These cookies are not brownies pretending to be cookies, and they are not crispy wafers trying to win a toughness competition. They land in a very pleasant middle ground. The texture is tender and slightly snappy around the edges, with a firm but soft center that makes them excellent for gifting, decorating, and eating one after another while claiming you are “just testing the batch.”
The flavor is deeply chocolaty but not aggressively sweet. The black cocoa gives the cookies a dark, smooth finish, while the Dutch cocoa fills in the chocolate notes so the result tastes complete instead of one-dimensional. The vanilla glaze adds contrast and just enough sweetness to make the whole thing pop.
Tips for the Best Black Cocoa Moon Cookies
Use a blend of cocoas for better flavor
If you use only black cocoa, the cookies may look fantastic but taste a little too flat. Combining black cocoa with Dutch-process cocoa gives you stronger chocolate flavor while preserving that dramatic dark color. This is one of the easiest upgrades you can make.
Do not skip chilling the dough
Chilled dough is easier to roll, easier to cut, and more likely to bake into neat circles rather than abstract lunar events. If your kitchen runs warm, chill the dough again after cutting. Cookie dough does not mind being cold; it minds being ignored.
Roll the dough evenly
Uneven dough means some cookies bake faster and some stay underdone in the middle. Aim for a consistent 1/4-inch thickness. If you want a slightly crispier cookie, roll a bit thinner. If you want a softer bite, stay right at the 1/4-inch mark.
Let the glaze dry fully
If you plan to package or stack the cookies, give the glaze plenty of time to set. A few hours at room temperature is ideal. Patience is annoying, yes, but it beats a tray of smeared lunar fingerprints.
Fun Variations to Try
Moon phase cookies
Use the same dark cookie base, then decorate the tops with white icing crescents, half-moons, and full-moon designs. This makes a gorgeous party platter, especially if you arrange them in order like a tiny edible astronomy lesson.
Black cocoa sandwich moon cookies
Skip the glaze and sandwich two cookies together with vanilla buttercream or marshmallow filling. Roll the edges in sparkling sugar for extra flair. These feel a bit more indulgent and are excellent for holiday boxes.
Espresso moon cookies
Add 1 teaspoon espresso powder to the dough for deeper flavor. It does not make the cookies taste like coffee; it simply makes the chocolate taste more like it got dressed up for a nice evening out.
Peppermint eclipse version
Add 1/4 teaspoon peppermint extract to the glaze for a winter-friendly twist. Keep it subtle. Peppermint should whisper, not shout through a megaphone.
Common Mistakes to Avoid
Overbaking
Because these cookies are nearly black, they do not show doneness the way golden sugar cookies do. Set a timer and start checking early. Overbaked black cocoa cookies lose their tender texture fast.
Adding too much flour
It is easy to keep adding flour if a chocolate dough seems soft, but that can make the finished cookies dry. Chill first, then reassess. Most cookie problems are not solved by panic-flouring.
Using thin glaze
A watery glaze slides right off the cookies and ruins the moon effect. Start thick, then loosen gradually. You want a spreadable glaze, not sweet milk soup.
How to Store and Make Ahead
Once fully cooled and glazed, store the cookies in an airtight container at room temperature for up to 4 days. If layering them, place parchment between layers after the glaze is completely set. The unglazed cookies also freeze well for up to 2 months. You can thaw them at room temperature and decorate later.
The dough can be made ahead and refrigerated for up to 2 days before rolling. If it gets too firm, let it sit on the counter for 10 to 15 minutes before working with it. This makes the recipe especially useful during holiday baking season, when your refrigerator is full of butter, your counter is full of powdered sugar, and your brain is full of tiny lists.
Why This Black Cocoa Moon Cookies Recipe Works for SEO and for Real Life
Let’s be honest: a lot of recipe pages promise magic and deliver a cookie identity crisis. This one works because it gives home bakers what they actually need. It uses accessible ingredients, offers visual decorating ideas, explains why black cocoa behaves differently from other cocoa powders, and includes practical troubleshooting. That matters whether someone searched for black cocoa cookie recipe, moon cookies, dark chocolate sugar cookies, or roll-out black cocoa cookies.
In real life, though, the best part is that these cookies feel special without requiring a baking degree or a 17-step decorating marathon. They look striking on a dessert table, fit a space theme beautifully, and offer just enough drama to make people assume you worked much harder than you did. That is the kind of recipe I respect.
Experiences Related to Black Cocoa Moon Cookies Recipe
The first time I made black cocoa moon cookies, I expected them to taste like regular chocolate sugar cookies wearing a darker outfit. They did not. The dough smelled softer, toastier, and more mysterious somehow, like chocolate that had been to graduate school and no longer needed to prove anything. The color alone was enough to stop me mid-mix. It was so dark that I actually held the bowl near the window just to admire it like a very dramatic person in a cooking show montage.
What surprised me most was how people reacted when the cookies hit the table. Adults did the classic “Oh wow, those are pretty,” which is nice. Kids, however, went straight for them like tiny dessert meteorologists. One called them “space Oreos that got promoted.” Another said they looked like cookies from a wizard bakery. Honestly, neither description was wrong, and both made me irrationally proud.
There is also something unusually satisfying about decorating these cookies. Traditional sugar cookies can be beautiful, but black cocoa cookies make every pale glaze color look brighter and more intentional. When I spread the vanilla icing and dragged a little gray through it to mimic lunar craters, even the imperfect ones looked artistic. That is a rare blessing in home baking. Usually, imperfections look like mistakes. Here, they just look atmospheric.
I also learned that these cookies are conversation starters. People ask what black cocoa is. They want to know whether it tastes bitter, whether it is the same as Dutch-process cocoa, and why the cookies look almost velvety black. So if you bring them to a party, do be prepared to give a tiny chocolate seminar between bites. It is the sort of dessert that makes people curious before they even taste it.
On the practical side, these cookies taught me patience. With pale dough, you can usually see when the edges turn golden. With black cocoa dough, visual cues are less obvious, which means you really need to trust your timer, your oven habits, and your nose. The first batch I ever made stayed in a minute too long because I kept waiting for a color change that was never coming. They were still good, but not as tender as the later batches. Ever since then, I have treated black cocoa cookies like confident people: believe them the first time when they say they are done.
Another memorable experience came during holiday baking. I made a mixed cookie box with gingerbread, vanilla cutouts, and these moon cookies. Guess which ones disappeared first? Not the decorated trees. Not the snowflakes. The dark, moody moon cookies. People kept coming back for “just one more,” which is the highest compliment a cookie can receive. Fancy is nice, but irresistible is better.
Over time, I have come to appreciate that this recipe sits in a sweet spot between playful and elegant. You can make it whimsical for kids, refined for grown-up gatherings, or spooky for Halloween. You can leave the cookies plain, sandwich them with filling, or decorate them until they look like a lunar map. That flexibility makes the recipe feel useful, not just pretty.
And maybe that is why black cocoa moon cookies keep earning repeat status in my kitchen. They are different enough to feel exciting, simple enough to make again, and dramatic enough to make people think you did something wildly clever. In baking, that is basically the jackpot.
Conclusion
This Black Cocoa Moon Cookies Recipe delivers the kind of dessert people remember: dark, elegant, easy to personalize, and genuinely delicious. The black cocoa gives the cookies their signature celestial look, while the blend of cocoas keeps the flavor rich and balanced. Add a simple moon glaze, and you have a bakery-worthy treat that still feels doable in a real home kitchen.
Whether you bake them for a party, a holiday tray, or just because your dessert routine needs more drama, these moon cookies prove that a little technique and a lot of chocolate can go a very long way.


