
Table of Contents >> Show >> Hide
- What You’ll Learn
- Before You Start: Pick the Right “First Tile” Project
- Step 1: Plan the Job (Tile, Layout Style, and the “Buy Extra” Rule)
- Step 2: Prep the Surface (This Is Where Pros Quietly Win)
- Step 3: Layout and Dry-Fit (Measure Twice, Cut Once, Still Cut Again)
- Step 4: Set the Tile (Thinset, Trowels, and the Secret of Coverage)
- Step 5: Grout and Finish (Pretty, Protective, and Surprisingly Easy to Mess Up)
- Common First-Timer Mistakes (And the Fixes That Save Your Weekend)
- Wrap-Up: Your First Tile Job Can Look Pro (If You Follow the Order)
- Extra: of Real First-Tile Experiences (So You Don’t Learn the Hard Way)
So you’ve decided to tile something. Congratulations! You’re about to join the elite club of people who can look at a perfectly normal floor and think,
“I could make this harder… with tiny squares.” The good news: DIY tile installation is absolutely learnable. The better news: most “tile disasters” aren’t
caused by bad luckthey’re caused by skipping steps, rushing cure times, or trusting vibes instead of a level.
This guide breaks your first tile job into five clear steps, with practical tips, real-world examples, and the kind of rookie-proofing that keeps your tile
from turning into a future archaeology project. Whether you’re tackling a small bathroom floor, a kitchen backsplash, or a laundry room that deserves better,
the workflow is the same: plan, prep, layout, set, groutthen walk away and let chemistry do its thing.
Before You Start: Pick the Right “First Tile” Project
Your first DIY tile installation should be small, flat, and forgiving. Translation: a simple floor in a square-ish room or a straightforward backsplash
is friendlier than a shower with niches, slopes, and corners that seem to multiply when you’re tired.
Beginner-friendly picks
- Backsplash: Light traffic, easy access, and mistakes are easier to hide behind a toaster.
- Small bathroom or laundry floor: Teaches layout, cutting, and leveling without needing scaffolding.
- Entry/mudroom: Great practicejust plan cure time so you don’t trap yourself in your own house.
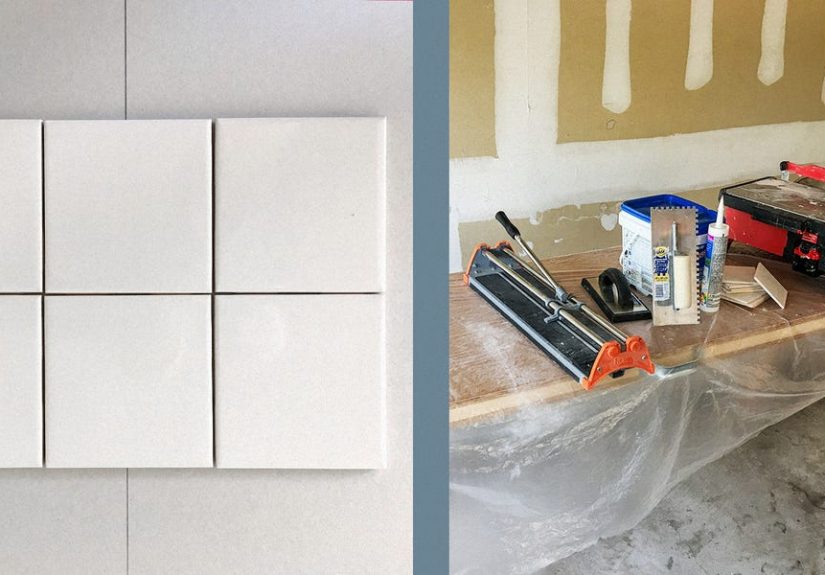
Materials and tools (the short list)
You don’t need a contractor trailer of gear, but you do need the right basics:
tile, thinset mortar, spacers (or a leveling system for large tile), a notched trowel, a level/straightedge, a tile cutter or wet saw,
a mixing bucket and paddle, a grout float, sponges, and a decent vacuum. Add knee padsyour future self will write you a thank-you note.
Step 1: Plan the Job (Tile, Layout Style, and the “Buy Extra” Rule)
Tile success starts before you open a bag of mortar. Planning is where you decide what tile fits your skill level, your space, and your tolerance for
cutting triangles at 10 p.m.
Choose tile that helps you win
- Porcelain or ceramic is ideal for first-timers: durable, common, and widely supported by standard mortars.
- Smaller tiles (like mosaics) can follow slight floor dips, but they add more grout lines (more cleaning later).
- Large-format tile looks sleek, but demands a flatter surface and better technique to avoid lippage (toe-stub city).
Do the math (without crying)
Measure square footage: length × width (in feet). Then buy extra:
10% extra for a simple straight-lay pattern, and 15%+ if you’re doing diagonal layouts, lots of corners, or fancy patterns.
Also check tile caliber and shade on boxesmixing batches can create subtle “why is this tile different?” moments.
Example: simple bathroom floor
A 5 ft × 8 ft bathroom is 40 sq ft. Add 10% = 44 sq ft of tile. If you’re using 12″ × 24″ tile and the room isn’t perfectly square,
you might bump that closer to 15% because you’ll be cutting around the toilet flange, vanity, and doorway.
Step 2: Prep the Surface (This Is Where Pros Quietly Win)
If tile had a love language, it would be flat, clean, stable. The tile doesn’t care if your house is “mostly level.”
It cares whether your substrate is solid and properly prepared.
For floors: stabilize and flatten
- Remove old flooring as needed and tighten squeaky subfloors with appropriate screws.
- Check flatness with a long level or straightedge. High spots get sanded/ground; low spots get filled with a patch or self-leveler.
- Use the right underlayment: cement backer board or an uncoupling membrane (depending on your system and manufacturer guidance).
For wet areas: waterproof like you mean it
“Water-resistant” and “waterproof” are not the same thingespecially in bathrooms and showers. If your project is in a splash zone,
use a waterproofing approach that matches your substrate and tile system (sheet membrane, liquid-applied membrane, or a compatible waterproof board system).
Quick reality check
Most first-time tile failures aren’t the tile’s fault. They’re bonding failures, cracked grout, or loose tiles caused by movement underneath.
Prep is not glamorous, but neither is redoing a floor you just finished last weekend.
Step 3: Layout and Dry-Fit (Measure Twice, Cut Once, Still Cut Again)
Layout is how you avoid ending up with a 1/2″ sliver of tile along the most visible wall. It’s also how you keep lines straight and patterns centered.
Start with reference lines
Snap chalk lines to create clear guides. A common method is two perpendicular lines that intersect at the center of the room. Then confirm they’re square
(a framing square helps; the 3-4-5 method also works). Your goal is a layout that produces balanced cuts at edges and keeps the “main view” looking intentional.
Dry-lay a row (or a mini grid)
Put tiles on the floor without mortar using spacers. This lets you preview where cuts will land and adjust so you don’t end with awkward slivers.
For backsplashes, dry-fit along the countertop line and around outletsbecause outlets love to sit exactly where a full tile wishes to be.
Plan movement gaps
Tile needs room to expand and contract. Leave a small gap at perimeters and changes of plane (walls, cabinets, transitions). Those get covered by trim
or filled with an appropriate flexible sealantnot grout. This small detail prevents big cracks later.
Step 4: Set the Tile (Thinset, Trowels, and the Secret of Coverage)
This is the step everyone thinks is the whole project. It’s notbut it’s the most satisfying part, because the room starts looking like a room again.
Your mission: get solid mortar contact, keep tiles aligned, and keep joints clean enough to grout later without inventing new curse words.
Mix mortar the right way
Follow the bag instructions. Many mortars require a short “slake” time (rest period), then remixing. Don’t freestyle the water ratiothinset isn’t pancake
batter, and “a little extra water” can weaken performance.
Trowel technique that actually works
- Key-in: Use the flat side of the trowel to burn a thin layer into the substrate.
- Comb: Add more mortar and comb in straight, parallel lines (not swirls).
- Set and press: Place the tile, then press and slide slightly to collapse the ridges.
Coverage: the hidden MVP
Industry guidance commonly targets at least 80% coverage in dry interior areas and 95% coverage in wet areas/exteriors,
with good support at edges and corners. The practical move: lift a tile occasionally to check. If you’re seeing lots of bare spots, adjust:
larger trowel notch, better technique, or back-buttering on larger tiles.
Work in manageable sections
Spread only as much mortar as you can tile before it skins over (starts drying on the surface). If you touch the ridges and they don’t transfer to your finger,
scrape it up and reapply. Yes, it’s annoying. It’s also cheaper than loose tiles.
Keep joints clean as you go
Thinset squeezing up into grout lines is normal. Leaving it there is not. Clean it out while it’s fresh using a margin trowel, spacer, or utility tool.
Your future grout float will appreciate the clear runway.
Once tile is set, protect it and let it cure. Most projects need a solid wait before walking on it or groutingcheck the mortar’s label and your room conditions
(temperature and humidity matter).
Step 5: Grout and Finish (Pretty, Protective, and Surprisingly Easy to Mess Up)
Grout is not glue. It’s a filler that locks tiles together visually, helps keep debris out of joints, and supports edges. Picking the right grout and cleaning it
correctly is the difference between “wow” and “why is there a chalky film on everything I own?”
Choose the right grout type
- Cement-based grout: Common and budget-friendly; may need sealing depending on the product and location.
- High-performance/single-component grouts: Often better stain resistance and color consistency; convenient for busy areas.
- Epoxy grout: Extremely durable and stain-resistant; more expensive and time-sensitive during installation.
Grout like a calm person
- Work grout diagonally across joints with a grout float.
- Remove excess grout from tile faces with the float held at a steep angle.
- After a short wait (per product directions), wipe with a damp sponge using light, consistent passes.
- Buff remaining haze with a dry microfiber cloth once the surface firms up.
Finish the details
Use a flexible sealant (not grout) at changes of planelike where a backsplash meets the countertop or where floor tile meets a tub.
Reinstall trim, transitions, and outlet covers carefully. If your grout product requires sealer, apply it only after the grout has cured per the manufacturer’s timeline.
Common First-Timer Mistakes (And the Fixes That Save Your Weekend)
1) Tiling over a “good enough” surface
Fix: flatten first. Tile highlights humps and dips like a spotlight highlights glitterthere’s no hiding it later.
2) Skipping layout and ending with slivers
Fix: dry-lay rows and adjust. Center what the eye sees first (doorway view, vanity line, backsplash focal area).
3) Not checking mortar coverage
Fix: lift a tile early and often. Adjust trowel size and technique until coverage looks consistent and supportive.
4) Grouting corners and transitions
Fix: use flexible sealant at changes of plane to handle movement without cracking.
5) Rushing cure time
Fix: respect the chemistry. “It looks dry” is not the same as “it’s cured.”
Wrap-Up: Your First Tile Job Can Look Pro (If You Follow the Order)
The secret to DIY tile installation isn’t superhuman hand skills. It’s discipline: plan the layout, prep the surface, set with good coverage, keep joints clean,
and let everything cure. Do those things, and your first tile job won’t scream “first tile job.” It’ll quietly whisper, “I watched three tutorials and I listened.”
Extra: of Real First-Tile Experiences (So You Don’t Learn the Hard Way)
My first tile job taught me two important lessons: (1) tile is surprisingly honest, and (2) my knees are not indestructible. I started with a “quick”
bathroom floorbecause every DIY story begins with someone saying the word quick right before losing an entire weekend. I had the tile, the thinset,
the spacers, and a confidence level that was wildly out of proportion to my actual experience. What I didn’t have was a truly flat floor.
Here’s what happened: I set the first few tiles and felt like a home-improvement wizard. Then I slid my straightedge across the surface and discovered
a gentle hump in the subfloorgentle like a speed bump you only notice after you spill your coffee. That tiny hump turned into lippage, and lippage turned
into me pulling up fresh tiles, scraping thinset, and learning new respect for the prep step. If you’re new, don’t treat surface prep like optional reading.
It’s the chapter that makes the rest of the book make sense.
I also learned the joy of “thinset squeeze-up.” At first I ignored it because the tiles looked fine and I was in a groove. Later, when it was time to grout,
I realized half my grout lines were filled with hardened mortar. So there I was, carefully digging thinset out of joints like I was restoring an ancient artifact,
except the artifact was my own bad decision from yesterday. Now I clean joints as I gobecause it takes ten seconds when it’s wet and ten years when it’s dry.
My cutting strategy was another rookie moment. I tried to “save time” by cutting everything at once. The problem? Layout changes as you goespecially if your
walls are slightly out of square (spoiler: they are). I ended up with a stack of perfectly cut tiles that were perfect for a room that did not exist in my house.
The smarter approach is to cut in batches: do your full tiles, set a section, then measure and cut for edges and obstacles as they reveal themselves.
The best surprise from that first project was how much calmer everything got once I slowed down. I started checking coverage by lifting a tile here and there.
I mixed smaller batches of mortar so it didn’t stiffen up on me. I stopped trying to work around corners “just this once” and snapped proper layout lines.
And when the tile was finally in, I forced myself to wait before groutingeven though I wanted to keep going. The next day, the surface felt solid, the lines
stayed straight, and the job looked like I knew what I was doing (which is the highest compliment a first tile job can receive).
If you’re about to tile for the first time, take it from the person who tried to outsmart gravity and lost: plan carefully, prep thoroughly, work in small sections,
and clean constantly. The goal isn’t speed. The goal is a floor or wall that still looks great when you’ve forgotten what thinset dust tastes like.


