
Table of Contents >> Show >> Hide
- A quick rulebook for “expensive” (without the expense)
- 1) Paint like you hired a designer
- 2) Upgrade lighting (and make it flattering)
- 3) Replace hardware and “little metals” for instant polish
- 4) Add architectural detail with trim and molding
- 5) Hang window treatments the expensive way
- 6) Curate with scale: rug + oversized art + “edited” styling
- A realistic weekend plan (that looks way pricier than it costs)
- Conclusion
- Experiences Related to “6 Budget-Friendly Updates That Will Make Your Home Look Expensive” (Real-Life Lessons & What People Notice)
If you’ve ever walked into a “nice” house and immediately felt calmer, richer, and suddenly tempted to whisper,
you’re not imagining things. Homes that look expensive usually share the same secret: they’re not necessarily packed
with pricey stuffjust fewer, better-looking decisions made consistently.
The good news: you don’t need a full renovation, a designer on speed dial, or a second job as an “unboxer” to get
that elevated look. You need high-impact upgrades that improve how your home reads: cleaner lines, better
lighting, intentional details, and the kind of polish that makes visitors assume you know the difference between
“brass” and “brassy.”
A quick rulebook for “expensive” (without the expense)
- Consistency wins. Matching finishes and a tight color palette look more high-end than a mix-and-match free-for-all.
- Scale matters. One larger rug or one big piece of art often looks pricier than five small “almost” items.
- Light makes (or breaks) a room. If your lighting screams “interrogation,” your decor doesn’t stand a chance.
- Details signal quality. Hardware, trim, and well-hung curtains are the grown-up version of a crisp haircut.
1) Paint like you hired a designer
Paint is the MVP of budget upgrades because it changes everything you seewalls, trim, ceilings, doors, and even
dated finisheswithout changing your floor plan or your bank balance. The “expensive” look comes from thoughtful
color choices and a professional-level finish.
Choose a color palette that looks intentional
- Pick one neutral and commit. Soft whites, warm greiges, and quiet taupes make rooms feel brighter and more cohesive.
- Use one accent color on purpose. Try a deep green, navy, charcoal, or earthy clay in a powder room, office, or dining room.
- Don’t forget the ceiling. A clean ceiling makes a room feel taller and fresherlike a good haircut for your house.
Prep is what separates “DIY” from “done right”
- Patch nail holes and dings, then sand smooth.
- Caulk gaps at trim for that seamless, custom look.
- Use painter’s tape strategically (and remove it before paint fully cures).
- Paint in the right order: ceiling → walls → trim/doors.
Three paint moves that instantly look upscale
- Paint interior doors a statement color. A deep charcoal or satin black door can look shockingly high-endespecially with upgraded hardware.
- Refresh trim in a crisp white. Clean trim makes the whole home feel newer, even if the couch is technically “vintage” (and by vintage we mean “college”).
- Use the right sheen. Walls often look best in eggshell or satin; trim and doors can handle semi-gloss for a sharper, more tailored finish.
Pro tip: If your budget is truly tight, paint the rooms people see first: entryway, living room, and
hallway. A cohesive first impression is half the luxury battle.
2) Upgrade lighting (and make it flattering)
Lighting is one of the fastest ways to make a home feel expensive because it changes mood, function, and perceived
qualitysometimes more than furniture does. If your fixtures are builder-basic or your bulbs are mismatched, your
space can look dated even when it’s clean.
Start with “high-visibility” fixtures
- Entryway: a single statement fixture creates a strong first impression.
- Dining area: swap a basic dome light for a chandelier or pendant.
- Kitchen island: a pair of pendants reads custom and intentional.
Make your bulbs consistent
- Use the same color temperature within an open area so rooms feel cohesive.
- Warm-white bulbs tend to feel more inviting than harsh cool-white lighting.
- Consider high-quality LEDs for better color rendering (your walls and decor will look “truer”).
Add dimmers for instant “hotel energy”
Dimmers are a small upgrade that makes a big differenceespecially in dining rooms, bedrooms, and living rooms.
Soft lighting reads luxurious because it feels intentional. (Also: you can stop living like you’re rehearsing for a
stage production.)
Safety note: If electrical work makes you nervous (totally fair), hire an electrician or choose plug-in lamps,
picture lights, and sconces for a similar effect without wiring.
3) Replace hardware and “little metals” for instant polish
Hardware is like jewelry for your home. And just like jewelry, it doesn’t have to be expensive to look expensiveit
just needs to look cohesive and intentional.
Where hardware upgrades make the biggest impact
- Kitchen + bathroom cabinet pulls/knobs
- Faucets (especially if yours screams “1998 starter home”)
- Interior doorknobs (if they’re mismatched, shiny, or tired)
- Switch plates and outlet covers (small, but surprisingly noticeable)
How to choose finishes like a pro
- Pick one primary finish per floor (e.g., matte black or brushed nickel) and repeat it.
- Keep it tight: two finishes max in the same sightline is usually enough.
- Match undertones: warm metals (brass/gold) look best with warm paint and wood; cooler metals pair well with grays and crisp whites.
Installation tips that prevent “oops” moments
- Measure existing hole spacing for pulls before you buy replacements.
- If you’re changing sizes, use a template (or a jig) for consistent drilling.
- Consider backplates to cover old holes if you’re swapping styles.
- Tighten hardware evenlycrooked pulls give “rental maintenance request,” not “custom kitchen.”
Budget sweet spot: Upgrade the hardware in one “hero” area (like the kitchen) first. The visual payoff is immediate.
4) Add architectural detail with trim and molding
Want your home to look more expensive? Add the kind of detail builders skip when they’re trying to keep costs down.
Trim creates shadow lines, structure, and that “finished” feeling people associate with older or custom homes.
High-impact trim upgrades (pick one)
- Picture-frame molding in a dining room or hallway
- Board-and-batten in an entryway or bedroom
- Simple crown molding for rooms with plain ceiling lines
- Upgraded baseboards (taller baseboards read instantly more upscale)
Make it look custom with one simple trick
Paint the trim the same color as the wall (a “monochrome” look). It feels modern, intentional, and
designer-ylike your home drinks sparkling water and says things like “I’m into texture.”
Renter-friendly alternatives
- Peel-and-stick wall molding kits (installed carefully, removed cleanly later)
- Peel-and-stick beadboard panels for small zones (like a powder room wall)
- Temporary wallpaper on a focal wall for pattern and depth
Where this upgrade shines: small rooms. A powder room with molding and paint often looks like a boutique hotelwithout the boutique hotel bill.
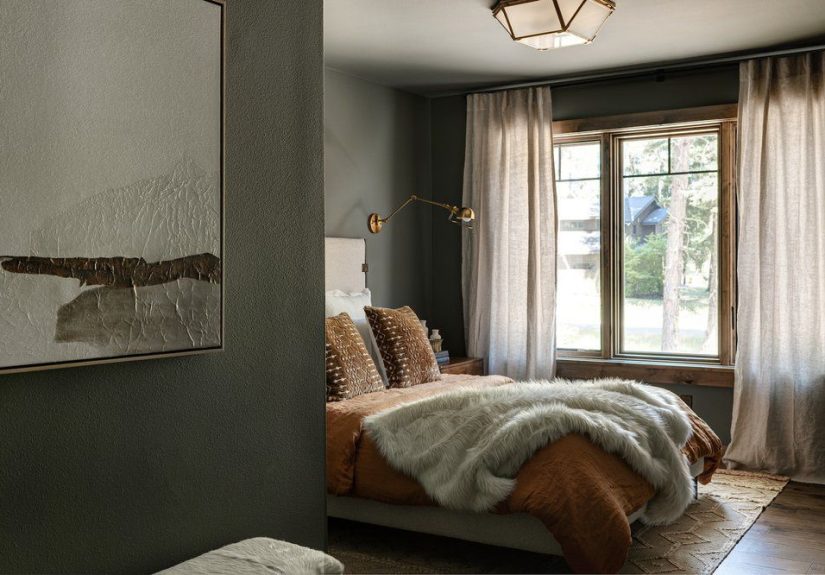
5) Hang window treatments the expensive way
Window treatments are one of the most underrated “luxury signals.” Expensive homes rarely have bare windows or tiny
curtains that look like they’re afraid of commitment. The goal is height, fullness, and clean lines.
The three rules of high-end curtains
- Hang them high. Place the rod close to the ceiling (or several inches above the window frame) to make ceilings feel taller.
- Hang them wide. Extend the rod beyond the window so panels stack off the glass and the window looks larger.
- Go full length. Panels that “kiss” the floor look tailored; too-short curtains look accidental.
Affordable ways to make curtains look custom
- Use curtain rings with clips to create elegant, even pleatsno sewing required.
- Hem with iron-on tape for the right length.
- Layer for depth: a simple shade (or blind) plus drapery reads more expensive than either one alone.
Pro move: Choose solid panels in a textured fabric (linen-look, cotton blend, or velvet-style) and let the texture do the “luxury” work.
6) Curate with scale: rug + oversized art + “edited” styling
The easiest way to make a home look expensive is to make it look considered. This isn’t about buying a bunch
of new stuff; it’s about choosing fewer focal points and letting them breathe.
Go bigger than you think (yes, really)
- Rugs: A too-small rug makes a room feel temporary. Size up so at least the front legs of furniture sit on it.
- Art: One large piece often looks more expensive than a cluster of small prints.
- Mirrors: Oversized mirrors bounce light and add that “grand” feelingespecially in entries and dining areas.
Use the “three zones” styling method
- Clear surfaces: Remove anything that doesn’t belong (mail piles, random cords, mystery objects).
- Create one styled moment: A tray + candle + small plant on a coffee table looks intentional.
- Add life: Fresh greenery or a simple vase of branches reads high-end for very little money.
Quick edits that instantly look more luxe
- Hide cords and power strips (cord management is wildly underrated).
- Swap a few throw pillow covers for textured neutrals.
- Replace one “busy” shelf with negative space and a single statement object.
Thrift-smart tip: Look for vintage frames, mirrors, and ceramic vases. A little patina often looks richer than something shiny-new and plastic.
A realistic weekend plan (that looks way pricier than it costs)
If you want a “before-and-after” without losing an entire month of your life, try this:
- Friday night: Declutter surfaces + clean windows + patch wall dings.
- Saturday: Paint one high-impact room or refresh trim/doors.
- Sunday morning: Swap cabinet hardware + replace switch plates.
- Sunday afternoon: Hang curtains high and wide + add one oversized art piece or mirror.
- Sunday evening: Adjust bulbs for consistent warm light and celebrate your new “I totally hired a designer” vibe.
Conclusion
Making your home look expensive isn’t about chasing trends or buying the fanciest version of everything. It’s about
nailing a few high-impact detailspaint, lighting, hardware, trim, window treatments, and well-chosen scaleso your
space feels cohesive, polished, and intentional.
Pick one update, finish it fully, and then move on to the next. That “finished” feeling is the real luxuryand it’s
surprisingly budget-friendly when you focus on the upgrades that do the most visual heavy lifting.
Experiences Related to “6 Budget-Friendly Updates That Will Make Your Home Look Expensive” (Real-Life Lessons & What People Notice)
A funny thing happens when you start making budget-friendly upgrades: you realize the “expensive” look isn’t a single
purchaseit’s a chain reaction. Many homeowners describe it like pulling one loose thread and suddenly discovering
the whole sweater is ready for an upgrade. You replace a dated light fixture, and now the room feels brighter, so the
scuffed walls look… extra scuffed. You paint the walls, and now the old switch plate looks like it’s been through a
minor apocalypse. None of this is bad newsit’s just your home finally getting the spotlight it deserves.
One of the most common experiences is how lighting changes behavior. When a room has warm, layered light
(overhead + lamps + dimmers), people actually use it differently. The space feels calmer. Even everyday routineslike
making coffee or folding laundryfeel less like a chore and more like you’re starring in a tasteful home commercial.
It’s not magic; it’s just that harsh lighting makes everything look a little tired. Softer, well-placed lighting makes
the room feel intentional, and intention reads as “expensive.”
Another pattern: paint delivers emotional ROI. A fresh coat of paint often brings a surprising sense of
control and “new start” energy. People frequently report that once the walls are clean and the trim lines look crisp,
they stop noticing what the home doesn’t have (bigger square footage, brand-new furniture, a kitchen worthy of a
magazine spread) and start noticing what it does have: good bones, personality, and a more polished backdrop. Paint is
also the upgrade that makes other upgrades look better. Your new hardware looks sharper against a freshly painted door.
Your curtains look richer when the wall color behind them isn’t dingy.
Then there’s the hardware effectarguably the most satisfying “five-minute win.” People tend to underestimate how often
they touch cabinet pulls, faucets, and doorknobs. Once those pieces feel sturdy and look cohesive, the home feels
cared-for. A home that looks cared-for is automatically perceived as higher-end. It’s the design equivalent of showing
up to dinner with polished shoes: you didn’t change who you are, you just look like you planned to be there.
Window treatments often come with a learning curve, but the payoff is huge. The most common “wish I’d known earlier”
moment is realizing that curtain placement matters more than curtain price. High and wide placement makes
windows look larger and ceilings look tallertwo features people associate with luxury homes. It’s also one of the most
dramatic before-and-after upgrades in photos, which is why it tends to be a favorite among renters and budget renovators.
Finally, many people describe an unexpected mindset shift: once they get one room looking more expensive, they become
pickier in a good way. Instead of buying more decor, they buy fewer, better piecesor they shop their own home and
edit what they already have. They start asking, “Does this add value to the room?” rather than “Where can I put this?”
And that’s the real secret behind high-end homes: the space isn’t crowded with stuff. It’s curated. The room breathes.
And you don’t need a huge budget to get therejust a plan, a little patience, and the willingness to move the curtain rod
up higher than feels reasonable (trust the process).


