
Table of Contents >> Show >> Hide
- Before You Start: The 10-Minute Setup That Saves an Hour
- Way 1: Declutter Like You Mean It (Not Like You’re Negotiating)
- Way 2: Do a Soft-Surface Refresh (Because Fabric Holds Secrets)
- Way 3: Clean Top-to-Bottom (So You Don’t Re-Dust Your Own Work)
- Way 4: Reset Your Storage (So It Stays Clean Past Tuesday)
- Mini Spring Cleaning Schedule (If You Want It Done Without a Meltdown)
- Conclusion: A Cleaner Room That Doesn’t Instantly Re-Clutter
- Real-Life Experiences That Make Spring Cleaning Easier (and Less Annoying)
Spring cleaning sounds wholesome until you’re staring at a chair that’s been holding “clean” laundry since… let’s call it “a previous season.”
The good news: you don’t need a full weekend, a label maker, and a personality transplant. You need a simple plan that’s easy to start,
hard to mess up, and satisfying enough that you’ll actually finish.
Below are four practical, room-specific ways to spring clean your roomwith the kind of tactics that work in real life:
small spaces, busy schedules, dusty corners, and mystery items that definitely weren’t yours when you moved in.
Before You Start: The 10-Minute Setup That Saves an Hour
Think of this as stretching before the workout (except you get to keep your dignity). Grab:
- Three containers: Donate, Trash/Recycling, Relocate (stuff that belongs elsewhere)
- Two cloths: one dry microfiber (dust), one damp (wipe)
- A vacuum (ideally with attachments) and/or broom
- All-purpose cleaner (and glass cleaner if mirrors are involved)
- Laundry basket (even if your hamper is currently “a suggestion”)
Open a window if weather/allergies allow, put on a playlist or a comfort show, and set a timer. You’re not “cleaning forever.”
You’re doing a focused reset.
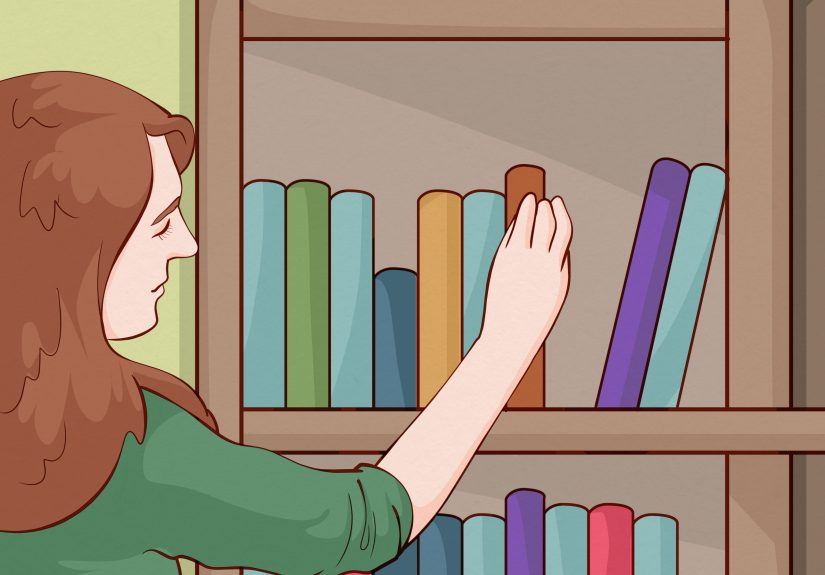
Way 1: Declutter Like You Mean It (Not Like You’re Negotiating)
If you try to deep clean around clutter, you’ll spend most of your time lifting items, moving items, and questioning your life choices.
Decluttering first makes every other step fasterand way less annoying.
Start with the “Visible Clutter Circuit” (15–25 minutes)
- Trash first: cups, wrappers, receipts, packaging, and anything that’s clearly not part of your personality.
- Clothes sweep: move dirty laundry to the basket; hang or fold the clean stuff (yes, even the chair pile).
- Surface reset: clear your nightstand, dresser, desk, and windowsill into the Relocate box.
Then tackle one “clutter hotspot” with a simple rule
Pick ONE: your closet, your dresser drawers, under the bed, or the “random shelf.” Use this rule:
If you haven’t used it in a year and it isn’t sentimental or essential, it’s a candidate for donation.
For clothes specifically, do a quick try-on test for the “maybe” pile. If it pinches, sags, itches, or makes you feel like you’re
starring in a regret montagelet it go.
Specific examples that make a big dent fast
- Closet: donate duplicates, anything that doesn’t fit, and “someday” outfits that have been waiting since 2019.
- Nightstand: keep only what you use weekly (chargers, book, medication, hand cream). Everything else gets relocated.
- Desk: old papers become a single folder; random cords go into one labeled pouch (not a drawer of despair).
Pro tip: Don’t “organize” clutter. Decide what stays, then organize what’s left. Organization without editing is just clutter in matching bins.
Way 2: Do a Soft-Surface Refresh (Because Fabric Holds Secrets)
Bedrooms collect dust and allergens in the places you can’t see: bedding, pillows, rugs, curtains, and upholstery. Refreshing soft surfaces
is one of the fastest ways to make your room feel cleanerand smell fresherwithout buying anything.
Bedding and linens: go beyond the sheets
- Wash sheets and pillowcases (warmest safe setting for the fabric).
- Wash or air out comforters/duvets based on care labels.
- Don’t forget pillow protectors and mattress protectors if you use them.
Mattress refresh in 3 steps (20 minutes hands-on)
- Vacuum the mattress using an upholstery attachmentespecially seams and edges.
- Spot treat stains with a fabric-safe cleaner (test first).
- Optional odor reset: sprinkle baking soda lightly, let sit, then vacuum again.
This is also a great time to rotate or flip the mattress if your model recommends it.
Curtains, blinds, and rugs: the “air + dust” combo
- Curtains: shake outside, vacuum with an attachment, or launder if washable.
- Blinds: vacuum with a brush tool, then wipe with a barely damp cloth.
- Rugs: vacuum both sides if possible; spot clean high-traffic areas.
If your room still smells “closed up,” crack a window for 10 minutes and swap in a clean set of linens. It’s the home version of a glow-up.
Way 3: Clean Top-to-Bottom (So You Don’t Re-Dust Your Own Work)
The biggest spring cleaning mistake is cleaning the floor first. Dust falls. Gravity wins. Your job is to work with physics, not against it.
Clean high areas first, then move downward to floors.
High-to-low checklist (30–45 minutes)
- Ceiling corners and fans: use a duster or vacuum extension.
- Light fixtures and lampshades: dust or wipe (make sure bulbs are cool).
- Walls and baseboards: spot clean marks; wipe baseboards with a damp cloth.
- Furniture: dust dresser tops, shelves, headboards; wipe sticky fingerprints.
- Mirrors and glass: quick polish for instant “wow, this room is alive” energy.
High-touch surfaces you’re probably missing
- Door handles and closet knobs
- Light switches
- Remote controls, keyboards, mouse
- Phone charging station area
A smart safety note: in most homes, cleaning (soap/detergent) comes before disinfecting. If you choose to disinfect, follow product labels
and don’t mix chemicals. “Spring fresh” should not involve a science experiment.
Floor finish: the satisfying finale
- Hard floors: vacuum/sweep first, then mop.
- Carpet: vacuum slowly in overlapping passes; use attachments for edges and corners.
- Under the bed: yes, you’re going there. It’s the dust bunny conference center.
Way 4: Reset Your Storage (So It Stays Clean Past Tuesday)
Spring cleaning your room isn’t just about making it look good once. The real win is making it easier to keep clean.
That means giving your everyday items a “home” that matches how you actually live.
Use the “Point of Performance” rule
Store items where you naturally use them:
- Skincare/makeup: keep daily items in one tray; everything else in a bin or drawer.
- Clothes: put frequently worn items at eye level; seasonal or special-occasion items higher or farther back.
- Workout gear: one basket near the door so it’s grab-and-go.
- Paper clutter: one inbox tray; once a week, file or toss.
3 simple organization upgrades (no renovation required)
- “Catch-all” bowl by the door: keys, earbuds, walletso they stop migrating.
- Under-bed storage: off-season shoes, extra linens, memorabilia (labeled, please).
- Drawer dividers: socks, chargers, hair toolsanything that turns into a tangled ecosystem.
Create a 5-minute nightly reset (your future self will clap)
Keep it ridiculously easy:
- Trash goes out
- Clothes to hamper
- Desk cleared to one “inbox” pile
- One quick floor sweep with a cordless vacuum (or a fast broom pass)
If you can do it while your phone charges, it’s the right size habit.
Mini Spring Cleaning Schedule (If You Want It Done Without a Meltdown)
Here’s a realistic way to break it up:
- Day 1 (30–45 min): Declutter surfaces + laundry + trash
- Day 2 (45–60 min): Bedding + mattress refresh
- Day 3 (45–60 min): Top-to-bottom dust + baseboards + floors
- Day 4 (30–45 min): Closet/drawers + storage reset
Conclusion: A Cleaner Room That Doesn’t Instantly Re-Clutter
The secret to spring cleaning your room isn’t perfectionit’s sequence.
Declutter first so you can actually clean. Refresh the soft stuff so the room feels new. Work top-to-bottom so you don’t redo work.
Then reset storage so your space stays calmer for longer than a single Instagram story.
And if you only do one thing today? Clear one surface and make the bed. It’s shockingly hard to feel chaotic in a room that looks like it has
its life together.
Real-Life Experiences That Make Spring Cleaning Easier (and Less Annoying)
Most people don’t fail at spring cleaning because they’re lazythey fail because they try to do it like a home makeover show.
Real rooms have real constraints: tiny closets, shared spaces, busy workweeks, and stuff that doesn’t have a “proper place” because no one ever
assigned it one. If that sounds familiar, here are some lived-in lessons that consistently make the process smoother.
1) The “Laundry Chair” is a symptom, not the problem. If clean clothes always end up on a chair, the issue usually isn’t folding.
It’s friction. Maybe your dresser is jammed, maybe hangers are hard to reach, or maybe you hate putting away clothes because it takes ten steps.
A small changelike adding an open basket for “rewear” items, putting a hamper exactly where you undress, or switching to slim hangerscan stop the
pile from forming in the first place. The chair was just bravely taking the blame.
2) Motivation shows up after you start, not before. Waiting to “feel like cleaning” is like waiting to “feel like flossing.”
The trick is to begin with a task that produces a visible win in under ten minutes: empty the trash, clear the nightstand, or strip the bed so
laundry is already in motion. Once the room looks even 10% better, it’s easier to keep going because your brain gets proof that effort works.
3) The fastest spring cleaning hack is limiting “decision fatigue.” Decisions burn energy: keep or toss, where does this go, do I need
this cord, why do I have three phone chargers from phones I no longer own? One practical approach is to create “decision zones.”
For example, all cords go into one box first (no sorting yet). All papers go into one pile first. Then you deal with each category oncewhen you’re in
that mindset. It’s oddly calming to postpone micro-decisions until the mess is contained.
4) Cleaning products matter less than tools you’ll actually use. People often buy another spray bottle when what they really needed was
a microfiber cloth in each room, a small handheld vacuum, or a duster that reaches corners. Convenience wins. If wiping a baseboard requires hunting for
supplies, you won’t do it. If the cloth is already under the sink (or in a drawer), you will. The same goes for storage: the “best” organizer is the one
you’ll keep using because it’s simple.
5) The room feels “clean” when the air and light feel clean. That’s why bedding, curtains, and dusting lamps make such a difference.
Fresh sheets, a quick mirror polish, and a cleared windowsill can transform the vibe even if you didn’t alphabetize your bookshelf (and you don’t need to).
When people talk about loving the result of spring cleaning, they’re usually reacting to those sensory cues: less dust, fewer odors, more open surfaces, and
light reflecting off clean glass instead of smudges.
6) Maintenance is easier than another big spring clean. After you finish, it’s tempting to declare victory and never return.
But the most realistic “keep it clean” system is a tiny routine: five minutes at night, one weekly laundry reset, and a quick monthly “donation bag.”
If you keep an empty bag in the closet and toss in one item whenever you find something you don’t use, decluttering becomes continuous instead of dramatic.
That way, next spring is a refreshnot a rescue mission.
Spring cleaning your room is really a form of self-care that doesn’t require a bath bomb.
When your space is lighter, your brain tends to follow. And if your room gets messy again later (it will), that doesn’t mean you failed.
It just means you live therelike a normal person.


