
Table of Contents >> Show >> Hide
- Why Sponges Still Earn Their Spot in the Kitchen
- 1. Use a Damp Sponge to Finish a Steam-Cleaned Microwave
- 2. Turn a Sponge and Baking Soda Into a Sink-Reset Duo
- 3. Keep One Dedicated Sponge for Greasy Backsplashes and Cabinet Fronts
- 4. Cut a Sponge Into Mini Cleaning Blocks for Tight Kitchen Spots
- Smart Sponge Rules That Make Easy Cleaning Actually Easy
- Common Sponge Mistakes That Make Kitchen Cleaning Harder
- Real-Life Experiences With Sponge Cleaning in the Kitchen
- Conclusion
- SEO Tags
Note: Clean HTML body content only. SEO tags are included in JSON format at the end.
If the kitchen had an unofficial mascot, it might be the sponge. It’s always there, slightly dramatic, a little soggy, and somehow involved in every mess from pasta sauce explosions to mystery splatters behind the faucet. But while a kitchen sponge is small, humble, and usually ignored until it starts smelling like regret, it can actually be one of the smartest cleaning tools in the room when you use it the right way.
The trick is not just owning a sponge. The trick is using it strategically. A good sponge can help you wipe away microwave splatter without scrubbing like you’re training for a fitness competition, polish up a sink with pantry staples, tackle grease on backsplashes, and handle those annoying tight spots where crumbs and grime love to hide. The not-so-glamorous truth, though, is that sponges also need boundaries. A dirty, overworked sponge can spread grime instead of removing it, which is not exactly the kind of teamwork your kitchen needs.
In this guide, you’ll learn four clever ways to use sponges in the kitchen for easy cleaning, plus practical tips for keeping your sponge from turning into the tiny germy villain of your countertop. Expect simple steps, realistic advice, and a few sanity-saving ideas for cleaning faster without making your kitchen feel like a chemistry lab.
Why Sponges Still Earn Their Spot in the Kitchen
For all the hype around fancy microfiber cloths, trendy scrub tools, and bottles that promise to make everything “sparkle instantly,” the classic kitchen sponge still deserves a little respect. It’s soft enough for many everyday surfaces, flexible enough to bend around faucet bases and sink corners, and absorbent enough to help lift grease, crumbs, and soap residue in one pass.
That said, not every sponge should be used the same way. The soft side is ideal for wiping down delicate surfaces, refrigerator shelves, appliance doors, and countertops that need a gentle touch. The scrubby side can be useful for tougher messes, but it should stay far away from surfaces that scratch easily. If you’ve ever seen dull streaks on a stainless-steel appliance or wondered why the lettering on a control panel suddenly looks tired, an abrasive sponge may have been the culprit.
The smartest approach is to treat your sponges like kitchen employees with different job descriptions. One does dishes. One handles surfaces. One gets retired before it starts smelling like a swamp. Suddenly, your kitchen cleanup routine becomes faster, cleaner, and a lot less chaotic.
1. Use a Damp Sponge to Finish a Steam-Cleaned Microwave
The microwave is where leftovers go to be reborn and where sauces go to decorate the ceiling. Instead of attacking dried splatter with brute force, use your sponge as the finishing tool after steam does the heavy lifting.
How this trick works
Steam loosens hardened food bits, grease, and sticky residue so your sponge can wipe them away without endless scrubbing. This saves time, protects the microwave interior from unnecessary abrasion, and makes cleaning feel much less annoying. That alone deserves applause.
How to do it
Fill a microwave-safe bowl with water and add lemon slices or a splash of vinegar. Heat it until the interior gets steamy, then let the steam sit for a few minutes with the door closed. Once it’s cool enough to work safely, use the soft side of a damp sponge to wipe down the walls, ceiling, turntable, and door.
For stubborn spots, add a drop of dish soap to the sponge and go back over the area. The softened mess should lift much more easily than it would on a dry surface. Finish by rinsing the sponge, wiping once more, and drying the microwave interior with a clean cloth.
Why this is one of the best sponge cleaning hacks
This method turns your sponge into a low-effort cleanup tool instead of a punishment device. It works especially well after reheating soup, melting butter, or discovering that pasta sauce apparently has theatrical ambitions. It also helps reduce the temptation to use harsh abrasives on a surface that really does not need them.
2. Turn a Sponge and Baking Soda Into a Sink-Reset Duo
If your kitchen sink looks dull, spotted, or vaguely offended by your lifestyle choices, a sponge and a little baking soda can fix a lot. This is one of the simplest ways to use sponges in the kitchen because it relies on two things many households already have.
Why it works
Baking soda gives you mild scrubbing power without being overly harsh, while a soft sponge helps work the paste into the sink’s curves, corners, and flat surfaces. It’s especially useful for stainless-steel and porcelain sinks that collect water marks, food residue, and greasy film throughout the week.
How to do it
Rinse the sink first so loose crumbs and debris go down the drain. Sprinkle baking soda across the damp sink basin or put some directly on a wet sponge. Add a few drops of dish soap if the sink is greasy. Then scrub in gentle circular motions, paying attention to the drain edge, the back corners, and the area around the faucet base.
For stainless steel, scrub with the grain when possible. For stubborn spots, make a thicker paste with baking soda and water and let it sit for a few minutes before wiping again. Rinse thoroughly and buff dry with a soft cloth to reduce streaks and water spots.
Where this trick really shines
This is a great weekly reset. It’s fast, inexpensive, and satisfying in the deeply adult way that only a shiny sink can be. You can also use the same general method on a sink divider, drain cover, or around the soap dispenser opening where grime quietly builds up while everyone pretends not to notice.
What to avoid
Do not go wild with the abrasive side of a sponge on finishes that scratch easily. Your goal is a clean sink, not a sink that looks like it lost a fight. If you’re cleaning around delicate fixtures or coated appliance surfaces nearby, stay with the soft side and mild cleaner.
3. Keep One Dedicated Sponge for Greasy Backsplashes and Cabinet Fronts
Grease is sneaky. It doesn’t always show up as a dramatic orange smear. Sometimes it settles into a light sticky film on the backsplash, cabinet fronts, range hood, or appliance handles and waits for the sunlight to embarrass you. This is where a dedicated surface sponge becomes a brilliant shortcut.
The smart setup
Keep one non-scratch sponge specifically for surfaces, not dishes. Better yet, choose a different color from your dish sponge so nobody accidentally washes a coffee mug with the same sponge that just wiped last week’s bacon fog off the backsplash. Boundaries matter.
How to use it
Dampen the sponge with warm water and add a tiny amount of dish soap. Wipe cabinet fronts, tile backsplash sections, stove sides, and appliance handles in manageable zones. Rinse the sponge often so you’re actually removing grease instead of smearing it around in a tragic little loop.
For areas with heavier buildup, let warm soapy water sit on the surface briefly before wiping again. Follow with a clean damp pass to remove residue, then dry with a microfiber cloth if you want a streak-free finish.
Why this sponge trick saves time
The biggest time-waster in kitchen cleaning is usually not the dirt. It’s the delay. Grease gets harder to remove when it sits for days or weeks. A dedicated sponge makes quick wipe-downs so easy that you’re more likely to do them before buildup becomes a full weekend project. That is what we call kitchen wisdom.
Best places to use this trick
- Backsplashes behind the stove
- Cabinet doors near the cooktop
- Refrigerator handles
- Microwave door and buttons
- Dishwasher front panel
- Trash can lids and nearby wall spots
Just remember: use the soft side first, especially on stainless steel, painted finishes, glossy tile, and control panels.
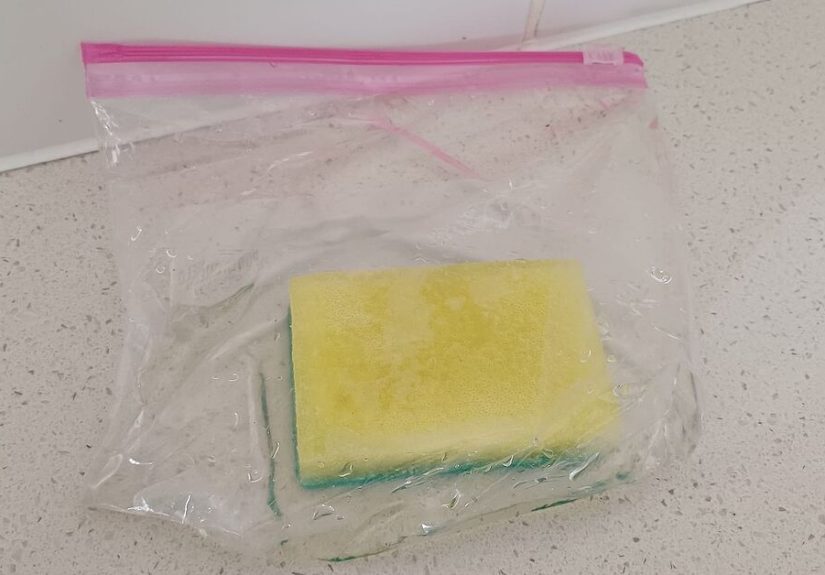
4. Cut a Sponge Into Mini Cleaning Blocks for Tight Kitchen Spots
Sometimes the full-size sponge is too bulky for the job. Around faucet bases, sink rims, narrow ledges, refrigerator shelf edges, and the grooves where crumbs gather like they pay rent, smaller is better. One of the cleverest kitchen sponge ideas is to cut a basic sponge into smaller pieces and assign each one a specific purpose.
Why this works so well
Mini sponge blocks give you better control. They fit into narrow spaces, they’re easier to grip, and they help you target grime without dragging a large soggy sponge over already-clean areas. They also make it easier to keep one piece for grimier jobs and another for gentler wipe-downs.
Where mini sponges are especially useful
- Around the kitchen faucet base
- Along sink seams and edges
- Inside refrigerator bins and shelf lips
- Around stovetop trim
- On drawer pulls, knobs, and handles
- Inside the lip of the trash can lid
How to use them
Cut a clean sponge into two or four smaller pieces. Dampen one with warm soapy water and use it for detail-cleaning small areas. Because the pieces are smaller, they’re also easier to rinse thoroughly. When one starts looking rough or smelling questionable, toss it without guilt. This is a low-cost trick that feels surprisingly efficient.
It’s also handy for cleaning the refrigerator, where a giant dripping sponge can make a mess worse. A small sponge lets you wipe shelf edges, corners, and drawer rails with much better accuracy. That means less sloshing, fewer streaks, and less muttering under your breath.
Smart Sponge Rules That Make Easy Cleaning Actually Easy
The best sponge cleaning routine is simple: keep them clean, keep them separate, and replace them before they become suspicious. A sponge should help your kitchen stay fresh, not become its own science project.
Use separate sponges for separate jobs
At minimum, keep one sponge for dishes and another for counters, sinks, backsplashes, and appliance exteriors. This small habit can reduce cross-contamination and make cleaning feel more organized.
Sanitize regularly
Refresh your sponge on a regular basis using a method appropriate for its material. Many households use the dishwasher’s hottest cycle and dry setting. Some people prefer a diluted bleach soak or boiling water. Wet microwaving can work for some plain sponges, but only when the sponge is fully wet and contains no metal or metallic scrub layer. When in doubt, pick the safer method over the faster-sounding one.
Replace often
If your sponge smells bad, falls apart, stays slimy, or starts looking like it has seen too much, replace it. In a busy kitchen, that might mean every week or two. There is no medal for owning the oldest sponge on the block.
Let it dry
Rinse the sponge well after each use, squeeze out extra water, and store it where air can circulate. A constantly wet sponge is basically a tiny invitation for grossness.
Common Sponge Mistakes That Make Kitchen Cleaning Harder
Even a good sponge can become a bad idea with the wrong habits. Here are the mistakes that tend to turn “easy cleaning” into “why is this still sticky?”
- Using one sponge for everything from dishes to raw-meat cleanup zones
- Scrubbing delicate appliances with the abrasive side
- Leaving the sponge soaked in the sink all day
- Forgetting to rinse out food bits after use
- Trying to make one sponge last for what feels like an entire fiscal quarter
A little sponge strategy goes a long way. The point is not to overcomplicate cleaning. The point is to make a basic tool work smarter.
Real-Life Experiences With Sponge Cleaning in the Kitchen
One of the most common experiences people have with kitchen cleaning is realizing that the hardest jobs are often caused by waiting too long. A microwave splatter looks harmless on day one, but by day four it has hardened into something that seems permanently attached. Using a sponge after steam-cleaning changes that experience completely. Instead of scraping and scrubbing with frustration, the mess wipes away in a few calm passes. It feels less like deep cleaning and more like restoring order.
Another very real kitchen experience is discovering that the sink somehow looks dirty even right after the dishes are done. That usually happens because dishwashing alone does not fully remove dull film, water spots, or residue around the drain and faucet base. A sponge with baking soda solves that in a way that feels immediate. Many people notice the kitchen looks cleaner overall when the sink looks brighter, even if nothing else has changed. The sink becomes a visual reset button for the room.
Grease is another issue that tends to surprise people. It builds slowly, and because it often lands on vertical surfaces like cabinet fronts and backsplashes, it can be easy to miss until the area feels sticky. The experience of using a dedicated sponge for greasy surfaces is usually a good one because it removes the mental barrier. There is no need to stop and wonder which tool to use. The sponge is already assigned to the job, so a quick wipe becomes part of the cooking routine instead of a postponed chore.
Small sponge pieces also make a noticeable difference in everyday cleaning. Full-size sponges can feel awkward in tight spaces, especially around sink rims, refrigerator shelf edges, and narrow ledges near the stove. Cutting one sponge into smaller blocks gives you better control and makes detail-cleaning far less annoying. This sounds like a tiny change, but in practice it often means people clean those neglected spots more often simply because the tool fits the task.
There is also the experience nobody loves discussing: the moment a sponge starts to smell strange. That odor is usually the sign that the sponge has crossed from “helpful tool” to “please remove this from the premises.” Once people begin rinsing, drying, sanitizing, and replacing sponges more regularly, the whole kitchen tends to feel fresher. Cleanup gets faster, surfaces feel less sticky, and there is less second-guessing about whether the sponge is actually cleaning anything at all.
In real kitchens, the biggest benefit of clever sponge use is not perfection. It is consistency. A sponge that is used intentionally makes small daily cleaning tasks so much easier that the kitchen stays under control without marathon scrubbing sessions. And honestly, anything that keeps dinner cleanup from turning into a dramatic life event deserves a permanent place by the sink.
Conclusion
The best kitchen cleaning tricks are usually not flashy. They are practical, repeatable, and just clever enough to save you time every single week. A sponge can help you steam-clean a microwave, reset a stained sink, wipe away grease before it becomes stubborn, and handle narrow spaces that larger tools miss. The secret is using the right sponge for the right job and keeping it clean enough to stay useful.
If you want easy kitchen cleaning, do not underestimate the power of a simple sponge with a smart routine behind it. Give it a proper role, refresh it often, and let it make your kitchen work a little less hard and look a lot better.


