
Table of Contents >> Show >> Hide
- Before You Start: Understand What You Are Working On
- Safety First: Paint Removal Is Not a “Hold My Soda” Project
- Way 1: Remove Paint From Auto Fiberglass by Sanding
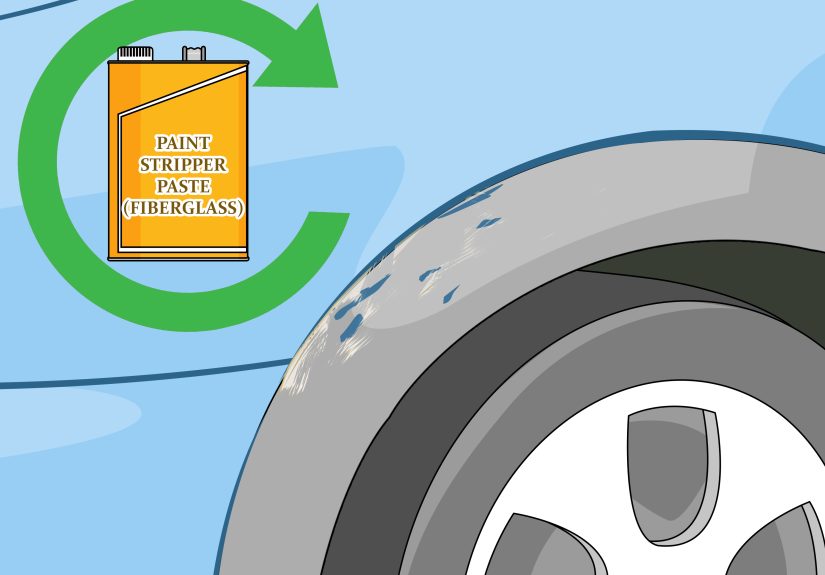
- Way 2: Use a Fiberglass-Safe Paint Stripper
- Way 3: Remove Small Paint Spots With Wet Sanding and Polishing
- How to Choose the Right Paint Removal Method
- What to Do After the Paint Is Removed
- Extra Experience: Real-World Lessons From Removing Paint From Auto Fiberglass
- Conclusion
Removing paint from auto fiberglass is not the same as stripping paint from steel. Metal can take a little more abuse. Fiberglass, on the other hand, has feelings. Sand too aggressively, use the wrong chemical stripper, or overheat the panel, and you can damage the gelcoat, expose fibers, create waves, or turn a simple repaint into a weekend-long apology letter to your wallet.
Whether you are restoring a fiberglass hood, repairing a custom body kit, refinishing a Corvette-style panel, cleaning up overspray, or prepping an aftermarket fiberglass bumper, the goal is simple: remove the unwanted paint without chewing into the structure underneath. The best method depends on the paint condition, the thickness of the coating, the size of the area, and what you plan to do afterward.
This guide breaks down three practical ways to remove paint from auto fiberglass: mechanical sanding, fiberglass-safe chemical stripping, and spot removal with wet sanding and polishing. Each method has its place. Used correctly, they can help you get a clean, smooth surface ready for primer, sealer, gelcoat repair, or fresh automotive paint. Used carelessly, they can make your project look like it was attacked by an angry raccoon with a power tool.
Before You Start: Understand What You Are Working On
Automotive fiberglass is usually a composite material made from glass fibers held together by resin. Some fiberglass auto parts also have a gelcoat or surface layer that provides a smoother finish before primer and paint are applied. That top surface is important. If you sand or strip through it unnecessarily, you may expose raw fibers, create pinholes, or make the panel harder to refinish.
Fiberglass parts can also vary widely in quality. A factory-style fiberglass panel may be thick, consistent, and well-cured. A cheaper aftermarket body kit may have thin edges, air pockets, uneven resin, or flexible sections that require more patience. This is why the best paint removal method is usually the least aggressive method that still gets the job done.
Safety First: Paint Removal Is Not a “Hold My Soda” Project
Paint dust, old coatings, solvents, and chemical removers can be hazardous. Always work in a well-ventilated area, wear eye protection, use suitable gloves, and control dust with a vacuum-assisted sander when possible. If the coating is old, unknown, or possibly contains hazardous pigments, consider professional testing before sanding. Do not burn paint off fiberglass, and avoid aggressive heat methods that can soften resin, warp panels, or release harmful fumes.
Also, be careful with chemical paint removers. Some older paint strippers contained methylene chloride, a chemical associated with serious health risks and banned from consumer paint removers in the United States. For fiberglass work, choose only products specifically labeled as safe for fiberglass or gelcoat, and follow the product label and safety data sheet exactly. When in doubt, test a small hidden area first.
Way 1: Remove Paint From Auto Fiberglass by Sanding
Best for: Peeling paint, rough panels, full repaint prep, and controlled removal
Sanding is the most common and controllable way to remove paint from auto fiberglass. It is especially useful when the old paint is peeling, cracked, poorly bonded, or too uneven to paint over. Sanding also gives new primer a mechanical surface to grip, which is essential for a lasting finish.
The biggest advantage of sanding is control. You can remove the paint layer by layer, feather edges, stop when you reach a stable surface, and avoid soaking the panel with chemicals. The downside is dust. Fiberglass dust and paint dust are not things you want floating around your garage like party confetti. Use dust extraction, wear proper protection, and clean the area thoroughly afterward.
How to sand fiberglass without destroying it
Start by washing the panel with soap and water to remove dirt. After it dries, wipe it with a wax and grease remover compatible with automotive refinishing. This step matters because sanding over wax or silicone can push contamination into the surface and cause paint problems later.
For heavy paint removal, many technicians begin with a coarse grit in the 80- to 120-grit range, depending on how thick and stubborn the coating is. Use a dual-action sander for broad, flat areas and hand-sanding blocks for edges, curves, and body lines. Do not stay in one spot too long. Keep the sander moving, use light pressure, and let the abrasive do the work.
Once most of the unwanted paint is gone, move to finer grits such as 180, 220, or 320 to refine the scratches and feather the remaining edges. If you are repainting the part, the final grit depends on the primer or sealer system you plan to use. Always follow the paint manufacturer’s surface preparation recommendations.
Common sanding mistakes to avoid
The first mistake is using too much pressure. Fiberglass does not reward brute strength. Heavy pressure can create low spots, heat buildup, and uneven waves that show up after the glossy new paint is applied. The second mistake is sanding through the gelcoat when you do not need to. If the old coating is stable and compatible with the new paint system, complete removal may not be necessary. Sometimes scuffing, feathering, priming, and sealing are enough.
The third mistake is ignoring edges. Fiberglass edges are often thinner than flat areas, so they burn through quickly. Sand edges by hand whenever possible. A power sander can turn a crisp body line into a melted-looking noodle faster than you expect.
Way 2: Use a Fiberglass-Safe Paint Stripper
Best for: Multiple paint layers, detailed shapes, heavy buildup, and large panels where sanding would be slow
Chemical stripping can be useful when a fiberglass auto part has several layers of paint or when the surface has curves, vents, scoops, or details that are difficult to sand evenly. A paint stripper softens the coating so it can be lifted away with a plastic scraper rather than ground off with abrasives.
The key phrase is fiberglass-safe. Not every paint remover belongs near fiberglass. Some aggressive strippers can attack gelcoat, soften resin, stain the surface, or leave residue that causes adhesion problems later. Choose a product specifically labeled for fiberglass or gelcoat surfaces. If the label does not clearly say it is safe for fiberglass, treat it like a raccoon in your engine bay: interesting, but not something you want to touch.
How fiberglass-safe stripping generally works
Begin with a clean, dry panel. Mask off nearby rubber, trim, hardware, and areas you do not want exposed. Apply the stripper according to the product label, usually in a consistent layer thick enough to stay wet while it works. Avoid improvising with household solvents or mixing products. Paint chemistry is not a kitchen recipe.
After the coating softens, use a plastic scraper or non-metallic tool to lift the paint. Metal scrapers can gouge fiberglass and create repair work you did not ask for. For tight corners, use a soft brush or plastic detailing tool. Repeat the process only as directed by the product manufacturer.
Once the paint is removed, the surface must be cleaned exactly as the stripper instructions require. Some products clean up with water; others require a specific wipe-down process. After the panel is dry, sand lightly to remove residue, smooth the surface, and prepare it for primer. Chemical stripping removes paint, but it does not automatically create a perfect refinishing surface.
When chemical stripping is not the best choice
A chemical stripper may not be ideal for thin aftermarket fiberglass, unknown repairs, stress-cracked panels, or areas where the surface already feels soft or unstable. It is also not the best option if you cannot provide proper ventilation, personal protection, and cleanup. When safety conditions are not right, sanding or professional refinishing is the smarter path.
Way 3: Remove Small Paint Spots With Wet Sanding and Polishing
Best for: Overspray, paint transfer, minor drips, thin top layers, and finish correction
Not every paint removal job requires stripping the entire panel. Sometimes you only need to remove overspray, a paint scuff, a bad blend edge, or a small drip. In that case, wet sanding and polishing can be the cleanest approach.
Wet sanding uses very fine abrasive paper with water to level the surface gradually. It is slower than dry sanding, but it creates less airborne dust and offers excellent control. It is often used after paint correction, gelcoat repair, or refinishing to remove sanding scratches before compounding and polishing.
How to approach spot removal
First, clean the area thoroughly. If the unwanted paint is only sitting on top of the finish, try the mildest safe cleaning approach first, such as an automotive-safe surface cleaner or detailing clay. If that does not work, wet sanding may be needed.
For delicate correction, start with a fine grit rather than jumping straight to a harsh abrasive. The exact grit depends on the condition of the surface, but the principle is always the same: start as mild as possible. Sand gently with a small block or flexible pad, keep the area wet, check your progress often, and stop as soon as the unwanted paint is removed.
After wet sanding, the surface will usually look dull. That is normal. The shine comes back through compounding and polishing. Use a fiberglass- or paint-safe rubbing compound to remove sanding haze, then follow with a finer polish if needed. If the part is finished in gelcoat, use products suitable for gelcoat. If it is automotive paint, use products compatible with that paint system.
Why this method is great for beginners
Spot removal is slower, but that is exactly why it is beginner-friendly. You can sneak up on the result instead of blasting through the finish. It is ideal when you are dealing with small flaws and want to preserve as much of the original surface as possible. Patience is the secret ingredient. Sadly, it is not sold in spray cans.
How to Choose the Right Paint Removal Method
Choose sanding when the paint is peeling, cracked, thick in some places, or when you need to reshape and refinish the panel. Sanding is also the best choice when you want maximum control over feathering and surface preparation.
Choose a fiberglass-safe chemical stripper when there are many layers of old paint or when the shape is too complicated to sand efficiently. This method can save time, but only if the product is safe for fiberglass and used exactly as directed.
Choose wet sanding and polishing when the problem is small: overspray, paint transfer, a drip, or a thin unwanted layer. This method protects the surrounding finish and avoids unnecessary full-panel refinishing.
What to Do After the Paint Is Removed
Paint removal is only half the job. Once the old coating is gone, inspect the fiberglass carefully. Look for pinholes, cracks, exposed fibers, soft spots, previous repairs, or areas where the gelcoat has been damaged. Small defects should be repaired before primer goes on.
Next, clean the panel using products recommended for your paint system. Avoid touching the surface with bare hands after final cleaning because skin oils can create adhesion issues. If the surface is bare fiberglass or repaired composite, use a primer or sealer designed for fiberglass and compatible with your topcoat. Automotive paint systems work best when every layer is compatible: cleaner, primer, sealer, basecoat, and clearcoat.
Finally, remember that glossy paint reveals everything. A surface that looks “good enough” in dusty garage lighting may look wavy and scratched under sunlight. Take time to block sand, inspect, and correct defects before color. The best paint jobs are usually won before the first coat of paint ever leaves the spray gun.
Extra Experience: Real-World Lessons From Removing Paint From Auto Fiberglass
One of the most useful lessons in fiberglass paint removal is that speed is usually the enemy. A person may begin the project thinking, “I’ll just buzz this old paint off in an hour.” Three hours later, the panel has uneven low spots, the edges are too thin, and the garage looks like a powdered donut exploded. Fiberglass rewards patience. Work in small sections, check the surface constantly, and do not assume every layer needs to disappear if the existing coating is stable.
A practical example is a fiberglass hood with peeling paint around the scoop but decent paint across the center. The wrong move is to strip the entire hood aggressively just because one area failed. A better approach is to remove loose paint around the damaged zone, feather the edges, inspect for cracks, repair if needed, and then sand the rest of the panel for primer. This saves time and preserves the factory or molded surface.
Another common experience involves aftermarket fiberglass bumpers. These parts often have tight curves, vents, and thin edges. A power sander may work well on the broad face of the bumper, but it can quickly ruin the edges around openings. Hand sanding feels slower, but it keeps the shape intact. For detailed areas, a fiberglass-safe stripper may help, but only after testing a hidden spot. Some budget fiberglass parts react unpredictably because the resin, filler, or surface coating may not be consistent.
Overspray removal is another situation where restraint matters. Many beginners immediately reach for coarse sandpaper, but overspray often sits on top of the finish. Detailing clay, mild surface cleaners, or very fine wet sanding may remove it without cutting deeply into the paint or gelcoat. The less material you remove, the better. Paint correction is like editing a sentence: remove only what is necessary, or suddenly the whole thing stops making sense.
Dust control is also a real-world game changer. Vacuum-assisted sanding, plastic sheeting, and regular cleanup make the job safer and cleaner. They also help you see what you are doing. A dusty panel hides scratches, waves, and leftover paint edges. Wipe the surface, inspect it from different angles, and use a guide coat if you are doing serious refinishing. The surface will tell you what it needs if you stop long enough to look.
The final lesson is to plan the repaint before removing the paint. Know whether the part will receive gelcoat repair, epoxy primer, high-build primer, sealer, basecoat, or clearcoat. Different systems require different sanding grits and cleaning steps. Random sanding followed by random primer is how adhesion problems are born. A successful fiberglass refinishing job is not just about getting the old paint off; it is about creating the right foundation for the new finish.
Conclusion
Removing paint from auto fiberglass is a balance of patience, control, and surface protection. Sanding gives you accuracy, fiberglass-safe chemical stripping helps with heavy buildup, and wet sanding with polishing is perfect for smaller paint defects. The best method is the one that removes the unwanted paint while preserving as much of the fiberglass, gelcoat, and panel shape as possible.
Before starting, clean the surface, protect yourself from dust and fumes, avoid harsh or unsafe chemicals, and test your method in a small area. Fiberglass can look tough, but it does not like shortcuts. Treat it carefully, and it will reward you with a smooth surface ready for primer and paint. Treat it badly, and it will make sure you learn new vocabulary in the garage.


