
Table of Contents >> Show >> Hide
- Before You Muzzle: A 60-Second Safety Check
- What You’ll Need
- Approach & Positioning: Set Yourself Up to Win
- Method 1: The Classic “Loop, Cross, and Tie” Gauze Muzzle
- Method 2: The Pre-Tied “Slip-Loop” (Fastest in a True Emergency)
- Method 3: The “Double-Anchor” Gauze Muzzle (Helps Prevent Slipping)
- Special Notes for Short-Nosed Dogs (Bulldogs, Pugs, Boxers)
- Common Mistakes (and How to Avoid Them)
- How Tight Is “Tight Enough”?
- Practical Scenarios (So You Know Which Method to Pick)
- When to Call the Vet Immediately
- Extra: of “Been There” Moments People Commonly Describe
- Conclusion
Dogs are basically best friends wrapped in fur… right up until they’re hurt, scared, and suddenly auditioning for a role in
“Teeth: The Musical.” In emergencies, even the gentlest dog can bitenot out of “being bad,” but because pain + fear is a
powerful combo. A gauze muzzle is a quick, temporary safety tool that can help you give first aid or transport a dog
to the veterinarian without anyone’s hands becoming an accidental chew toy.
This guide covers three practical ways to apply a gauze muzzle to a dog, plus fit checks, common mistakes, and when
you should not use a muzzle at all. It’s written for real life: messy, stressful, and occasionally involving a dog who
thinks “bandage” means “new snack.”
Before You Muzzle: A 60-Second Safety Check
A gauze muzzle is not a “set it and forget it” item. It’s for brief, supervised emergency restraint
while you’re actively handling the dogthink minutes, not a car ride soundtrack’s worth of time.
Do NOT use a gauze muzzle if the dog is:
- Vomiting or likely to vomit (muzzling can increase the risk of inhaling vomit).
- Struggling to breathe, coughing heavily, choking, or showing respiratory distress.
- Overheating or at risk of heatstroke (dogs cool themselves mainly by panting).
- Unconscious or having seizures.
- Showing major facial trauma around the muzzle/nose where pressure would worsen injury.
Use a gauze muzzle only when it’s truly needed
If the dog is calm and you can safely control them with gentle handling, a leash, a blanket wrap, or a helper holding a steady
“hug” around the chest may be enough. If you do need a muzzle, remember: improvised/gauze muzzles restrict panting.
That means you should remove it as soon as it’s safeespecially if the dog is stressed, warm, or breathing hard.
What You’ll Need
- Roll gauze (2–4 inches wide works for most dogs; smaller dogs may need narrower gauze).
- Scissors (or tearable gauze, if that’s what you have).
- Treats (optional, but helpful if the dog will take them).
- A helper (highly recommendedone person stabilizes, one person ties).
- Gloves if there’s blood or the dog is in significant pain.
Quick sizing tip (so you don’t run out mid-tie)
As a rough rule, you want enough gauze to go around the muzzle and head more than once. If you’re guessing, cut a long strip
you can always shorten it, but you can’t magically add gauze when your dog decides the situation is “too exciting.”
Approach & Positioning: Set Yourself Up to Win
Many bites happen in the “I’m just going to lean right into your face” moment. Instead, approach from the side,
keep your body out of the dog’s direct line of teeth, and avoid reaching straight toward the mouth.
Low-drama restraint options
- Standing hug: Helper stands behind the dog, arms around the chest (not the neck), holding steady.
- Corner support: Dog’s side gently against a wall or couch so they can’t spin as easily.
- Grounded position: If safe, guide the dog into a comfortable sit or lying position before tying.
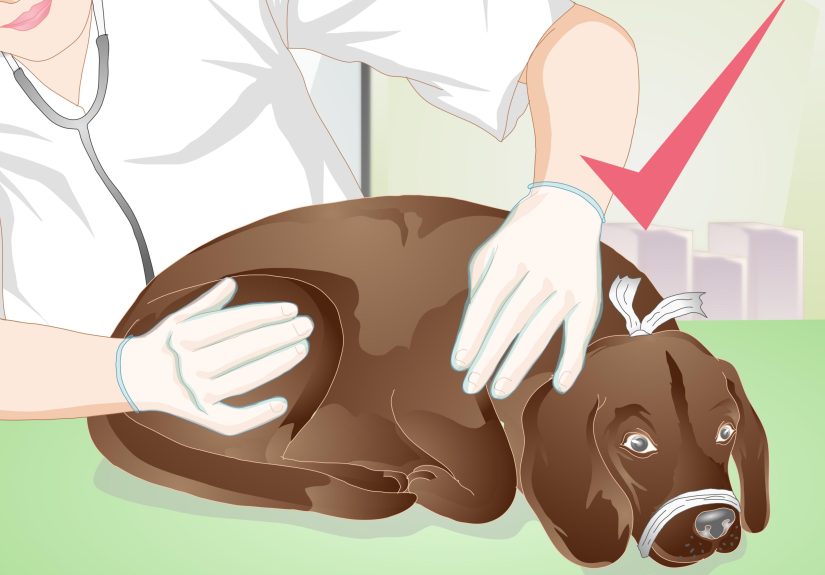
Method 1: The Classic “Loop, Cross, and Tie” Gauze Muzzle
This is the most common emergency gauze muzzle technique. It works best for dogs with medium to long snouts (think:
Labs, shepherds, collies). If your dog has a very short nose (bulldogs, pugs), skip to the special notes after the methods.
Step-by-step
-
Make a big loop in the middle of the gauze striplarge enough to slide over the dog’s nose.
(Think: “hula hoop,” not “bracelet.”) - Slip the loop over the muzzle and position it about midway down the snout (not on the nostrils).
- Tighten gently so the dog’s mouth is held closedbut not painfully squeezed.
- Cross the ends under the chin (like an X under the jaw).
-
Bring both ends up behind the ears (not across the eyes) and tie a quick-release bow.
A bow is faster to remove than a stubborn knot when you’re stressed. -
Optional stability step: If you have extra length, you can bring the ends forward along the cheeks and
tie a second bow behind the headbut avoid adding pressure to the throat.
Fit checks (don’t skip these)
- Nostrils clear: The gauze should never sit on the nose openings.
- Two-finger rule: You should be able to slide one to two fingers under the gauze in at least one spot.
- Watch breathing: If the dog is struggling, remove the muzzle immediately.
When this method shines
Use it when you need both hands to do something time-sensitivelike holding gauze on a bleeding paw, checking a cut, or safely
moving a dog into a car for a vet visit.
Method 2: The Pre-Tied “Slip-Loop” (Fastest in a True Emergency)
If you’ve ever tried tying knots with shaking hands while a dog does interpretive dance, you’ll appreciate this one.
The idea is simple: pre-tie a slip-style loop so the muzzle goes on quickly, then secure it behind the ears.
Step-by-step
- Pre-tie a loop near the middle of the gauze using a simple overhand knot, leaving a generous opening.
- With the dog stabilized, slide the loop over the muzzle and position it away from the nostrils.
-
Snug the loop so the mouth is closed, then immediately
bring both ends under the jaw. - Tie behind the ears with a quick-release bow.
- Do a fast breathing + comfort check (nostrils clear, no gagging, no panic escalation).
Why people like this method
- Speed: Less knot-tying while the dog is wiggling.
- Control: You can snug gradually instead of yanking tight in one motion.
- Removal: A bow releases quickly when you need to reassess breathing or the dog calms down.
Best use case
This is ideal when you’re alone and need a “get it on safely” approachlike securing a dog before lifting them or preventing a
bite while you clean a wound.
Method 3: The “Double-Anchor” Gauze Muzzle (Helps Prevent Slipping)
Sometimes a basic tie behind the ears slides forwardespecially on dogs with smooth coats, narrow heads, or enthusiastic head
shaking. The double-anchor adds a gentle stabilizing wrap so the muzzle is less likely to scoot off.
Important: the goal is stability, not more tightness. You should never cinch gauze around the neck. If you’re unsure,
use Method 1 or 2 and recruit a helper.
Step-by-step
- Apply a standard gauze muzzle using Method 1 (loop on muzzle, cross under chin, tie behind ears with a bow).
-
If you have extra gauze length, bring the loose ends down along the sides of the head toward the upper neck/shoulder
area (think “behind the head,” not “around the throat”). -
Tie a second loose bow off to one side, positioned so it won’t press on the windpipe and won’t rub the eyes.
This is a stabilizer, not a choke point. - Re-check: two fingers should fit easily under the stabilizing wrap, and the dog should be able to breathe comfortably.
- Keep the muzzle on only as long as you’re actively handling the dog. Remove it as soon as it’s safe.
When to use it
If you’re transporting a dog to the vet and the muzzle keeps sliding off during movement (but the dog is breathing normally and
not overheating), the double-anchor can buy you a little extra security while you relocateagain, briefly and under supervision.
Special Notes for Short-Nosed Dogs (Bulldogs, Pugs, Boxers)
Brachycephalic (short-nosed) dogs already have less room for airflow. A gauze muzzle can make breathing harder and can increase
overheating risk fast. If you’re dealing with a short-nosed breed in an emergency, the safest move is usually:
- Use professional help ASAP (vet/ER) and prioritize calm restraint over tight muzzling.
- Consider alternatives like a properly fitted basket muzzle designed for brachy breeds (for non-emergency planning).
- If you must prevent a bite briefly, use minimal restraint and remove immediately if breathing changes.
Common Mistakes (and How to Avoid Them)
Mistake 1: Covering the nostrils
If the gauze slides onto the nose openings, it can restrict breathing. Keep the loop farther back on the snout and re-tie if needed.
Mistake 2: Leaving it on “because it seems fine”
A dog can go from “fine” to “overheated and panicked” quickly, especially if stressed or warm. Gauze muzzles are for brief handling,
then off.
Mistake 3: Using a hard knot you can’t undo quickly
In emergencies, speed matters. Use a quick-release bow so you can remove the muzzle fast if the dog vomits, coughs,
struggles, or calms down.
Mistake 4: Treating a muzzle as a behavior solution
If you need a muzzle for routine grooming, vet visits, or known triggers, that’s a training and equipment conversation.
A properly fitted basket muzzle plus positive muzzle conditioning is far kinder (and safer) than improvised gauze.
How Tight Is “Tight Enough”?
The gauze should prevent the dog from opening their mouth wide enough to bite. It should not:
- Dig into the skin
- Pull the lips painfully against the teeth
- Make the dog gasp, panic, or struggle to breathe
If you can do it safely, aim for “secure but gentle.” If you can’t achieve that without force, pause and reassesscall a vet clinic
for guidance or wait for professional help when possible.
Practical Scenarios (So You Know Which Method to Pick)
Scenario A: Cut paw that won’t stop bleeding
You need both hands: one to hold pressure, one to wrap. Method 1 is usually the simplest for a long-snouted dog.
Scenario B: You’re alone and need speed
Dog is frightened, you’re trying to load them into the car. Method 2 (pre-tied slip-loop) is your best bet.
Scenario C: The muzzle keeps slipping off during movement
If the dog is breathing normally and you’re actively transporting, Method 3 (double-anchor) can help reduce slipping.
When to Call the Vet Immediately
A muzzle is not a treatmentjust a safety bridge to real care. Get professional help right away if you see:
- Deep wounds, uncontrolled bleeding, or suspected fractures
- Breathing trouble, collapse, extreme lethargy, or pale gums
- Heatstroke signs (heavy panting, drooling, weakness, vomiting)
- Bite wounds (they can look small on the surface but be serious underneath)
Extra: of “Been There” Moments People Commonly Describe
People don’t usually plan to learn emergency muzzling. It’s more like learning where your fire extinguisher is: you hope you never
need it, but you’ll be wildly grateful when you do. In pet first aid classes and vet-visit conversations, a few themes come up
again and again.
One common story: the “totally chill dog” who turns into a different creature the moment pain enters the chat. Someone notices a torn
nail, a paw cut, or a thorn stuck between pads. The dog limps in looking offended by gravity, and the human thinks, “No big deal,
I’ll just take a look.” Two seconds later, the dog is saying, very clearly, “Absolutely not,” with their whole bodyand sometimes
their teeth. That’s when a quick, gentle gauze muzzle can be the difference between calm first aid and a trip to urgent care for
the human.
Another classic: the car-loading scramble. Injured dogs often don’t want to be lifted, and scared dogs don’t want to be cornered.
People describe the moment they realize they need an extra hand they don’t have. A pre-tied slip-loop (Method 2) is popular in these
situations because it reduces knot-tying chaos. The goal isn’t to “win” against the dogit’s to keep everyone safe long enough to
get to the vet. If you’ve ever tried to tie a knot while your dog performs a surprise wiggle routine, you know why speed matters.
Then there’s the “muzzle slip” problem. Some dogs have heads shaped like sleek little rockets, and a simple tie behind the ears can
slide forward when they shake. People often describe feeling guiltylike they did something wrongwhen the gauze slips. In reality,
you’re not failing; you’re learning that fit depends on anatomy, coat, and movement. The double-anchor approach (Method 3) is basically
the “belt and suspenders” of emergency muzzling: it’s still temporary, still supervised, but it’s less likely to scoot off at the
worst moment.
A surprisingly important “experience lesson” is what happens after the emergency: many pet parents decide to muzzle-train
properly. They realize that an emergency gauze muzzle is like using a spare tire: it gets you off the highway, but it’s not the ideal
long-term solution. People often switch to a well-fitted basket muzzle and teach the dog, with treats and patience, that the muzzle
predicts good thingsnot doom. The next time the dog needs a nail trim or a vet exam, it’s calmer for everyone. The dog can pant, drink,
and take treats, and the humans can keep their fingers exactly where they belong: attached to their hands.
Finally, there’s a quiet win people mention: confidence. Knowing three safe ways to apply a gauze muzzle doesn’t make you paranoid.
It makes you prepared. And preparedness, in pet ownership, is basically love with a checklist.
Conclusion
A gauze muzzle is an emergency toolsimple, fast, and useful when you need to prevent a bite while you provide first aid or transport
a dog to the vet. Pick the method that matches your moment: Classic Loop-and-Wrap for straightforward control,
Pre-Tied Slip-Loop for speed, and Double-Anchor when slipping is the enemy. Keep it brief, keep it
supervised, and prioritize breathing and comfort every step of the way.


