Table of Contents >> Show >> Hide
- Why an Easy No-Tools Headboard Is a Bedroom Game-Changer
- A 2-Hour, No-Tools Headboard: Step-by-Step Guide
- Choosing Materials and Styles That Look High-End
- Renter-Friendly Tricks: Damage-Free Today, Easy Move-Out Tomorrow
- Styling Your New Headboard Like a Pro
- Real-Life 2-Hour Headboard Experiences & Lessons Learned
- Conclusion: A Headboard You Can Actually Finish Today
If your bedroom feels more “mattress in witness protection” than “cozy retreat,” a quick DIY headboard can change everything.
The good news: you don’t need power tools, a workshop, or a weekend. In about two hoursand without drilling a single holeyou can
create a stylish, renter-friendly headboard that looks custom and feels comfy.
This guide walks you through an easy, no-tools-required headboard project using peel-and-stick pieces and light materials.
We’ll cover what to buy, how to install it, simple styling tricks, and real-life tips from people who’ve done similar projects
in tiny apartments, dorms, and guest rooms. Think of it as “remodeling lite” with big visual payoff.
Why an Easy No-Tools Headboard Is a Bedroom Game-Changer
Instant style with almost zero commitment
A headboard does a lot of heavy lifting in design. It frames the bed, anchors the room, and gives your bedding something to
“lean on” visually. But traditional headboards can be:
- Expensive (especially upholstered or custom designs)
- Heavy and hard to move
- Landlord-unfriendly because they often require drilling into walls
A peel-and-stick or lightweight foam headboard solves those problems. It goes up quickly, comes down cleanly, and can move
with you when you change apartments or rearrange furniture for the sixth time this year.
Perfect for renters, dorm rooms, and commitment-phobes
Many apartments and dorms say “no paint, no nails, no fun.” But removable productslike self-adhesive padded panels, foam tiles,
and peel-and-stick wallpaperare specifically designed to grab onto smooth walls and come off later with minimal damage when
used properly. That means you can test out bold colors, faux textures (like wood, leather, or tile), or arch-shaped “faux headboards”
without sacrificing your security deposit.
Comfort and practicality
Beyond looks, a cushioned headboard creates a cozy spot to sit up and read, scroll, or snack in bed. Foam or padded panels
add a little insulation and softness, especially if your bed is up against a chilly wall. And because you’re building the layout yourself,
you can extend the design higher or wider than a typical store-bought headboard to fit tall pillows, extra-wide mattresses,
or an off-center window.
A 2-Hour, No-Tools Headboard: Step-by-Step Guide
Let’s build the star of the show: a simple, upholstered-look headboard using peel-and-stick padded panels or foam pieces.
No drills, no saws, no staple gunsjust measuring, peeling, and pressing.
Step 1: Choose your base style
For a truly no-tools project, pick one of these easy base options:
-
Peel-and-stick upholstered panels: Soft, padded tiles with adhesive backs. They mimic a tufted or paneled headboard
and come in faux leather, linen, or velvet looks. -
Foam or insulation board with built-in adhesive: Lightweight panels you can cover with fabric or use as-is
if they’re decorative enough. -
Peel-and-stick wallpaper or wall decals in a headboard shape: Great if you want the look of a painted or arched headboard
without ever opening a paint can.
Look for products marketed as removable or renter-friendly, and check the recommended wall surfaces (usually smooth, clean, and dry).
Step 2: Measure your bed and plan the layout
Grab a measuring tape and jot down a few numbers:
- Width of the mattress or bed frame (twin, full, queen, king, etc.)
- Desired height of the headboard area (usually 24–48 inches above the mattress)
- Height of pillows if you want the panels to peek out above them
On the wall, lightly mark:
- The center point of the bed
- The top edge of the planned headboard
- The side boundaries (you can go exactly as wide as the bed or extend a few inches on each side for a more dramatic look)
Painter’s tape is your best friend here. Use it to outline the future headboard shape: a simple rectangle, a gentle arch,
or a playful scalloped silhouette if your panels allow.
Step 3: Prep the wall
Your adhesive is only as good as the surface it sticks to. Before you peel anything:
- Wipe the wall with a slightly damp cloth to remove dust and let it dry completely.
- Avoid freshly painted wallsmost removable adhesives recommend waiting at least a couple of weeks.
- If your wall is very textured, consider a thin, removable backing panel (like smooth foam board) attached with removable strips first.
Step 4: Start sticking from the center
To keep everything symmetrical and straight, begin at the center line:
-
Peel the backing off your first panel halfway, align the panel’s bottom with your “headboard base” line,
and gently press the exposed adhesive onto the wall. - Once you’re happy with the placement, peel off the rest of the backing and press firmly from the center outward to remove air bubbles.
- Add panels to the left and right of that first piece, maintaining even spacing (or snug seams, depending on the design).
If you’re using an arch or shaped decal, follow any included template lines or printed edges on the backing.
For rectangular tiles, think in “rows and columns”finish the bottom row, then move up.
Step 5: Build height and shape
Continue adding panels upward to your desired height. For a classic, padded look:
- Keep rows aligned so seams form a neat grid.
- Use panels in a single color for a sleek hotel vibe.
- Or alternate two tones for a subtle pattern (for example, light gray and charcoal stripes).
If you’re using peel-and-stick wallpaper, you can cut it into an arch or “half-moon” shape before applying,
or apply it as a wide rectangle and trim the top with scissors or a craft blade (go slowly and protect the wall).
Step 6: Press, smooth, and finish edges
Once all panels or decals are in place:
- Run your hands firmly over each piece, especially the edges and corners.
- Check for any lifted spots and press them down again.
- If the product allows, you can use a soft cloth or rubber squeegee to smooth bubbles out.
That’s ityour “no tools required” headboard is officially done. Add pillows and admire your work while pretending
you hired a designer.
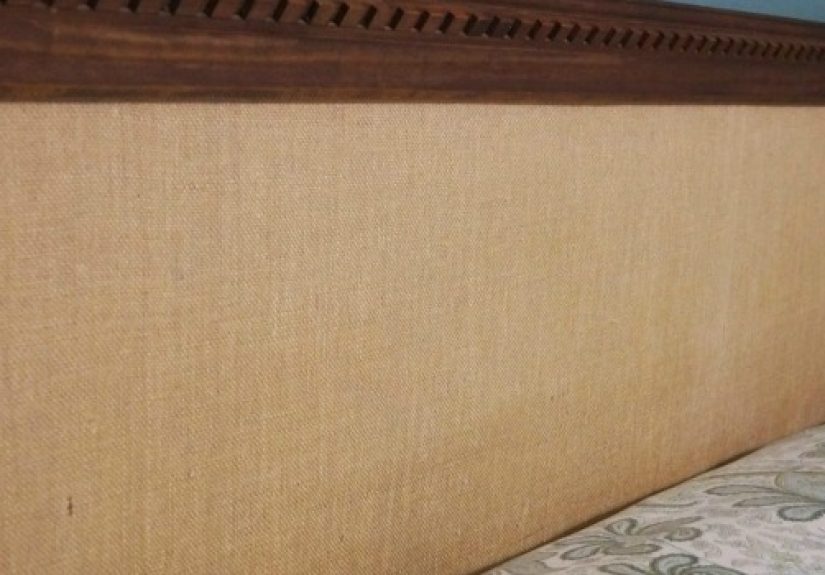
Choosing Materials and Styles That Look High-End
Upholstered and padded looks
If you love hotel-style beds, padded panels are your best bet. Look for:
- Faux linen or tweed: Adds texture and warmth, great in neutral bedrooms.
- Faux leather: Easy to wipe clean and perfect for modern or industrial spaces.
- Velvet textures: Instantly cozy and a little glamorous, especially in jewel tones.
Arrange square panels in a simple grid, or use long rectangular pieces to create vertical channels
(a luxe look that’s trending in design magazines and Instagram bedrooms).
Wallpaper and decal “faux headboards”
If you prefer a flat, painted look, peel-and-stick wallpaper and arch decals are amazing shortcuts.
You can mimic:
- Painted arches in terracotta, sage green, or soft blush
- Scalloped shapes for kids’ rooms or playful guest spaces
- Faux shiplap, brick, or tile if you’re going for farmhouse or loft vibes
Because these products are removable, you can swap them out when you get bored or when your color obsession moves
from earth tones to moody navy overnight.
Creative extras: textiles, lights, and art
Want to go beyond panels? Layer your headboard with:
-
Wall-hung textiles: Hang a lightweight throw, macramé, or tapestry centered over your peel-and-stick base.
Use removable hooks or Velcro-style strips to avoid nails. - LED fairy lights: Frame the headboard area with plug-in or battery-powered string lights for a soft glow.
-
Framed art or mirrors: Mount a row of small, lightweight frames just above the headboard line using removable strips
for a gallery-style look.
Renter-Friendly Tricks: Damage-Free Today, Easy Move-Out Tomorrow
Use adhesives wisely
Even when products say “no residue,” it’s smart to take a few precautions:
- Test one small piece in a low-visibility spot first.
- Follow the manufacturer’s install and removal instructions (yes, actually read them).
- Stick to smooth, non-textured walls whenever possible.
When it’s time to move or redecorate, remove panels slowly at a low angle.
If any adhesive remains, a bit of warm soapy water and a soft cloth usually takes care of it.
Make it truly portable
Want a headboard that moves with you in one piece? Try this variation:
- Buy a lightweight foam board or rigid insulation board roughly the width of your bed.
- Apply peel-and-stick panels or wallpaper to the board instead of directly to the wall.
- Use removable strips to attach the finished “headboard board” to the wall, or simply wedge it between the wall and the bed frame.
When you move, you just detach the board and take your headboard to the next place like any other piece of decor.
Styling Your New Headboard Like a Pro
Balance the proportions
A headboard that’s too small can look awkward, while one that’s too large can overwhelm a tiny room.
A good rule of thumb:
- Width: as wide as the mattress or up to 6 inches wider on each side
- Height: at least 18–24 inches above your tallest pillow stack
Coordinate colors and textures
Think of the headboard as part of a bigger story with your bedding, walls, and curtains. For example:
- Neutral headboard + bold bedding: Soft gray or beige panels let patterned duvets shine.
-
Bold headboard + simple bedding: A dark green or terracotta faux-arch pairs beautifully with white sheets
and a textured quilt. - Tone-on-tone: Use a shade slightly darker or lighter than your wall color for a subtle, designer look.
Layer with pillows and throws
To finish the look:
- Add two large Euro pillows (24×24) for height.
- Layer standard pillows in front, then a couple of throw pillows for color and pattern.
- Drape a throw blanket across the foot of the bed to balance out the headboard visually.
Real-Life 2-Hour Headboard Experiences & Lessons Learned
On paper, “no-tools 2-hour headboard” sounds almost too good to be true. In real bedrooms, though, it’s genuinely doable
with a few quirks, surprises, and “oops” moments along the way. Here are some experience-based tips and mini stories to
help you avoid the common pitfalls.
The renter who beat the beige box
Picture a small city apartment with classic “landlord beige” walls and a basic metal bed frame. The renter wanted a cozy,
hotel-style bed but couldn’t paint, drill, or attach anything permanently. Her solution:
- She ordered peel-and-stick padded panels in a warm light gray.
- She measured the width of her queen mattress and marked a rectangle about 32 inches high.
- Starting at the center, she built a grid of three rows of panels, pressing each one firmly as she went.
The whole project took about 90 minutes, including tea breaks. The biggest surprise? Once the headboard was up,
she realized the rest of the room suddenly looked “unfinished”so she swapped in nicer lamps and a textured throw.
The headboard became the anchor that inspired the rest of the makeover.
Dorm room upgrade on a tiny budget
In a dorm, storage and function matter just as much as style. One student used peel-and-stick wallpaper in a soft arch shape
behind her twin XL bed:
- She taped an arch outline on the wall using painter’s tape.
- She cut a large piece of peel-and-stick wallpaper slightly bigger than the arch.
- After sticking it to the wall, she carefully trimmed along the tape edge to get a clean curve.
Then she added a narrow floating shelf (also installed with removable strips) above the bed for small plants and fairy lights.
The result looked like a styled Pinterest bedroom but cost less than a dinner out and required no tools at all.
Guest room: from “storage zone” to “welcome home”
Many guest rooms double as storage or offices. A homeowner with a plain box spring and mattress wanted to make occasional visitors
feel more welcome without a full remodel:
- She mounted a foam board headboard covered in peel-and-stick faux linen panels.
- She attached the board to the wall with heavy-duty removable strips so the bed could still be moved for cleaning.
- She coordinated the fabric color with existing curtains for a pulled-together look.
After the project, the room instantly felt more intentional. She joked that the biggest “problem” was that guests now wanted to stay longer.
What people wish they’d known before starting
Ask anyone who’s done a quick no-tools headboard and you’ll hear similar takeaways:
-
Measure twice, peel once. The most time-consuming part is getting the first panel straight.
Once that’s set, the rest is almost mindless. -
Lighting reveals everything. Check your headboard in daylight and at night. Shadows can highlight uneven rows,
so step back and adjust while the adhesive is still forgiving. -
Start simple. A basic rectangular layout is faster and easier than a complicated pattern.
You can always add details later. - Don’t overthink “perfect.” Small imperfections disappear once pillows, linens, and decor are in place.
Why this project is so addictive
The combination of low risk, low cost, and high impact makes this kind of headboard strangely satisfying.
Once you realize you can completely transform the focal point of your bedroom in about two hourswithout tools or permanent changes
it’s easy to start dreaming up “what if?” projects:
- What if you extended the panels across the entire wall behind the bed?
- What if you created matching peel-and-stick accents on a dresser or closet doors?
- What if you switched out the color or pattern seasonally?
That’s the beauty of a no-tools, removable headboard: it lets you experiment. If you change your mind, your style, or your address,
you can change your headboard toono damage, no drama, and no toolbox required.
Conclusion: A Headboard You Can Actually Finish Today
You don’t need to be a carpenter or own a garage full of tools to have a bedroom that feels pulled together and intentional.
With peel-and-stick panels, removable wallpaper, and lightweight boards, you can build an easy, renter-friendly headboard in
about two hours using nothing more than careful measuring and your hands.
Whether you’re in a rented studio, a dorm room, or a forever home, this simple project adds comfort, color, and personality
right where you notice it the most: behind your bed. Start with a straightforward rectangular design, choose materials that fit
your style, and let the rest of the room evolve around your new DIY focal point.