Table of Contents >> Show >> Hide
- Why a DIY Mirror Frame Is the Upgrade That Actually Pays Off
- Plan Like a Pro Before You Touch a Saw
- Choose a Style That Fits Your Space (and Your Patience Level)
- Tools and Materials Checklist
- How to Frame a Builder-Grade Bathroom Mirror (The Most Popular DIY)
- 1) Clean the Mirror Like You Mean It
- 2) Measure, Mark, and Plan Your Cut List
- 3) Cut the Pieces (Mitered or Square)
- 4) Deal With Mirror Clips (If You Have Them)
- 5) Paint or Stain Before Installation
- 6) Assemble the Frame (Optional but Helpful)
- 7) Apply Adhesive and Attach
- 8) Caulk for a Seamless, Built-In Look
- How to Build a Traditional Frame for a Loose Mirror
- Bathroom-Proofing: Make Your DIY Mirror Frame Last
- Common DIY Mirror Frame Mistakes (So You Don’t Join the Club)
- Cost, Time, and Difficulty: What to Expect
- Fast Inspiration: Mirror Frame Ideas You Can Actually Pull Off
- Conclusion
- Extra: Real-Life DIY Mirror Frame Experiences (The Good, the Messy, and the Weirdly Funny)
- SEO Tags
A mirror without a frame is like toast without butter: technically fine, emotionally suspicious.
If you’ve got a builder-grade bathroom mirror glued to the wall (you know the onebig, basic, and
silently judging your life choices), adding a DIY mirror frame is one of the fastest upgrades you can
do without touching plumbing or summoning electrical gremlins.
This guide walks you through smart, beginner-friendly ways to build a custom mirror frame that looks
expensive, fits your space, and won’t fall off the wall the first time someone slams the door.
We’ll cover style options, tools, measurements, adhesive choices, bathroom-specific tips, and the
mistakes that turn “cute weekend project” into “why is there trim stuck to my sock?”
Why a DIY Mirror Frame Is the Upgrade That Actually Pays Off
Framing a mirror is one of those rare home projects where effort and reward are in a suspiciously
healthy relationship. A good mirror frame can:
- Make a basic mirror look custom (and yes, your bathroom deserves custom energy).
- Hide mirror clips and rough edges that scream “this came with the house.”
- Match your decormodern, farmhouse, coastal, glam, or “I thrifted this and now I’m cultured.”
- Add depth and dimension so the vanity wall doesn’t feel flat.
- Optionally add function like a small ledge for toothbrushes, skincare, or that one candle you swear is “for ambience.”
Plan Like a Pro Before You Touch a Saw
A successful DIY mirror frame starts with two things: accurate measurements and realistic expectations.
(No, the trim will not magically cut itself while you scroll inspiration photos.)
Step 1: Measure the Mirror (Then Measure Again)
Use a tape measure and record the mirror’s width and height. If the mirror is glued
to the wall, measure the visible glass area. If clips or brackets are showing, decide whether your frame will:
(A) cover them, (B) notch around them, or (C) become the reason you learn new words.
Step 2: Check Clearances
Look around the mirror like a detective:
- How close are the vanity lights? Will a thick frame bump into the fixture base?
- Any outlets, medicine cabinets, or shelves nearby?
- Will a frame interfere with a door swing or a cabinet door?
- Is the mirror close to a shower where steam and splashes happen daily?
Step 3: Decide Your Build Type
Most DIY mirror frame projects fall into two buckets:
-
Wall-mounted, frameless mirror (builder-grade):
You attach trim/wood directly to the mirror (often with mirror-safe adhesive). -
Loose mirror panel (or you’re replacing the mirror):
You build a traditional frame with a “lip” (rabbet) to hold the mirror, add backing, and hang it.
Choose a Style That Fits Your Space (and Your Patience Level)
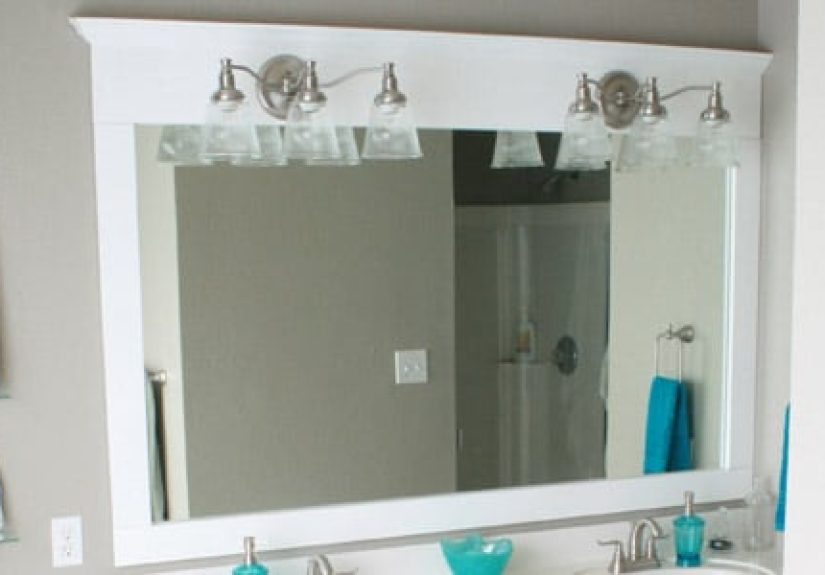
1) Classic Molding Frame
This is the most popular “frame a builder-grade mirror” approach: decorative molding creates a clean border.
It works in traditional, transitional, and even modern bathrooms if you pick simple profiles.
Bonus: it’s forgiving. If your cuts are slightly off, caulk is basically makeup for wood.
2) Chunky Modern Wood Frame
Think wide, flat boards with crisp lines. Great for modern, Scandinavian, and minimalist interiors.
Use common boards, MDF, or primed trim. Paint it matte black for drama, white for clean, or stain for warmth.
Your mirror will instantly look like it belongs in a catalog where nobody owns toothpaste.
3) Rustic or Reclaimed Wood Frame
Reclaimed wood brings texture, knots, and character. It’s also great at hiding walls that aren’t perfectly square,
because rustic style politely ignores perfection. Seal it well for bathroomssteam loves raw wood like a moth loves a lamp.
4) Tile or Mosaic Border
If you want a spa vibe, a thin tile border around the mirror can look high-end. This is more of a “careful craft” project:
plan spacing, keep lines straight, and use products rated for wet areas. Gorgeous result, slightly higher effort.
5) Peel-and-Stick or Pre-Taped Frames (Renter-Friendly-ish)
If you’d rather skip power tools, there are peel-and-stick trim options and pre-taped frame kits that install fast.
They’re popular for rentals and quick makeovers. You still need accurate measuring and clean surfaces, but the tool list is refreshingly short.
6) Statement Frames: Bobbins, “Blob” Frames, and Creative Shapes
Decorative add-ons like wood bobbins, carved appliqués, or sculpted organic (“blob”) frames can turn a plain mirror into art.
These styles are more about fun and personality than “traditional carpentry,” and they’re perfect for powder rooms, bedrooms,
or anywhere you want a conversation starter.
Tools and Materials Checklist
Your exact list depends on the style, but here’s a practical baseline for a DIY bathroom mirror frame using wood or molding:
Tools
- Tape measure and pencil
- Level (or a level app if you like living dangerously)
- Miter saw or miter box + hand saw
- Sandpaper (120 and 220 grit)
- Caulk gun (for caulk, not for dramatic sound effects)
- Painter’s tape and a clean cloth
Materials
- Molding/trim or boards (MDF, pine, poplar, or moisture-resistant material)
- Mirror-safe adhesive (avoid anything that can damage mirror backing)
- Wood glue (for assembling frame corners off the mirror)
- Finish: paint, primer, stain, and clear topcoat (bathrooms love topcoats)
- Paintable caulk (ideally mildew-resistant for bathrooms)
- Optional: corner clamps, brad nails (for off-mirror assembly), spacers, ledge board
How to Frame a Builder-Grade Bathroom Mirror (The Most Popular DIY)
This method attaches the frame directly to the mirror. It’s fast, budget-friendly, and a huge visual upgrade.
The goal: a clean frame that looks built-in, not “I glued craft sticks to glass.”
1) Clean the Mirror Like You Mean It
Adhesive needs a clean surface. Wipe the mirror edges where the frame will sit. Avoid oily cleaners.
If you’re not sure what cleaner was used before, a final wipe with a gentle degreaser helps. Let it dry completely.
2) Measure, Mark, and Plan Your Cut List
Decide whether your frame will sit on top of the glass (covering the edge) or extend outward with a gap.
Most people aim for the inner edge of the frame to overlap the mirror by about 1/4–1/2 inch, so you don’t see mirror edges
or clips. Make a cut list with the final lengths for:
- Top piece
- Bottom piece
- Left side
- Right side
3) Cut the Pieces (Mitered or Square)
Mitered corners (45°) look polished, especially with decorative molding.
Square cuts are easier and can look modernespecially with chunky boards.
After cutting, dry-fit the pieces around the mirror before you celebrate.
4) Deal With Mirror Clips (If You Have Them)
If clips sit on top of the mirror edge, you have two main options:
- Notch the back of the frame so it sits flush around clips.
- Use thicker trim that covers them without needing notches.
Notching sounds fancy, but it’s basically carving out a small recess so the frame doesn’t rock like a wobbly restaurant table.
5) Paint or Stain Before Installation
Painting before you attach the frame is cleaner (and less likely to end with paint on your mirror that dries into a permanent reminder).
If you stain, let it cure and add a protective topcoatespecially for bathrooms.
Pro tip: paint the inside/back edges too, so you don’t see raw material reflected in the mirror.
6) Assemble the Frame (Optional but Helpful)
Many DIYers assemble the four pieces into one frame first (wood glue + clamps, or brad nails if you’re building on a flat surface).
Then they mount the finished frame to the mirror as a single unit. This improves alignment and reduces the “one corner is weird” problem.
7) Apply Adhesive and Attach
Use a mirror-safe adhesive and follow its instructions. Apply adhesive to the back of the frame pieces in a pattern that supports the wood without squeezing out everywhere.
Press into place carefully. Use painter’s tape to hold the frame while it cures.
8) Caulk for a Seamless, Built-In Look
Run a small bead of paintable caulk where the frame meets the wall (not the mirror surface).
Smooth it with a damp finger or caulk tool. Touch up paint if needed. This step is what makes it look “custom” instead of “stuck on.”
How to Build a Traditional Frame for a Loose Mirror
If you’re framing a mirror that’s not glued to the wallor you’re replacing the mirror entirelybuild a proper frame with a lip (rabbet/rebate) so the mirror sits inside.
This approach is sturdier and easier to remove later, but it takes more woodworking.
1) Build the Frame with a Mirror “Seat”
The mirror needs a shallow ledge to rest in. This can be done with rabbet cuts, routed edges, or a layered build (frame + thin inner trim acting like a stop).
Add a tiny bit of clearance so the mirror isn’t pinched.
2) Add Backing and Secure the Mirror
Add a backing board (like plywood) and secure it with appropriate fasteners. Use mirror clips or glazing points if needed.
For bathrooms, consider moisture-resistant backing.
3) Hang It Safely
Mirrors can be heavy. Use strong hanging hardware rated for the weight. Many DIYers prefer French cleats for large mirrors because they distribute weight and keep the mirror level.
If you’re hanging on drywall, hit studs or use anchors specifically rated for heavy loads.
Bathroom-Proofing: Make Your DIY Mirror Frame Last
Bathrooms are basically saunas with better lighting. To keep your mirror frame from warping, peeling, or growing a mysterious fuzzy mustache:
- Seal it: Use a durable topcoat over paint or stain.
- Choose smart materials: PVC/composite trim handles moisture better than raw wood.
- Use mildew-resistant caulk along wall edges where moisture sneaks in.
- Ventilation matters: Run the fan during showers. Your frame will thank you.
- Avoid direct splash zones: If the mirror is near a shower, plan extra sealing and consider a moisture-resistant build.
Common DIY Mirror Frame Mistakes (So You Don’t Join the Club)
- Measuring only once: The fastest way to create “abstract art” trim pieces.
- Ignoring wall out-of-square issues: Dry fit first; caulk hides small gaps, not heartbreak.
- Using the wrong adhesive: Some adhesives can damage mirror backing or fail in humidity.
- Skipping pre-painting: Painting in place increases mess and cleanup time.
- Forgetting the back/inside edge: Unfinished edges can reflect in the mirror and look sloppy.
- Not supporting while curing: Tape is not optionalit’s the temporary helper your frame needs.
- Too-thick frame near lights: Always test clearance with fixtures and switches.
Cost, Time, and Difficulty: What to Expect
| Frame Type | Estimated Cost | Time | Difficulty |
|---|---|---|---|
| Molding/trim frame (glued to mirror) | $25–$120 | 3–8 hours + drying | Beginner–Intermediate |
| Chunky board frame | $30–$150 | 4–10 hours + drying | Beginner–Intermediate |
| Traditional frame (loose mirror) | $60–$250 | 1–2 days | Intermediate |
| Peel-and-stick / pre-taped kit | $40–$200 | 1–3 hours | Beginner |
| Statement “art frame” (bobbins/clay/appliqués) | $15–$150 | 2–8 hours + drying | Beginner–Intermediate |
Fast Inspiration: Mirror Frame Ideas You Can Actually Pull Off
- Add a mini ledge: Build the bottom piece wider and let it act as a slim shelf for daily items.
- Go two-layer: Use a wide outer frame plus a thinner inner trim for a “designer” depth effect.
- Make it industrial: Paint simple trim matte black and keep lines crisp.
- Entryway upgrade: Frame a mirror and add hooks below for keysfunction meets “I have my life together.”
- Cheap glam: Use decorative appliqués or corner blocks for an elevated, vintage vibe.
Conclusion
A DIY mirror frame is the kind of project that makes your room look instantly more finishedwithout ripping out tile,
replacing a vanity, or selling your soul to a renovation schedule. Start with accurate measurements, choose a style
that fits your space, and use bathroom-smart materials and finishes if moisture is a factor.
Whether you’re framing a builder-grade bathroom mirror with molding, building a chunky wood frame for a modern look,
or going full statement-piece with creative shapes, the key is the same: plan first, dry fit, finish cleanly, and
attach it safely. Your mirror will look customand your reflection will finally have the framing it deserves.
Extra: Real-Life DIY Mirror Frame Experiences (The Good, the Messy, and the Weirdly Funny)
DIY mirror frames have a funny way of turning into tiny life lessons. Not “read poetry and stare into the ocean” lessons,
but the kind you learn while holding a piece of trim in one hand and trying not to panic with the other.
If you’re about to frame a mirror, here are the most common experiences DIYers run intoso you can feel prepared,
not personally attacked.
First, there’s the measurement confidence phase. It starts with you feeling extremely competent:
tape measure out, numbers written down, maybe even a little flourish like you’re on a home makeover show.
Then you cut your first piece and realize your “perfect” measurement didn’t include the extra overlap you wanted
to hide the mirror edge. It’s okay. This happens a lot. The best recovery move is to dry fit early and adjust your cut list
before you’ve turned half your trim into expensive toothpicks.
Next comes the dry-fit revelationthe moment you learn your wall is not square.
Many bathrooms have slight wonkiness where the mirror sits. You might discover a gap on one side that feels personal.
This is where DIYers usually discover the true power of caulk: not as a shortcut, but as the finishing tool that turns
“attached trim” into “built-in detail.” A neat caulk line and paint touch-up can make small imperfections vanish like
your motivation to mop the floor.
Then there’s the adhesive anxiety. People worry the frame will slide down the mirror in slow motion,
like a dramatic movie scene. The practical experience is: if you use mirror-safe adhesive correctly and tape the frame
in place while it cures, it stays put. Painter’s tape becomes the unsung hero, doing the quiet, unglamorous work of
holding your project together while you go do literally anything else (like stare at it from different angles).
Some DIYers also like to add temporary supportsscrap wood or spacers under the bottom pieceespecially with heavier frames.
Another classic experience is the finishing facepalm: you paint the front beautifully, step back, admire it,
and then notice the inside edge reflected in the mirror is raw wood or primer gray. The fix is simple: paint or finish the
inner/back edges before installation. The lesson is eternal: mirrors reflect everything, including your shortcuts.
Finally, a lot of DIYers report the unexpected confidence boost. Once you’ve framed a mirror,
suddenly other projects look less scary. You start noticing trim profiles, paint sheens, and hardware finishes like you’ve
been secretly hired as a design consultant. You might even begin rating friends’ bathrooms in your head. (Keep that part private.
Friendships are important.)
The overall experience? A DIY mirror frame is a manageable project with high visual payoffespecially if you accept that
the process may include a little sanding, a little re-cutting, and at least one moment where you whisper “why”
into the void. But when you’re done, your bathroom looks sharper, more finished, and way less builder-basic.
And every time you look in the mirror, you’ll get a tiny reminder that you made something with your own handswhich is
honestly a pretty great vibe.